
2. The Deployment Process for Deploying Syteca on Azure Cloud
NOT AVAILABLE IN SAAS
To deploy Syteca on Azure Cloud from Azure Marketplace, do the following:
1. Login to the Azure Portal: https://portal.azure.com/
2. On the Home page, click the Create a resource button.

3. Enter “Ekran System” in the Search the Marketplace field.
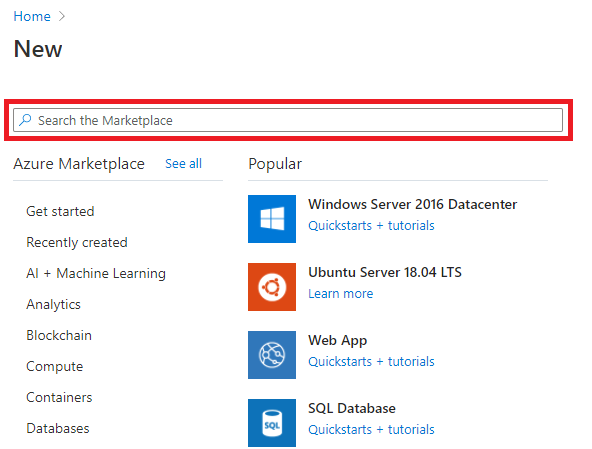
4. Click the Create button to open the installation wizard.
5. On the Basics tab of the installation wizard, select the Azure subscription you want to use, then create a new resource group and select the region where you want to deploy the application, and click Next.
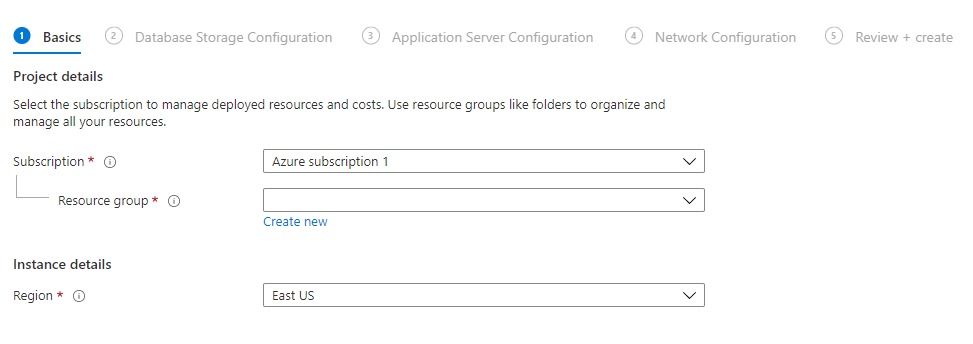
NOTE: Existing resource groups cannot be used to deploy Syteca. To create a new group, click on the "Create new" button under the "Resource group" field, and then in the pop-up window that opens, enter a name for the resource group. This name must be unique for your subscription.

6. On the Database Storage Configuration tab, you can choose whether to install a new SQL server, or use an existing SQL server if you have one.

6.1. If you choose to use an existing SQL server, you need to provide the connection data and the credentials for it.
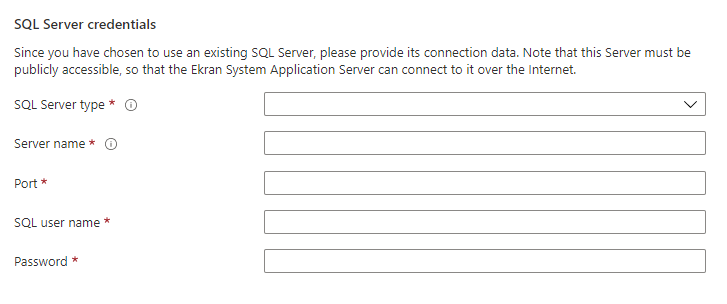
NOTE: The server name for an existing SQL server must be fully qualified (e.g. myserver.example.com).
6.2. If you choose to install a new SQL server, you have a choice of 3 types of servers: MS SQL, PostgreSQL, or Azure SQL Database server.

To host the MS SQL or PostgreSQL server, a virtual machine will be deployed in the resource group, and you will be asked to define several parameters.
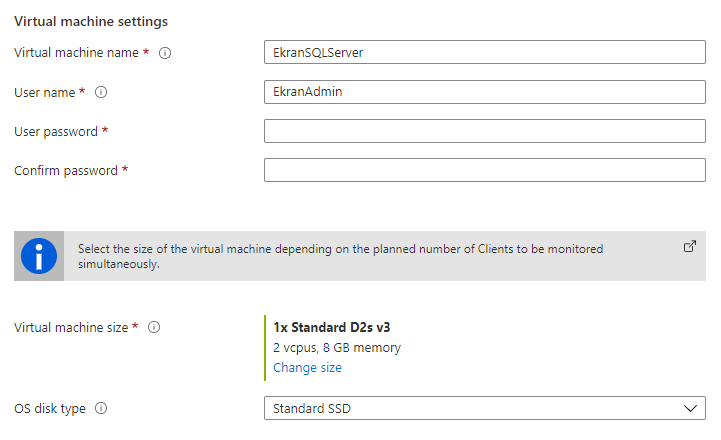
To change the virtual machine size, you can use the Change size button.
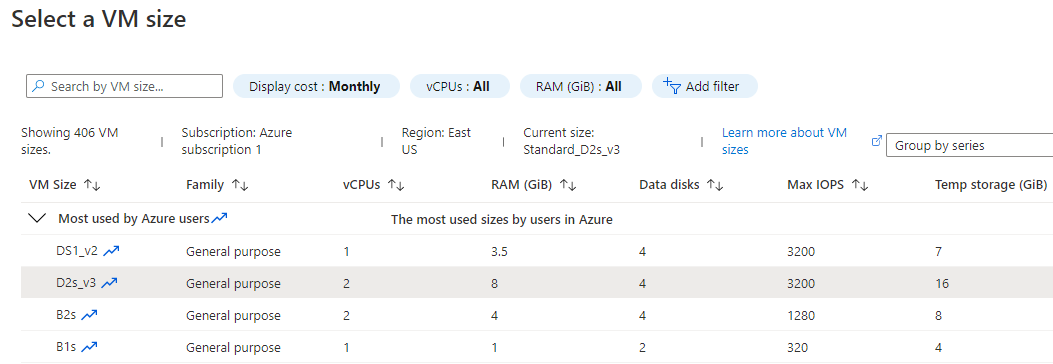
Select the virtual machine’s size depending on the number of Clients to be monitored simultaneously. For information about the hardware requirements, please see System Requirements.
If you chose to install the SQL server, you will be asked to define some parameters specific to the selected SQL server type.
6.2.1. For MS SQL:
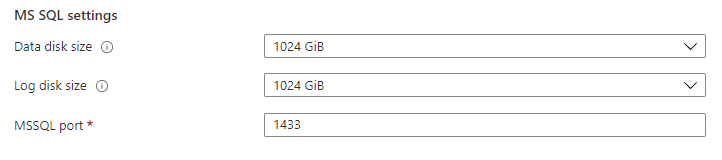
You can select the size of the data disk and of the log disk that will be used by the server. You can also enter a custom port to which the server will accept connections (recommended).
6.2.2. For PostgreSQL:
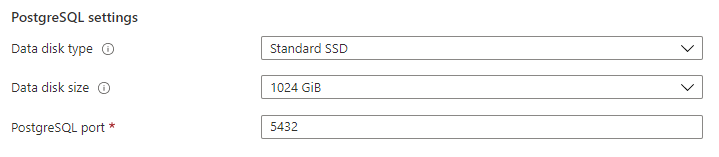
You can select the type and the size of the data disk that will be used by the server. You can also enter a custom port to which the server will accept connections (recommended).
6.2.3. For Azure SQL Database server.

You need to enter a name for the server. This name along with the database.windows.net domain will form the fully qualified domain name of the SQL server.
The SQL server will be accessed over the Internet by using this fully qualified domain name, so the name must therefore be globally unique.
The final configuration settings that you need to define for the new SQL server are specified in the SQL server account.
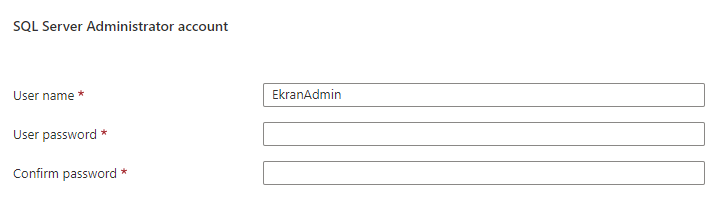
NOTE: For PostgreSQL, only the default user name “postgres” can currently be used.
When all settings on the Database Storage Configuration tab have been defined, click Next.
7. On the Application Server Configuration tab, you can choose whether to install the Application Server along with the SQL server.
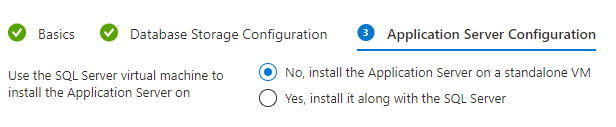
NOTE: This option is only available if you chose to install the SQL server in the previous step and the type selected was MS SQL or PostgreSQL.
7.1. If you choose to install the Application Server on a standalone virtual machine (recommended), you will be asked to define some parameters for the virtual machine.
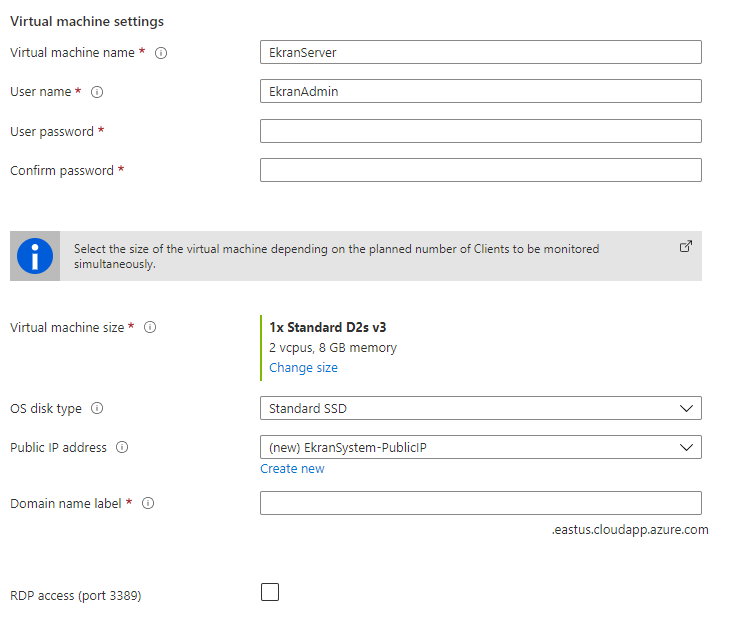
Select the virtual machine’s size depending on the number of Clients to be monitored simultaneously. Information about the hardware requirements can be found in the Syteca System Requirements.
NOTE: Do not select the None option for the Public IP address if you intend to access the virtual machine over the Internet (e.g. to be able to monitor Syteca Clients on-premises, the Application Server must be accessible over the Internet).
In the Domain name label field, enter a name label that, along with the domain name displayed under this field (e.g. “.eastus.cloudapp.azure.come”), will form a fully qualified domain name that must be globally unique.
7.2. If you choose to install the Application Server along with the SQL server, you will have an option to configure the public access parameters for the virtual machine.

NOTE: Do not select the None option for the Public IP address if you intend to access the virtual machine over the Internet (e.g. to be able to monitor Syteca Clients on-premises, the Application Server must be accessible over the Internet).
In the Domain name label field, enter a name label that, along with the domain name displayed under this field (e.g. “.eastus.cloudapp.azure.come”), will form a fully qualified domain name that must be globally unique.
The final configuration settings that you need to define for the Application Server are the Management Tool’s default user credentials and URL.
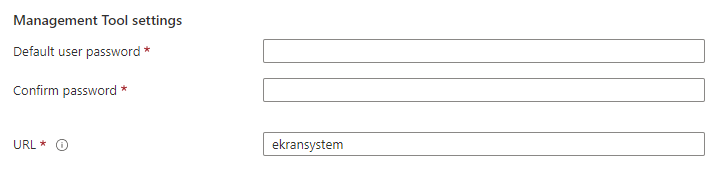
The default user name is “admin”. You will use these credentials to log in to the Management Tool.
NOTE: Please make sure that you do not forget these user credentials, so as to be able to access the Management Tool later.
When all settings on the Application Server Configuration tab have been defined, click Next.
8. On the Network Configuration tab, you can make changes to the virtual network to be created in the resource group, or use the default values.
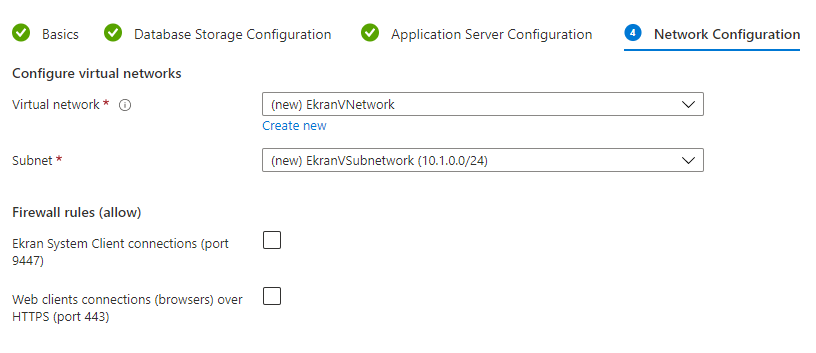
You also have the option to allow connections to the Application Server over the Internet via certain ports:
• Allow port 9447, if you want to monitor Clients on-premises.
• Allow port 443, if you want to access the Management Tool from an on-premises environment.
NOTE: This option will only be available if the Public IP address option in the previous step was not set to “None”.
NOTE: To monitor Clients in the cloud in other resource groups or regions, you can choose between accessing the Application Server over the Internet or configuring a VNet-to-VNet VPN gateway. For more details see: Microsoft Docs
When all settings on the Database Storage Configuration tab have been defined, click Next.
9. On the Review + create tab, you can check all the settings you have defined, and then, after carefully reading the Terms of Use, start deployment of Syteca by clicking the Create button.
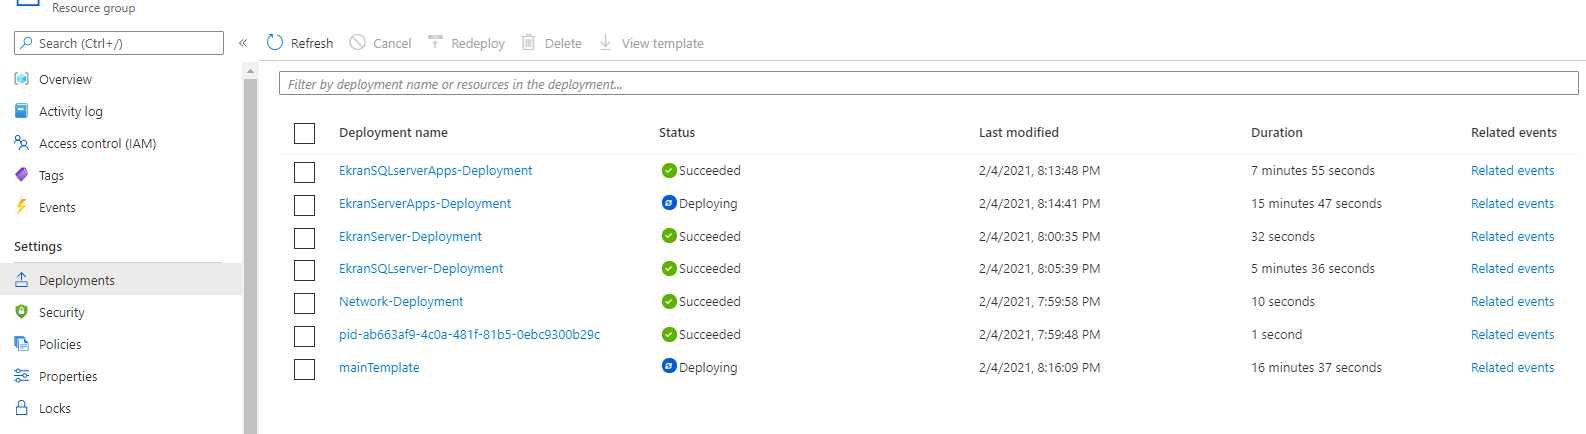
The deployment process will take between 30-50 minutes depending on the settings chosen. You can watch the progress on the Azure Portal on the Resource group page, on the Deployments tab.
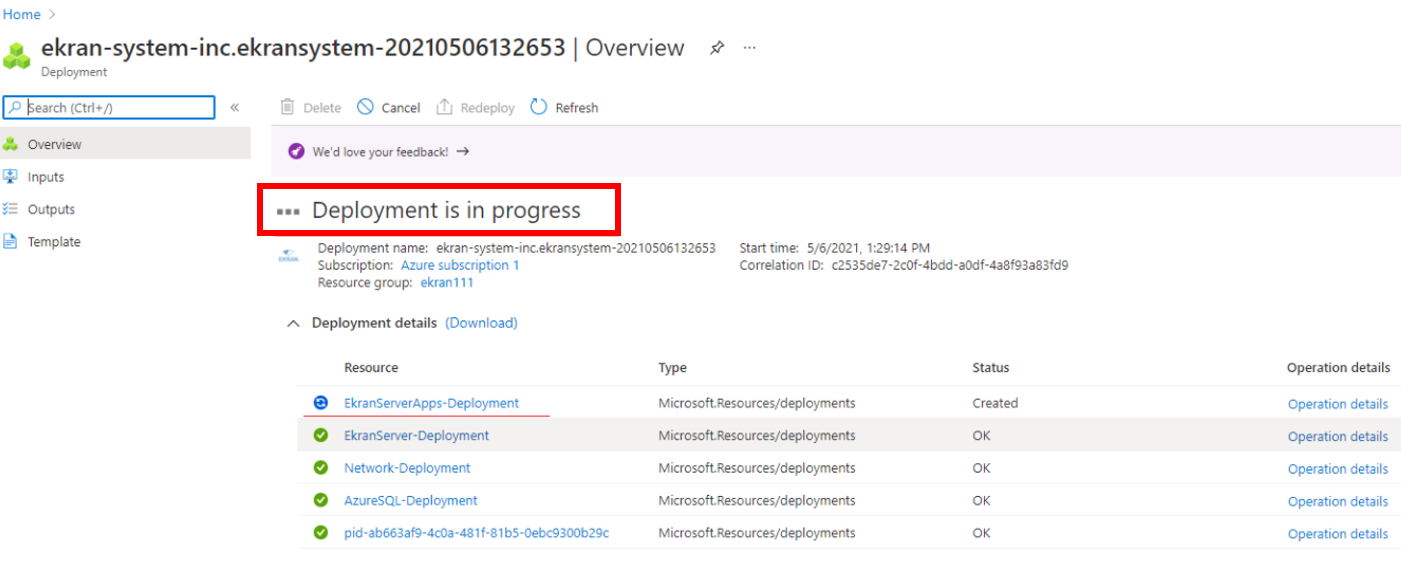
You can also see the progress on the Overview tab of the deployment.
Wait for deployment to complete.
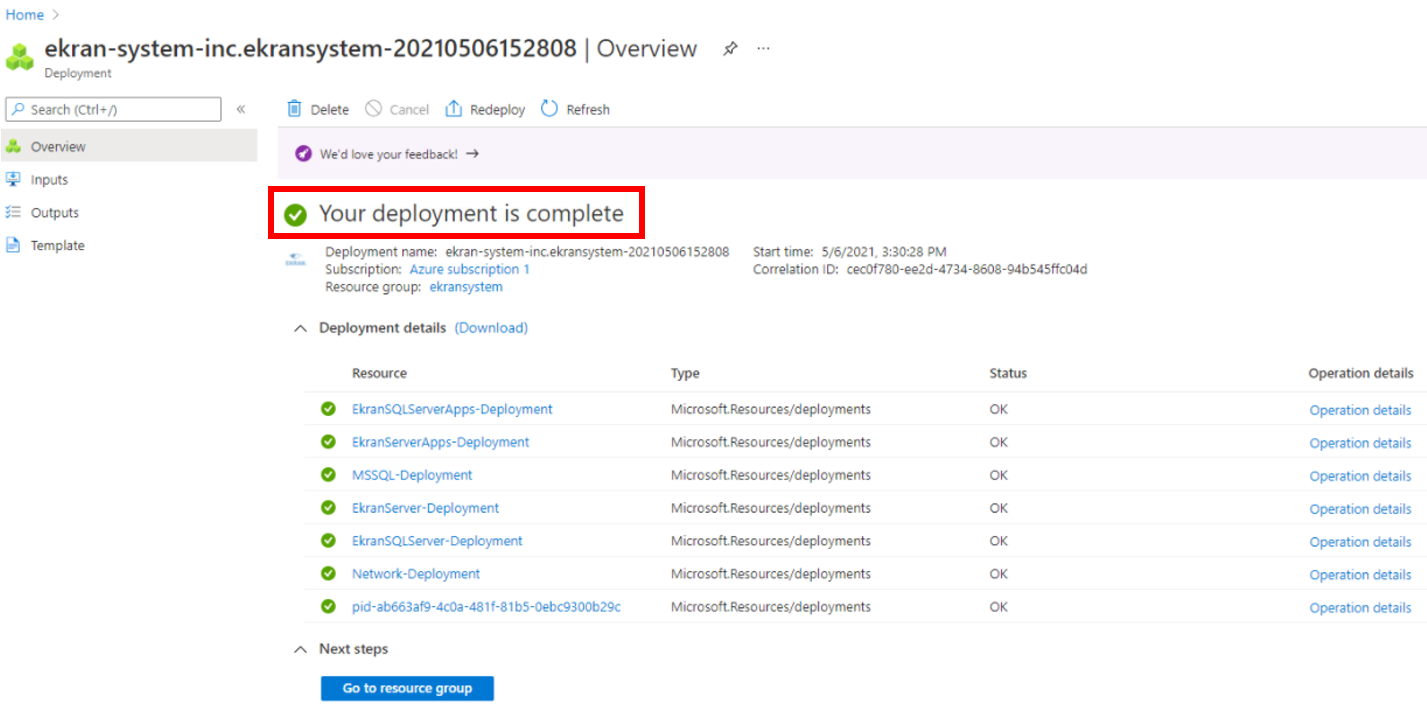
After deployment is complete, you can see the resources created on the Resource group page, on the Overview tab.

10. Having completed deployment of Syteca, you can then start using it.