
Configuring Citrix NetScaler Load Balancer for Use with Syteca
NOT AVAILABLE IN SAAS
This guide will assist you in configuring the Citrix NetScaler Load Balancer environment with the required security settings for use with a Syteca deployment.
Table of Contents
1. Servers
The first configuration step is to add the servers where Syteca Application Servers will be / have already been deployed for use with the Citrix ADC system.
To add the servers, do the following:
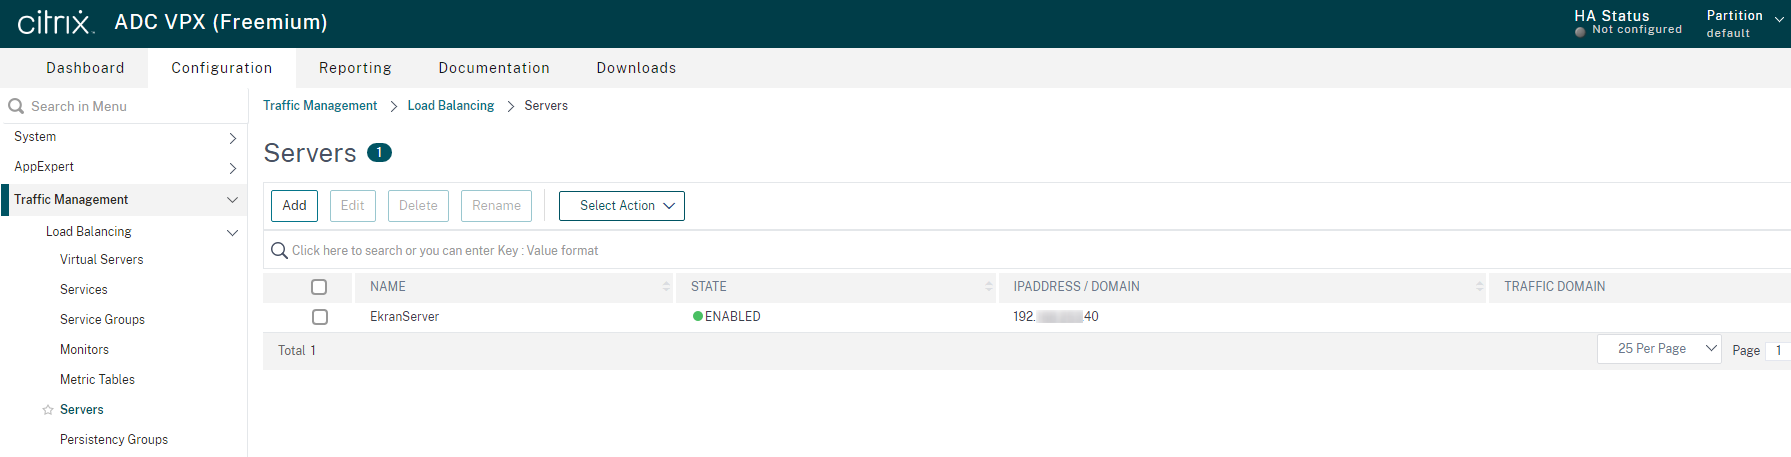
1. Go to Traffic Management > Load Balancing > Servers, and click Add to add a new server to the Citrix ADC.
NOTE: At least 2 servers need to be added.
2. On the Configuration page, specify the required values in the following fields:
• Name: Enter the name of the server.
• IPAddress: Enter the IP address of the server.
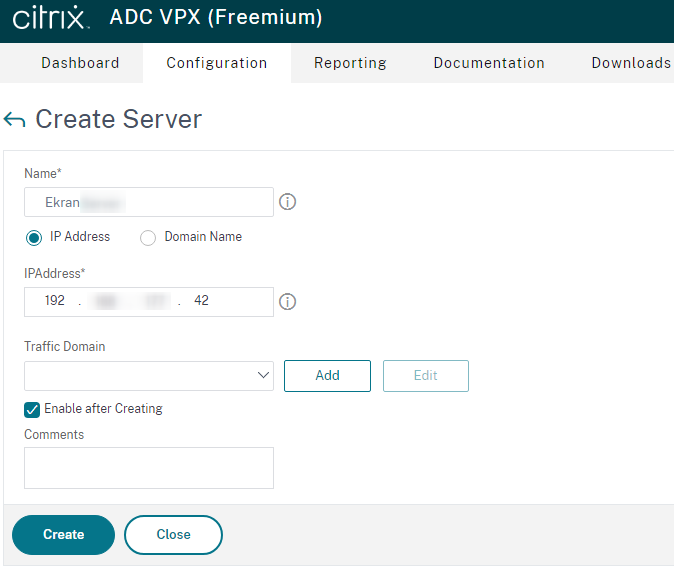
3. Click Create to apply the changes.
2. Services
For each server, you also need to create the services with the required ports and protocols and bind the newly added server to them. For each server, Ekran System requires 1 service (TCP/9447) to be added for the system to work. If you want to have access to other components, you also need to add more services accordingly (e.g. for the Ekran System Management Tool).
2.1. To create the services, do the following:
1. Go to Traffic Management > Load Balancing > Services, and click Add to configure a new service.

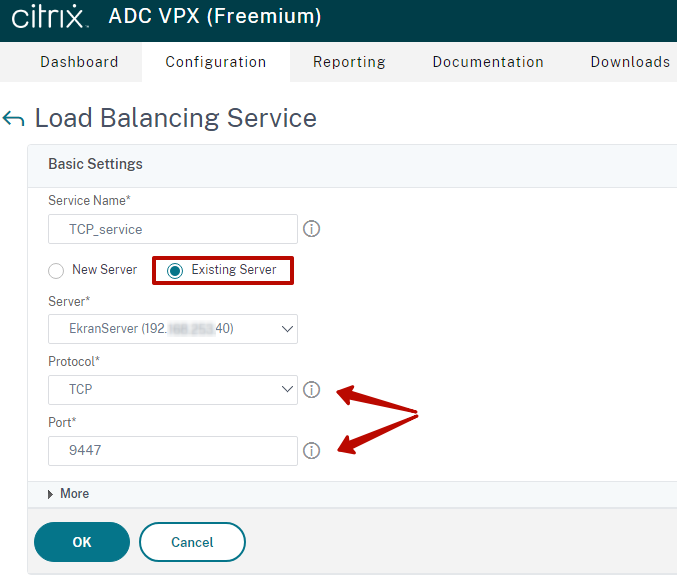
2. On the Configuration page, specify the required values in the following fields:
• Service Name: Enter a name for the service.
• Existing Server: Select this option to add the server where you have installed / will install the Ekran System Application Server.
• Server: Select the server from the drop-down list.
• Protocol: Select the required protocol.
• Port: Enter the required port number.
NOTE: To configure Ekran System correctly, you need to add 2 services (one for the Ekran System Application Server and another one for the Ekran System Management Tool):
• The first service requires the TCP protocol to be selected, and then the port 9447 to be entered.
• The second service requires HTTP protocol to be selected, and then the port 443 to be entered.
3. Click OK to apply the changes.
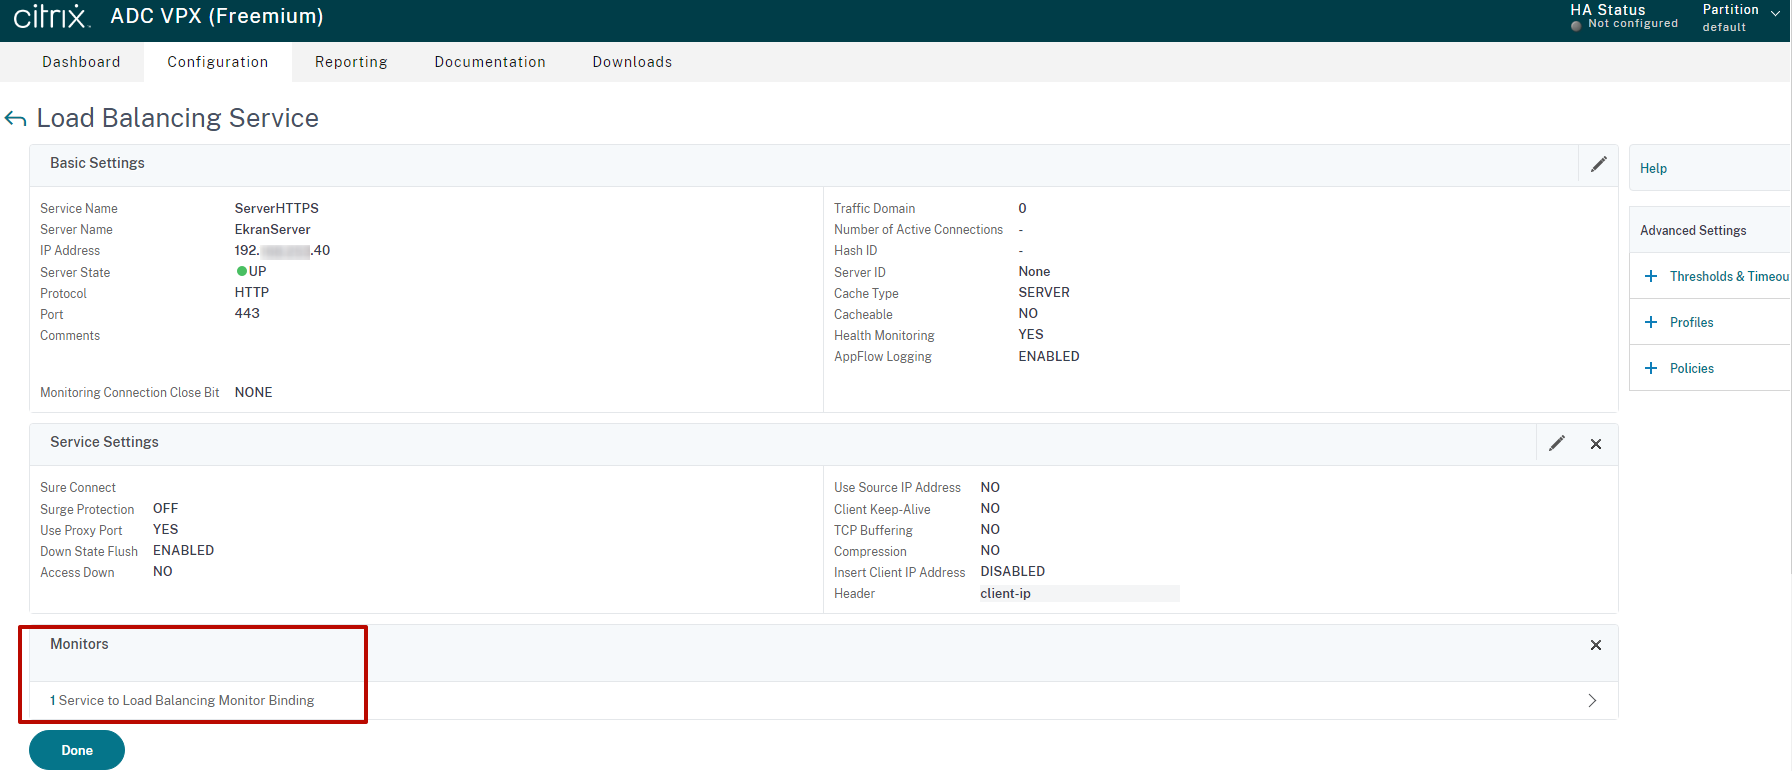
2.2. Add Monitors on the Configuration page to check the availability of your services, by doing the following:
1. In the Monitors section, click on No Service to Load Balancing Monitor Binding.
2. Click the Add Binding button to select your required monitoring binding in the pop-up window.
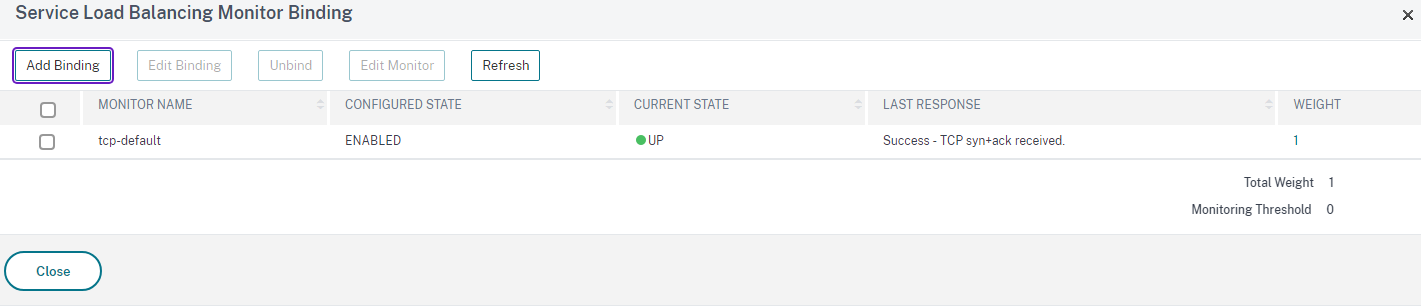
• For the service with the TCP protocol and port 9447, you can select e.g. the tcp-default monitor.
• For the service with the HTTP protocol and 443 port, you can select e.g. the http-default monitor.
3. Click Close to save the monitors.
4. Click Done on the Configuration page to complete configuring the services.
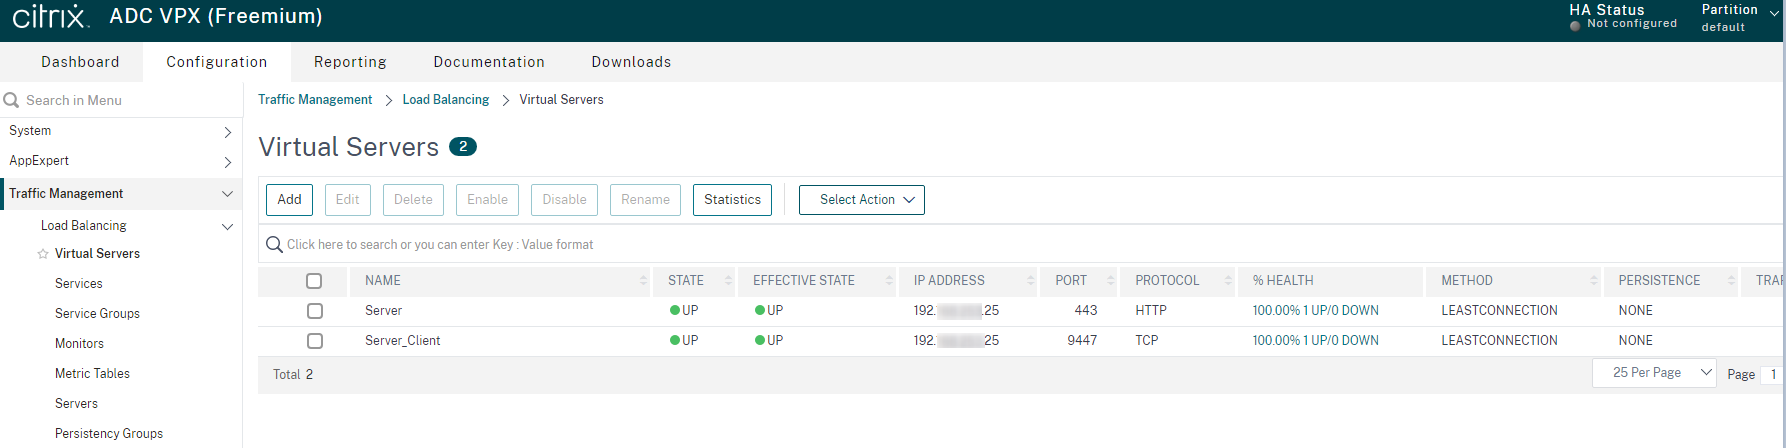
3. Virtual Servers
Add the Virtual Servers that will work as the load balancer, by doing the following:
1. Go to the Traffic Management > Load Balancing > Virtual Servers, and click Add to configure a new Virtual Server.
2. On the Configuration page, specify the required values in the following fields:
• Name: Enter the name of the Virtual Server.
• Protocol: Select the required protocol.
• IP Address Type: Select the IP address type from the drop-down list.
• IP Address: Enter the IP address, which should be the VIP that NetScaler displays publicly.
• Port: Enter the required port.
NOTE: To configure Ekran System correctly you need to add 2 Virtual Servers (one for the Ekran System Application Server and another one for the Ekran system Management Tool):
• The first Virtual Server requires the TCP protocol to be selected, and then port 9447 to be entered.
• The second Virtual Server requires the HTTP protocol to be selected, and then port 443 to be entered.
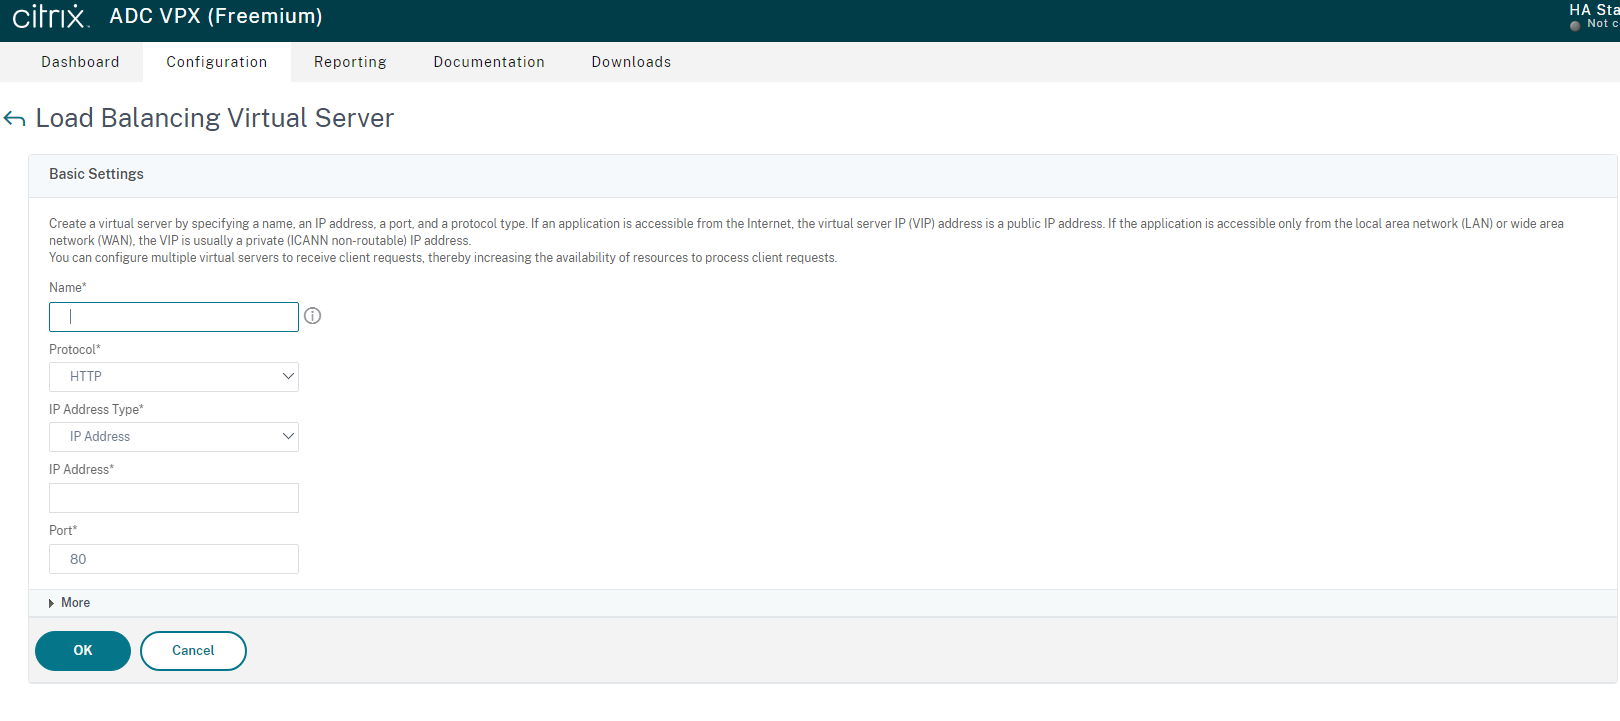
3. Click OK to create the Virtual Server.
4. In the Monitor section, click on No Load Balancing Virtual Server Service Binding to bind your services with the appropriate Virtual Servers.
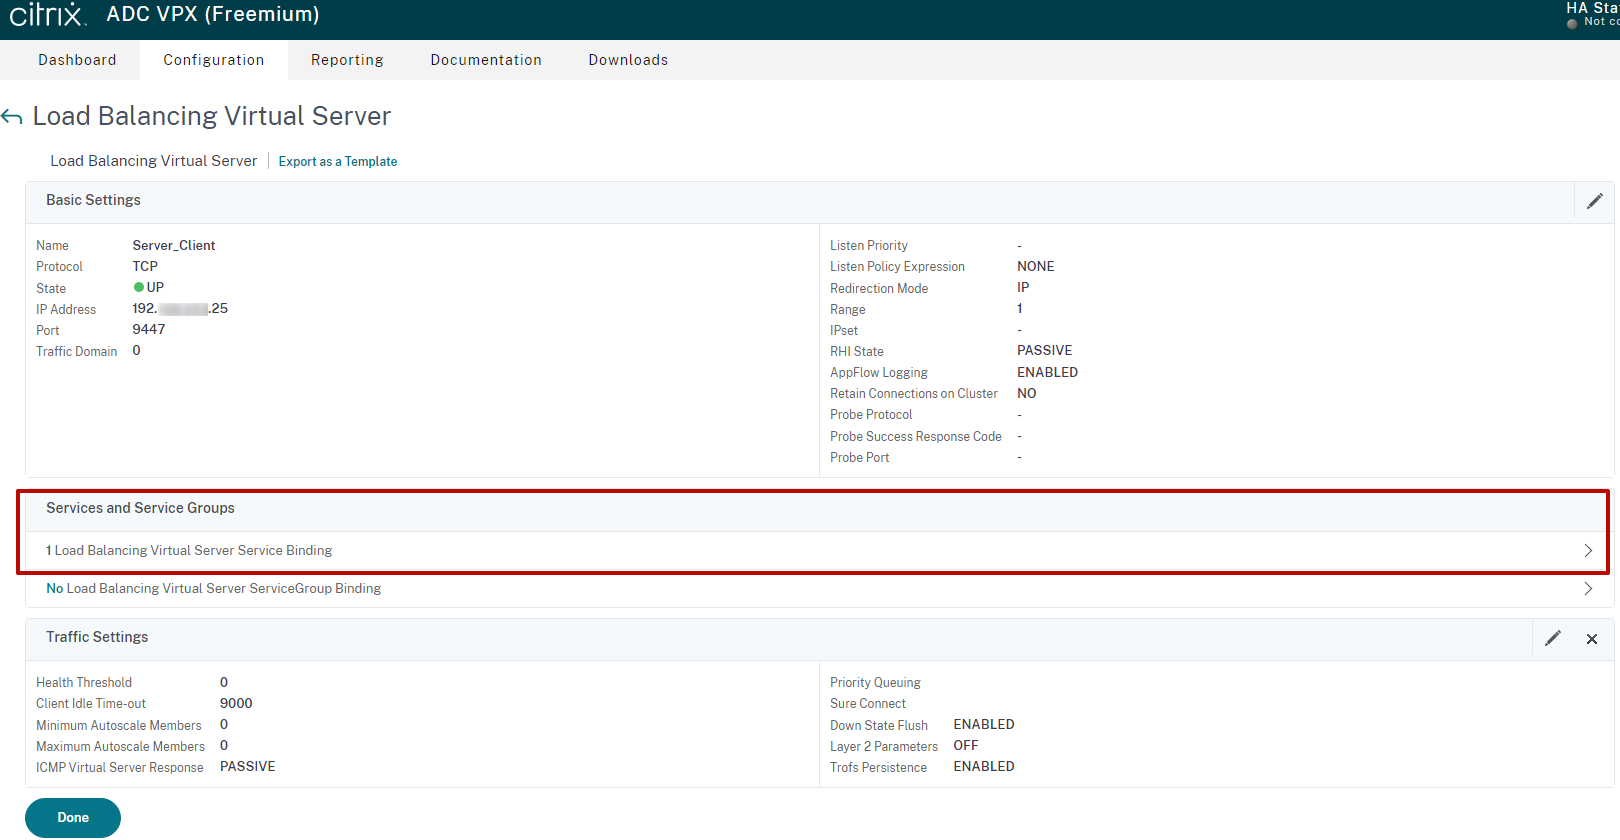
5. Click Add Binding, and select the services as follows:
• The service with the TCP protocol and port 9447 needs to be bound to the Virtual Server with the same port and protocol.
• The service with HTTP protocol and port 443 needs to be bound to the Virtual Server with the same port and protocol.
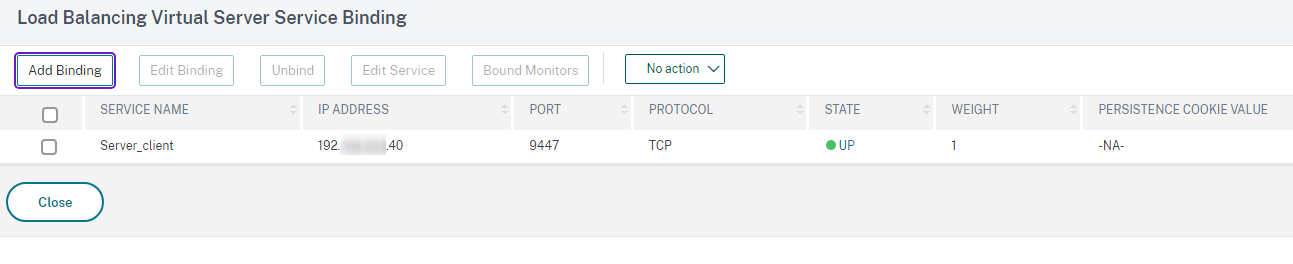
6. Click Close to save the services.
7. Click Done on the Configuration page to complete configuring the Virtual Server.