Configuring Syteca Integration with Azure SSO
Table of Contents
1. Configuring Microsoft Azure
To set up Azure SSO (SAML 2.0) authentication so as to integrate it for use with the Syteca Management Tool, do the following:
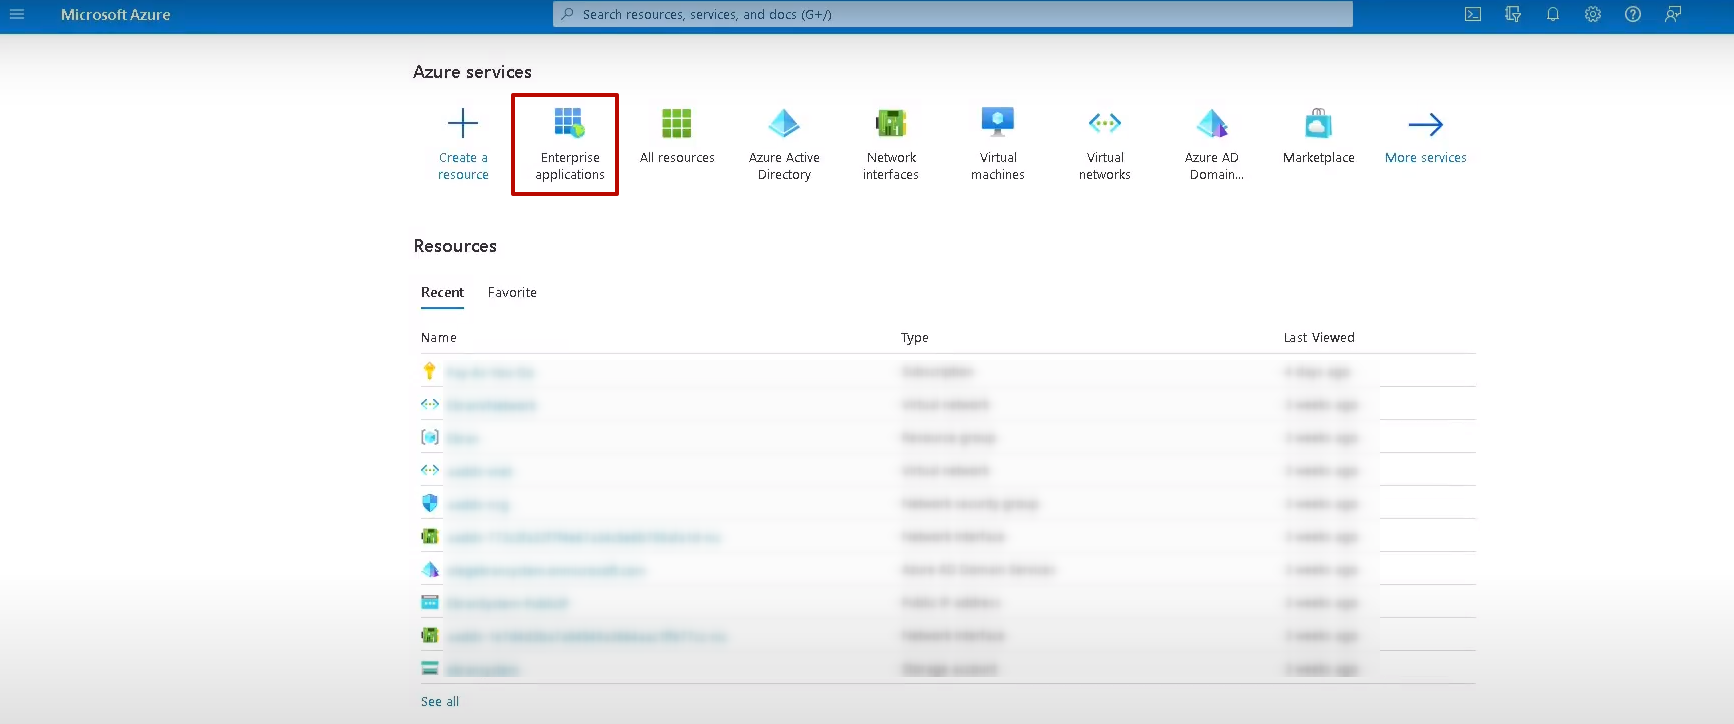
1. On the Azure Home page, click Enterprise applications.
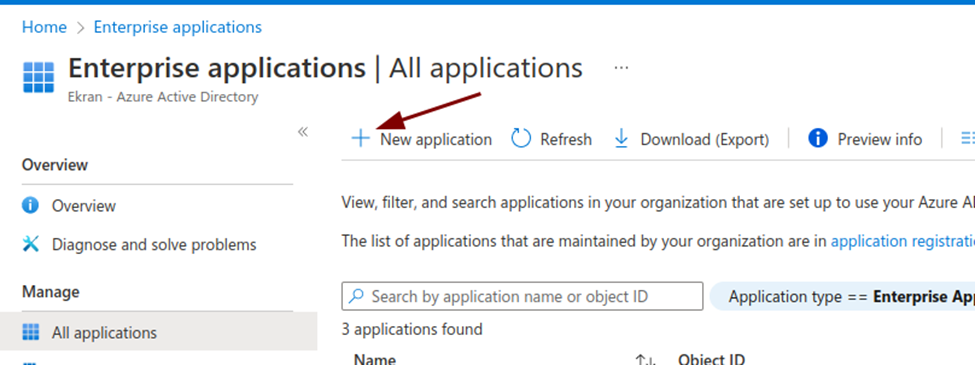
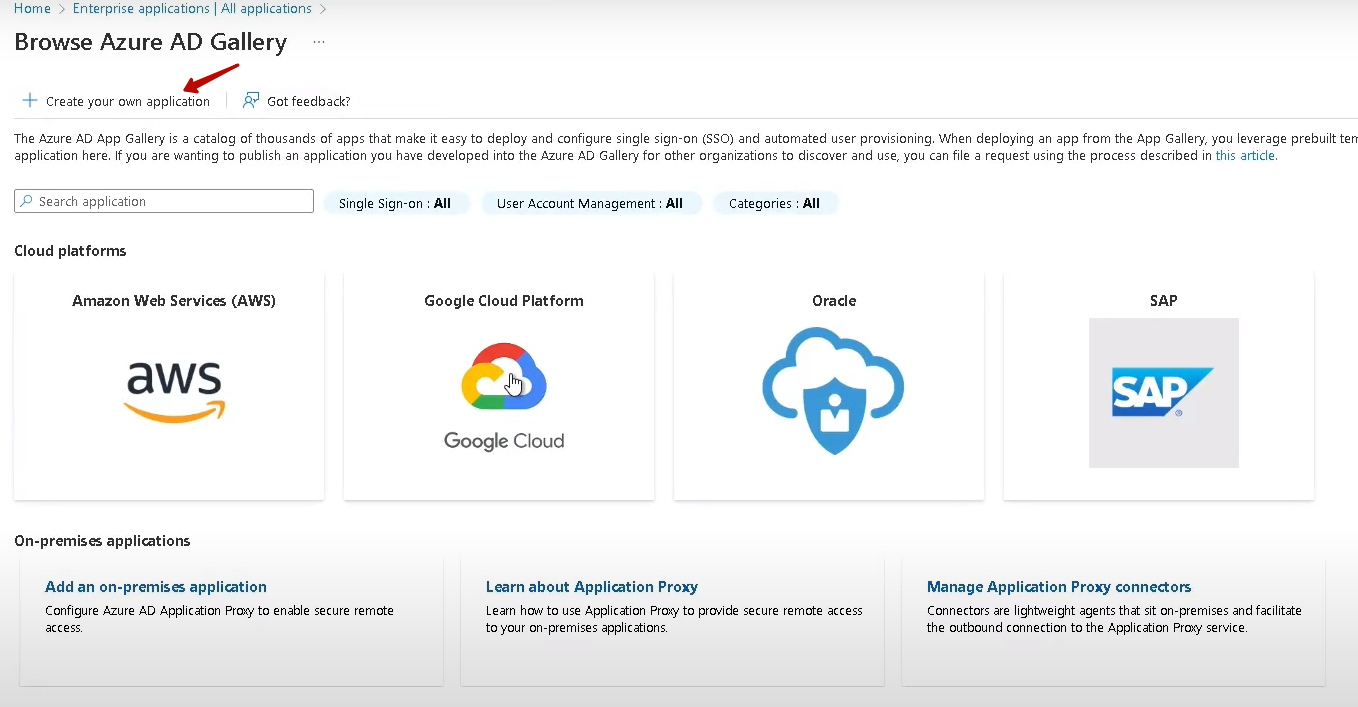
2. On the Enterprise applications page that opens, click the New application button, and then click Create your own application on the next page.
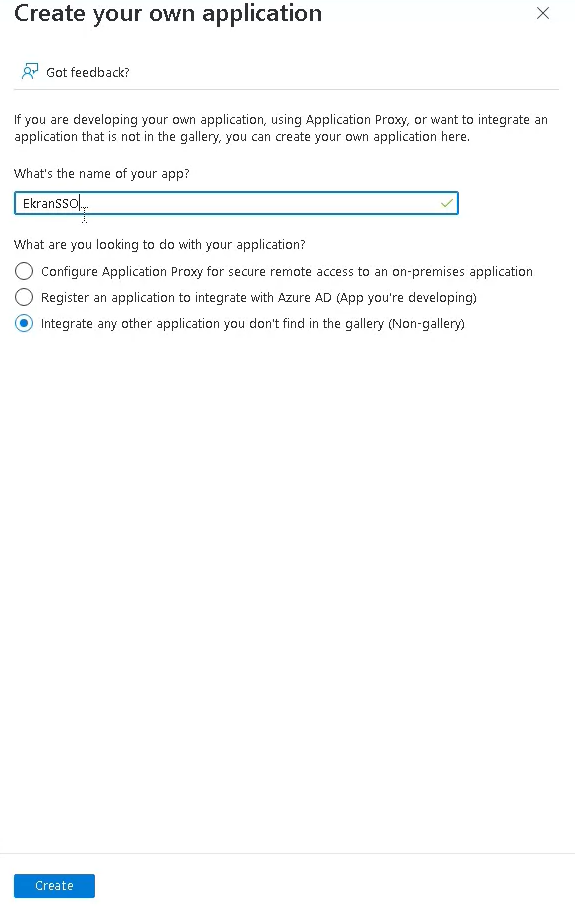
3. Enter a custom name for your application in the pop-up window, and then click Create.
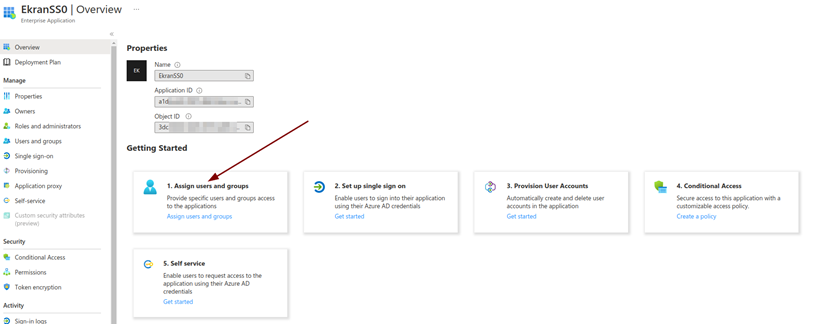
4. Select the Assign users and user groups option to add a user or user group to the application created.
5. Click Add user/group and select the required user or user group on the Users page that opens.
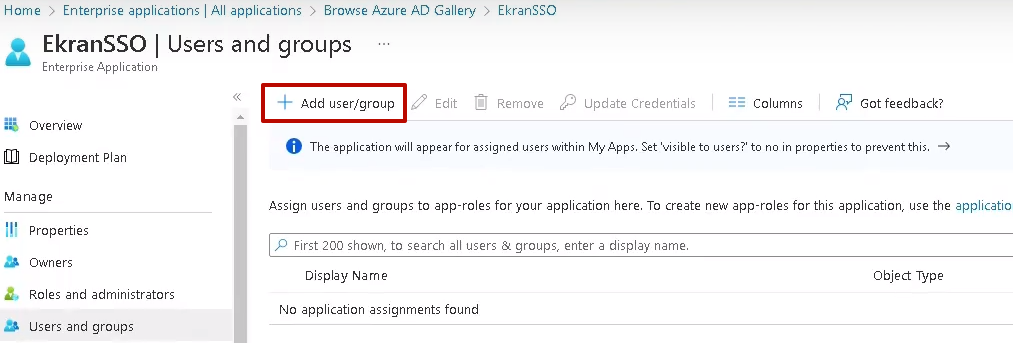

NOTE: After adding the user or user group to the application, check that the Role assigned is correct for the user or user group, otherwise edit it to make the required corrections.

6. Open the Single sign-on section, and select the SAML option.

7. On the Set up Single Single-On with SAML page, click the Edit button.
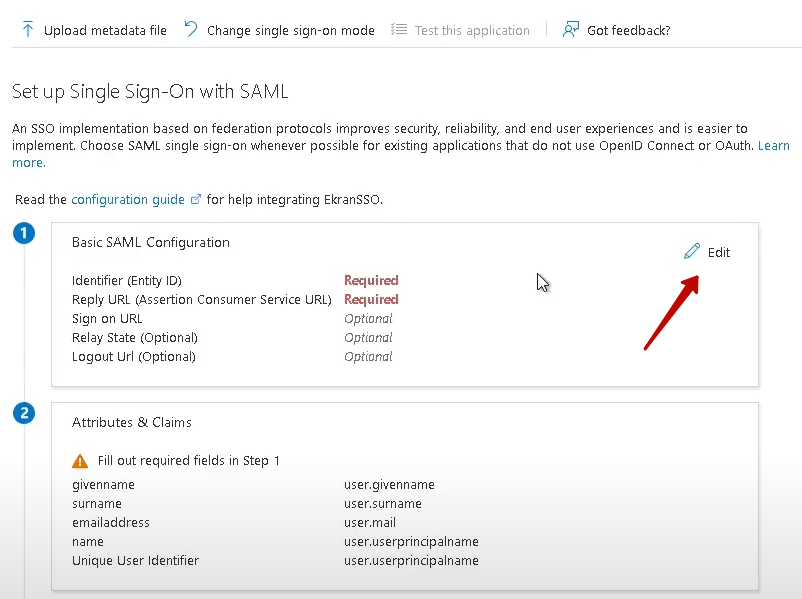
8. Configure the following fields:
• Identifier (Entity ID): Enter the Management Tool URL (e.g. https://<hostname or IP address>/Ekran System).
• Reply URL (Assertion Consumer Service URL): Enter the reply URL (https://<hostname or IP address>/Ekran System/Account/ConsumeSSO).
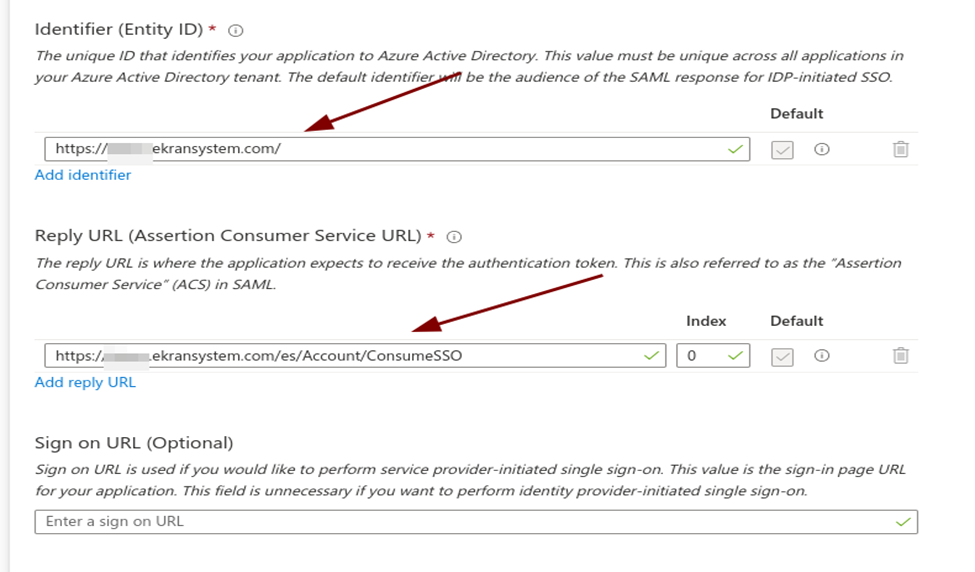
9. Click Save to apply the changes.
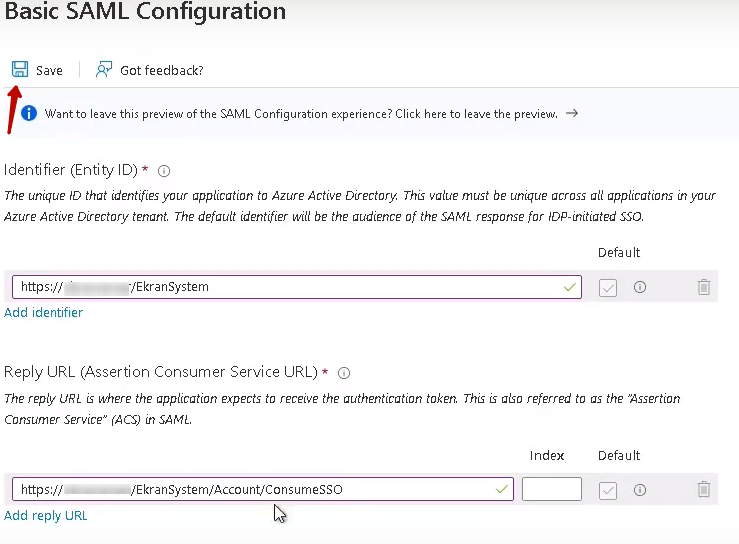
10. On the Set up Single Single-On with SAML page, scroll down to the SAML Signing Certificate section, and download the Federation Metadata XML file with the EkranSSO.xml file name.

2. Configuring the Management Tool
To configure the Syteca Management Tool, do the following:
1. Log in to the Management Tool, and click the Configuration () button (at the top of the Management Tool interface), and then select the SSO Integration tab.
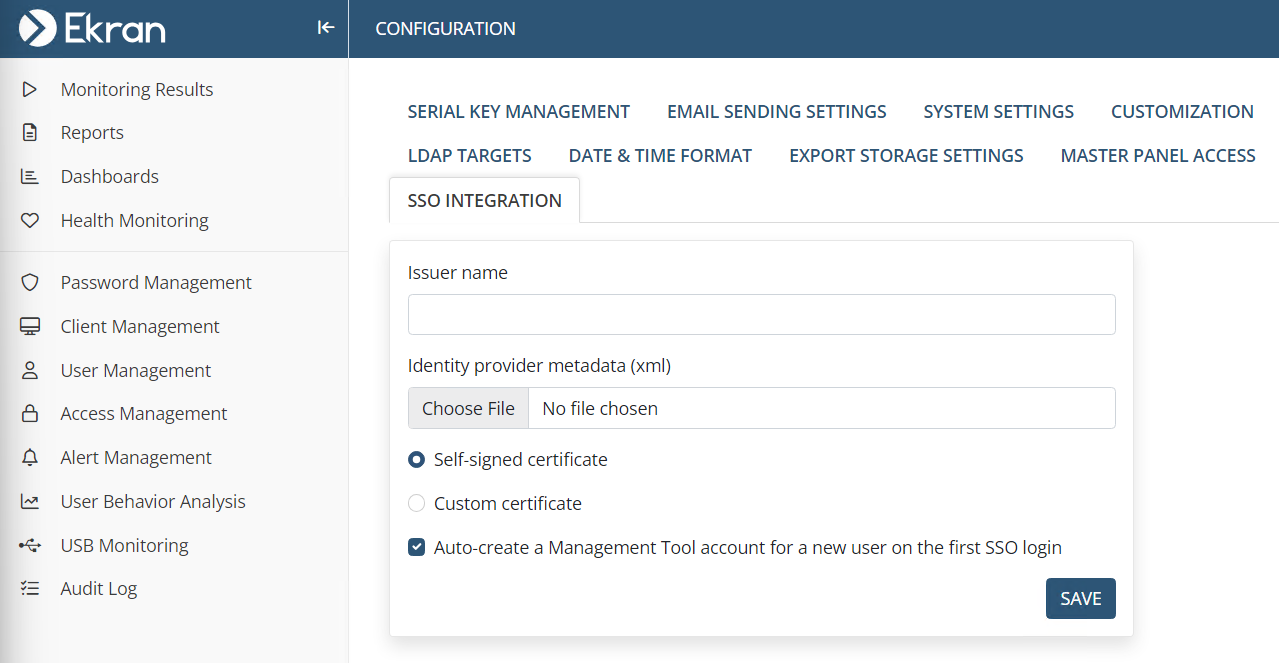
2. In the Issuer Name field, enter the Management Tool URL, and then upload your Syteca EkranSSO.xml file by clicking the Choose File button.
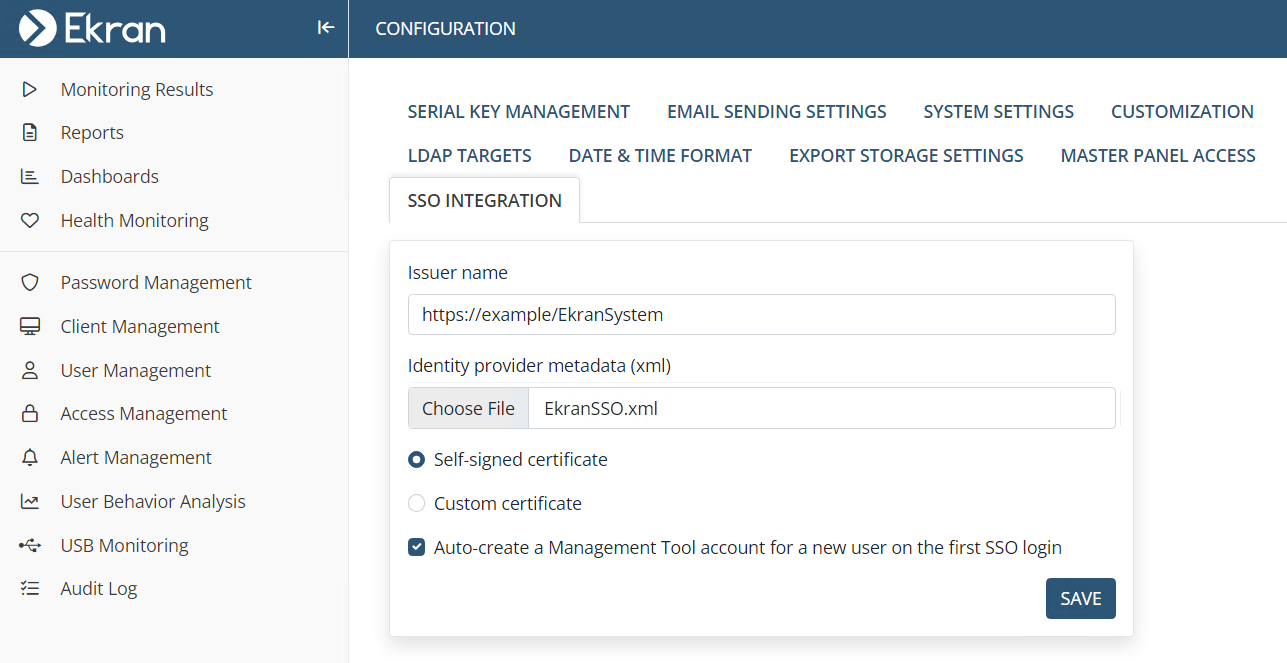
3. The Auto-create a Management Tool account for a new user on the first SSO login checkbox is selected by default, which automatically creates an internal / Active Directory user account in the Management Tool on a user's first login using SSO authentication if the user has not previously been added to the Management Tool, thereby enabling them to log in. This checkbox can be deselected, so that users who have not previously been added to the Management Tool are not added automatically, and are not therefore able to log in.
NOTE: Independently of whether this checkbox is selected or not, Active Directory users who have not been specifically added to the Management Tool as separate users, but who belong to an Active Directory group previously added, can log in (with a new Active Directory user account not created automatically if this checkbox is selected).
NOTE: SSO authentication is not currently implemented for use in Multi-Tenant mode.
4. Click Save to apply the changes.
5. Copy the Metadata URL to a new tab in your browser address bar, and the new EkranSPMetadata.xml file will then be downloaded automatically.
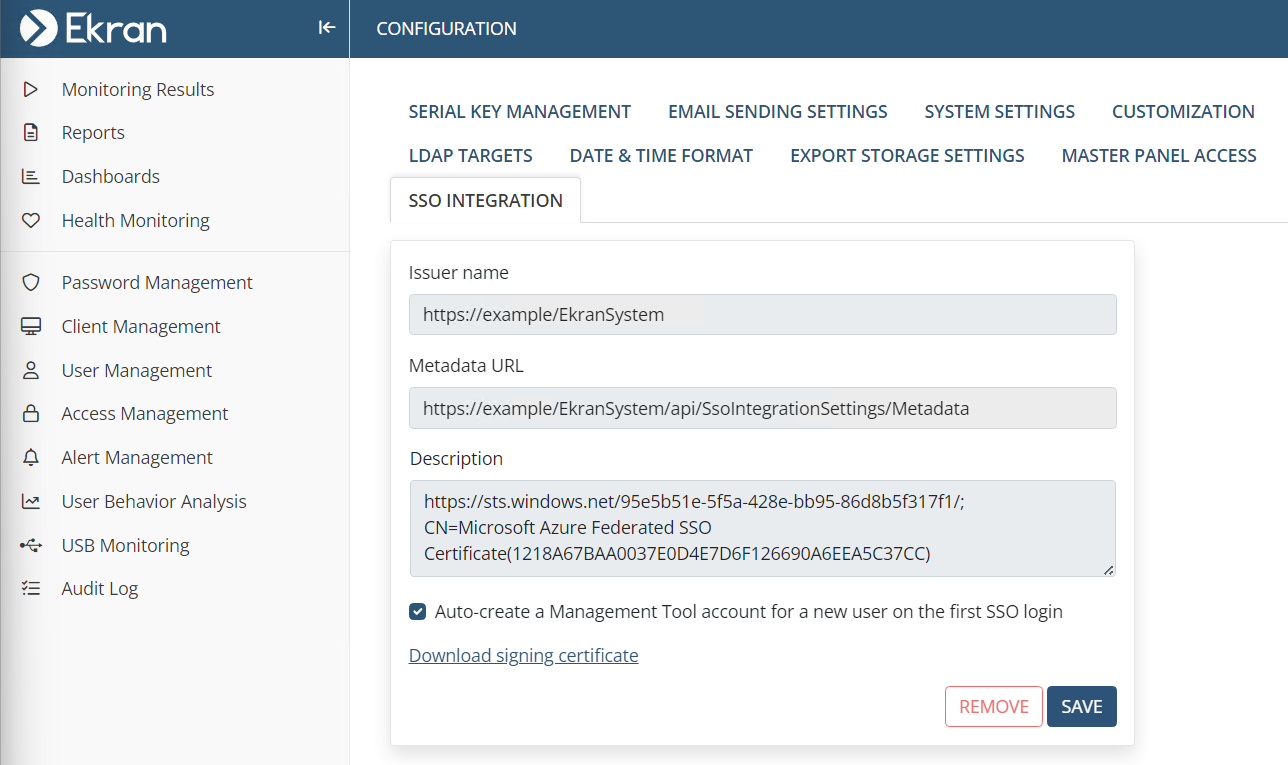
6. In Microsoft Azure, open the Home > Enterprise applications > All Applications > Browse Azure AD Gallery > EkranSSO section.
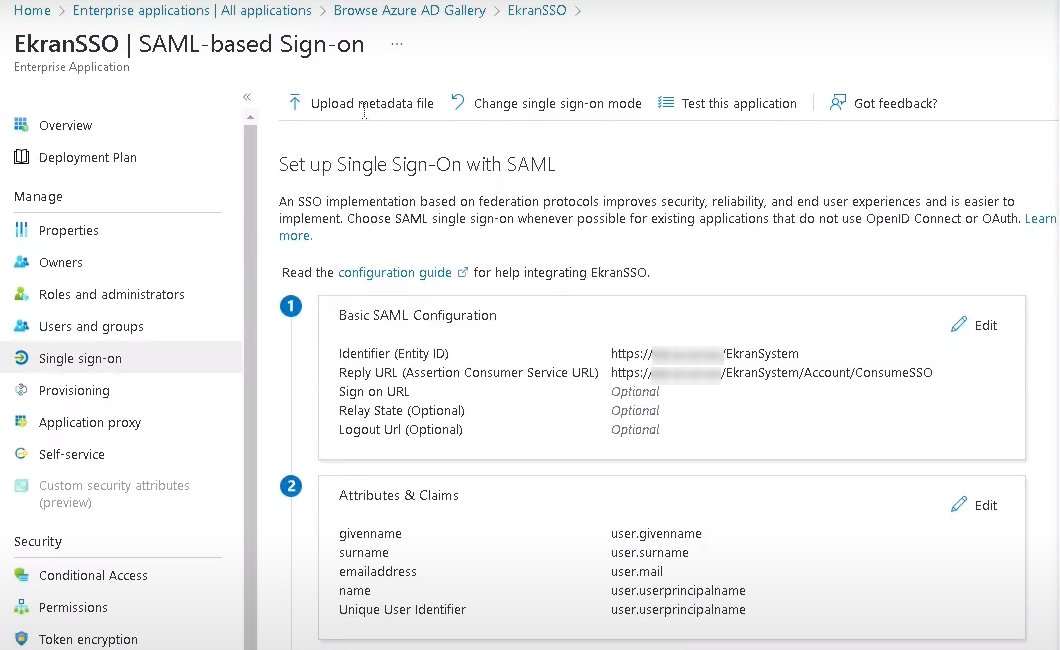
7. Click Upload metadata file, and select the EkranSPMetadata.xml file.

8. Click Save to save the new xml file and apply the changes.
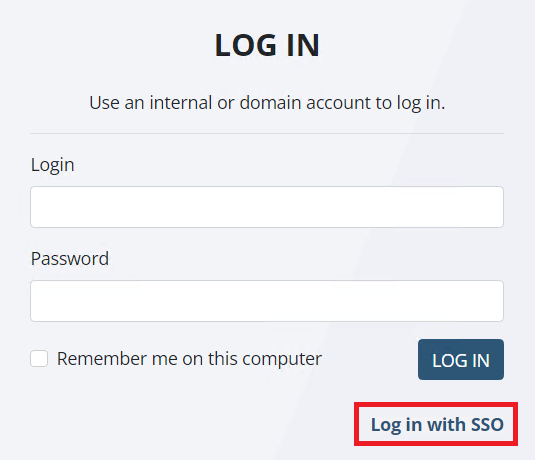
9. Configuration is now complete, and you can check that SSO integration works by logging in to the Management Tool.

.png?inst-v=362ca448-a20b-4783-93c2-f49186888f5c)