Moving the PostgreSQL Database to Another Computer
NOT AVAILABLE IN SAAS
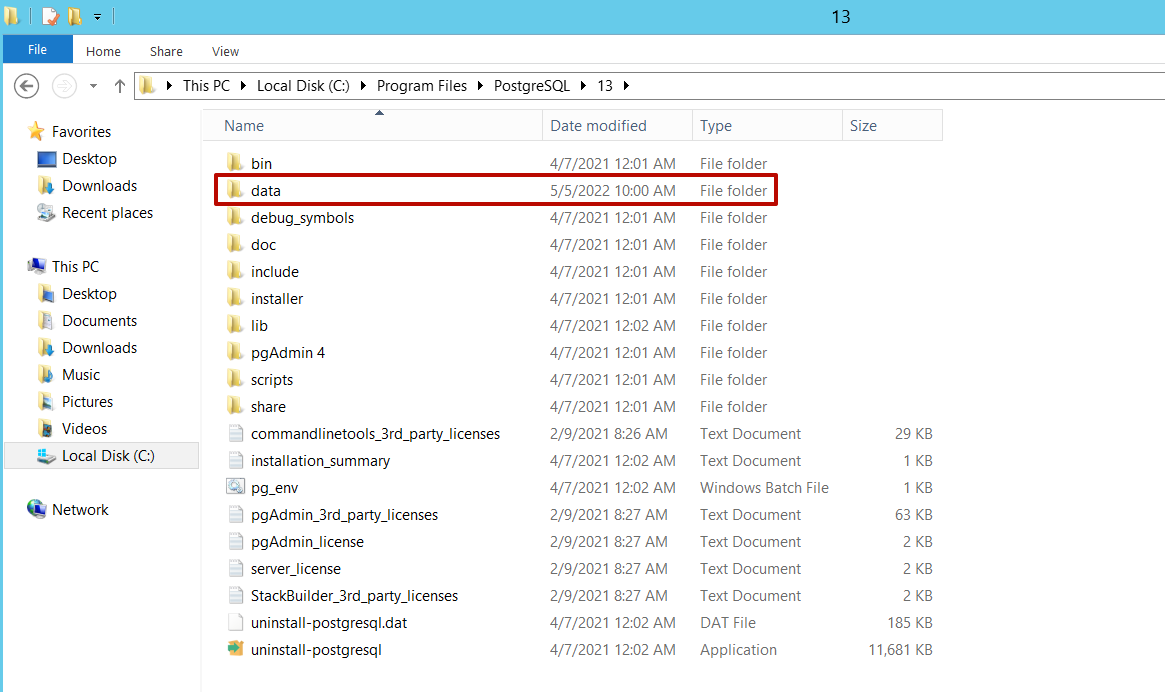
By default, PostgreSQL for Windows installs the PGDATA directory into the following folder: C:\Program Files\PostgreSQL\some version\data
To transfer the PostgreSQL database from one machine to another, follow the steps below.
Table of Contents
Step 1: Stop the EkranServer Service
Open Windows Services Manager and stop the EkranServer service.

Step 2: Stop The PostgreSQL Service
Open Windows Services Manager, and stop the PostgreSQL service on both the computer where the database is to be transferred from (i.e. the old PostgreSQL server) and the computer where the database is to be transferred to (i.e. the new PostgreSQL server).

NOTE: Check in the Task Manager to see if any postgresql.exe instances are still running, and if so, DO NOT TERMINATE them, but instead close all the applications that are still connected to the database.
Step 3: Move the Data Folder to a New Location
Move the existing PGDATA directory to the new machine where PostgreSQL Server with the same version number is installed.
NOTE: This should be done as an Administrator on the server machines, and you should also check the user permissions in the new directory to ensure that the user name under which your PostgreSQL instance is to run has the required permissions to do so in the new directory, otherwise PostgreSQL will not start.

Step 4: Change the Registry Values
On the new machine (i.e. with the new PostgreSQL Server), start Windows Registry Editor (regedit.exe) which is located at: HKEY_LOCAL_MACHINE\SYSTEM\CurrentControlSet\Services\pgsql-some version.
Double click on ImagePath, and change the directory after the "–D" option to that of your new location.
NOTE: If the path to your new location contains spaces, you should put the whole path inside quotes.

Step 5: Modify the PostgreSQL Configuration File
On the new machine (i.e. with the new PostgreSQL Server), open the C:\Program Files\PostgreSQL\13\data folder, and find the pg_hba config file.
Scroll down to the “IPv4 local connections” section, and (e.g. by copying and pasting the existing line in it) add a new similar line directly beneath the existing line, as follows (see an example in the screenshot below):
1. On the new second line, instead of the IP address in the first line, enter the IP address of the Syteca Application Server computer.
2. Instead of the encryption method in the first line of “scram-sha-256”, enter “md5”.

Step 6: Restart The PostgreSQL Service
Before you can start up your database you must close and re-open the Windows Services Manager window to refresh the path you just changed in the registry without needing to restart your system.
After closing and re-opening the Windows Services Manager window, you should re-check the "path to executable" information for the PostgreSQL database service. The path after the "–D" option should still be that of your new directory (as previously specified in Step 4).

Step 7: Configure the Database Parameters (DbSetupToolUI) Application
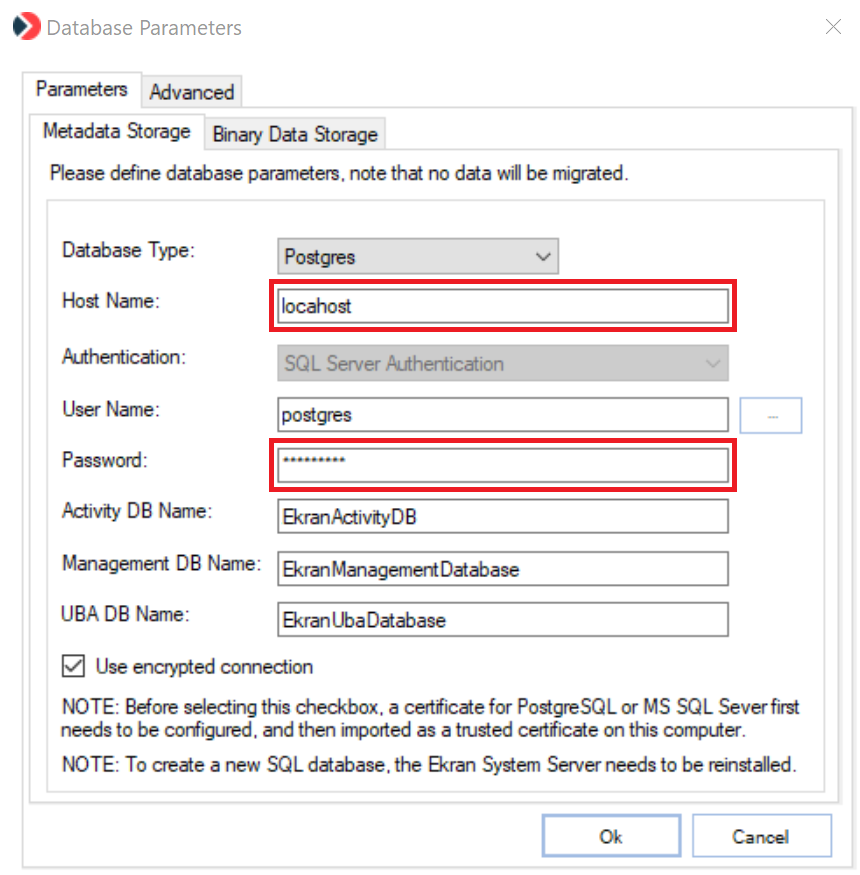
On the machine with the Syteca Application Server, open the Database Parameters (DbSetupToolUI) application (which can be opened from the Server tray icon, and also found in the C:\Program Files\Ekran System\Ekran System\Server folder), and change the IP address of the PostgreSQL Server in the Host Name field, and then click OK to apply the changes.
NOTE: If you use a new password for the new “postgres” user (i.e. different to the password used for the old PostgreSQL Server), you also need to change the password in the Database Parameters (DbSetupToolUI) application (see the screenshot below).

Step 8: Restart the EkranServer Service
Open Windows Services Manager, and start the EkranServer service.

