
Stage 3. Adding Storage to the Failover Cluster and Configuring the File Server Role
NOT AVAILABLE IN SAAS
Four steps are involved in adding storage to the failover cluster:
Step 1. Creating a File Share Witness.
Step 2. Adding the iSCSI virtual disks to the cluster.
Step 3. Creating a File Server role in the cluster.
Step 4. Creating a File Share.
Step 1. To create a File Share Witness, do the following:
1. Log in to a node in the cluster, and launch PowerShell as administrator.
2. Run the command: Set-ClusterQuorum -FileShareWitness \\someserver\someshare
As a File Share Witness, any File Share in the network can be used, but it must be available for all nodes. A File Share Witness will increase the reliability of the storage to be configured.
Step 2. To add the disks that were configured in Stage 1, do the following:
1. Log in to a node in the failover cluster, and launch PowerShell as administrator.
2. Run the following command: Get-ClusterAvailableDisk -All | Add-ClusterDisk
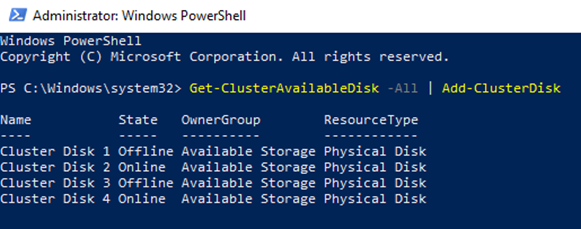
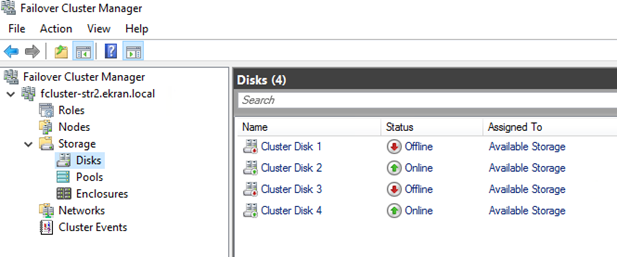
3. You can then see the disks added in the Failover Cluster Manager, by selecting Storage and then Disks in the navigation menu.
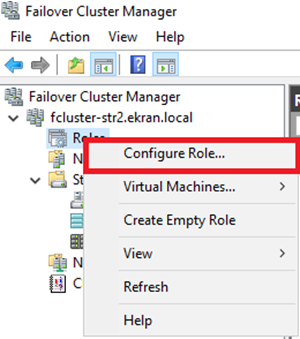
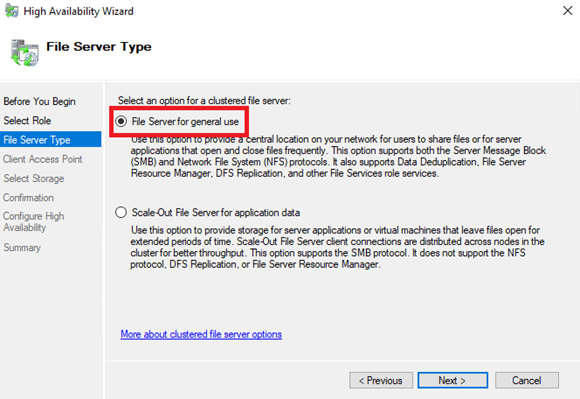
Step 3. To create a File Server role in the cluster, do the following:
1. In the Failover Cluster Manager, right-click Roles and select Configure Role.
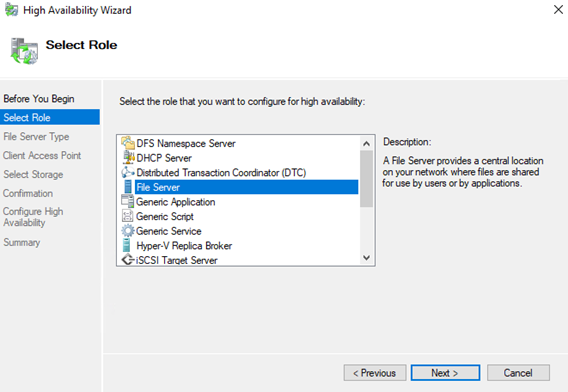
2. On the Select Role page, select File Server.
3. On the File Server Type page, leave the File Server for general use option selected by default.
4. On the Client Access Point page, enter a name which will be used later to access the storage via the network.

5. On the Select Storage page, select one disk from those available which will be initially used as storage.
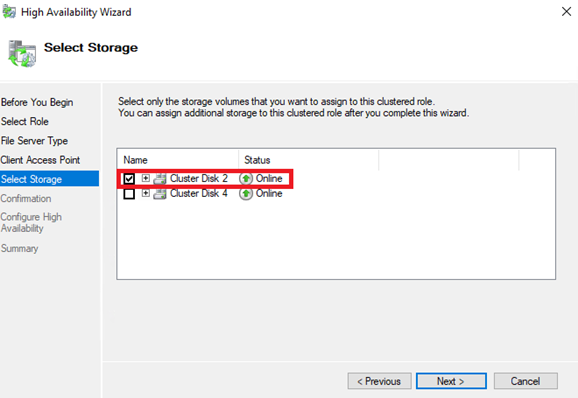
6. Proceed to the end, and click Finish.
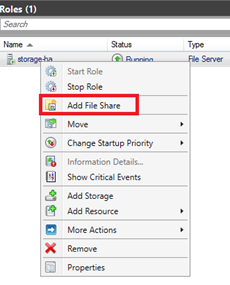
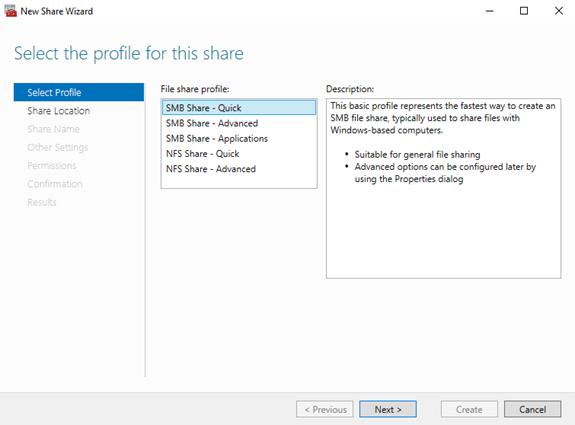
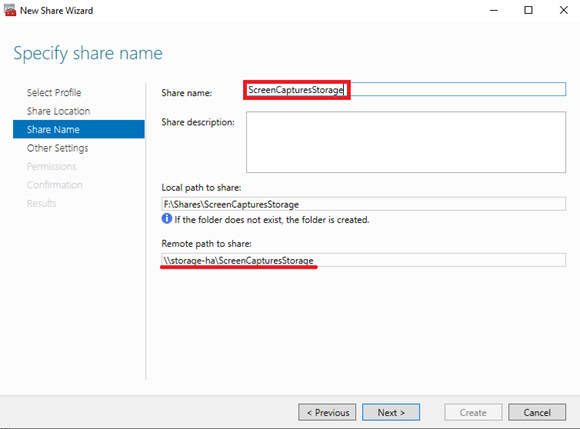
Step 4. To create a File Share, do the following:
1. In the Failover Cluster Manager, click Roles, then right-click the role you have created, and select Add File Share.
2. On the Select Profile page, leave the SMB Share – Quick option selected by default.
3. On the Share Location page, enter a name for the share where you want the screen captures to be stored. The Remote path to share field value will be used for Syteca Application Server configuration.
4. On the Permissions page, you can restrict access to the share.
5. Proceed to the end, and click Finish.