Step 1. Importing a Trusted Certificate
NOTE: For SaaS deployments, please contact your Syteca vendor or the Syteca Support team to enable this feature in your environment.
To import a trusted certificate, do the following:
1. On the Syteca Application Server computer, press Windows+R, enter mmc in the Run window that opens, and press Enter.
2. In the User Account Control window that opens, click Yes.
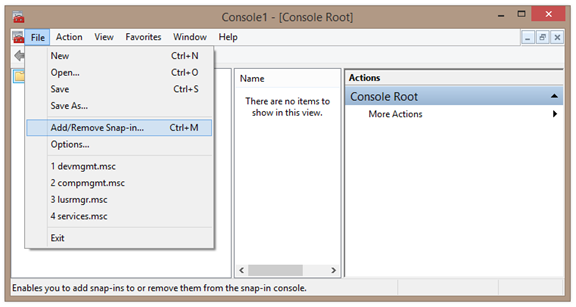
3. In the Console window, select File > Add/Remove Snap-in.
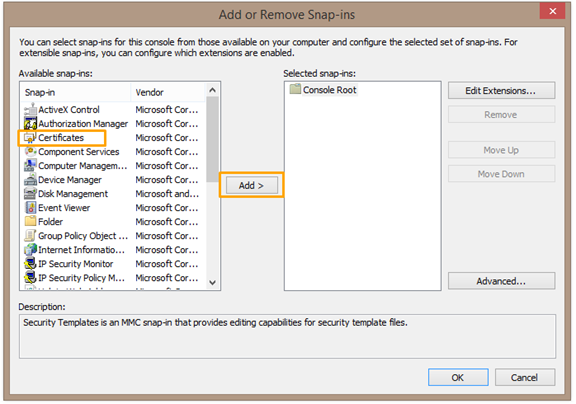
4. In the Add or Remove Snap-ins window, select Certificates and then click the Add button in the center.
5. In the Certificates Snap-in window, select the Computer account option, and then click Next.
6. In the Select Computer window, select the Local computer: (the computer this console is running on) option, and then click Finish.
7. In the Add or Remove Snap-ins window, click OK.
8. In the Certificates (Local computer) tree-view, find the Personal node.

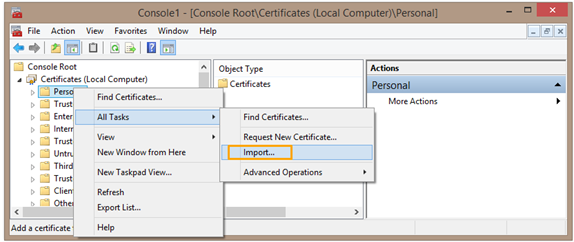
9. Right-click on the Personal node, In the context menu, select All Tasks > Import.
10. The Certificate Import Wizard opens.
11. On the Welcome to the Certificate Import Wizard page, click Next.
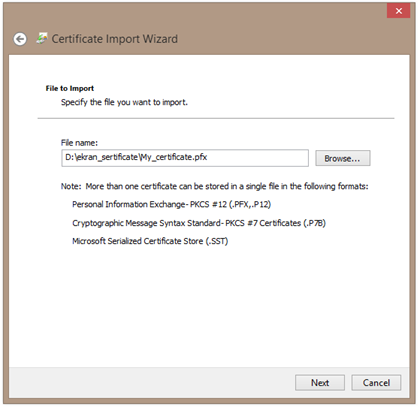
12. On the File to Import page, specify the location and name of the certificate to be imported manually or use the Browse button to locate the certificate file, and then click Next.
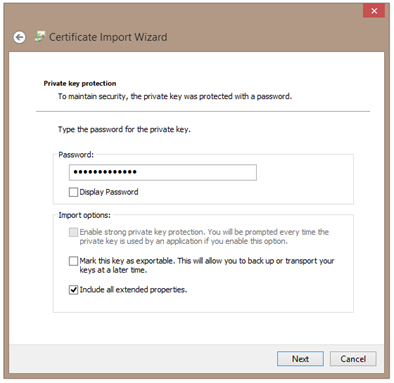
13. If required, on the Private key protection page, enter the password for the private key, and then click Next.
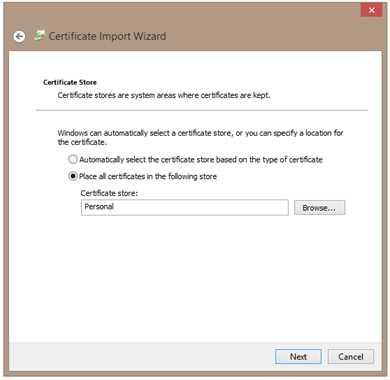
14. On the Certificate Store page, click Next.
15. On the Completing the Certificate Import Wizard page, click Finish, and then click OK in the confirmation message.
16. Select Certificates (Local Computer) > Personal > Certificate, and then double-click the imported certificate.
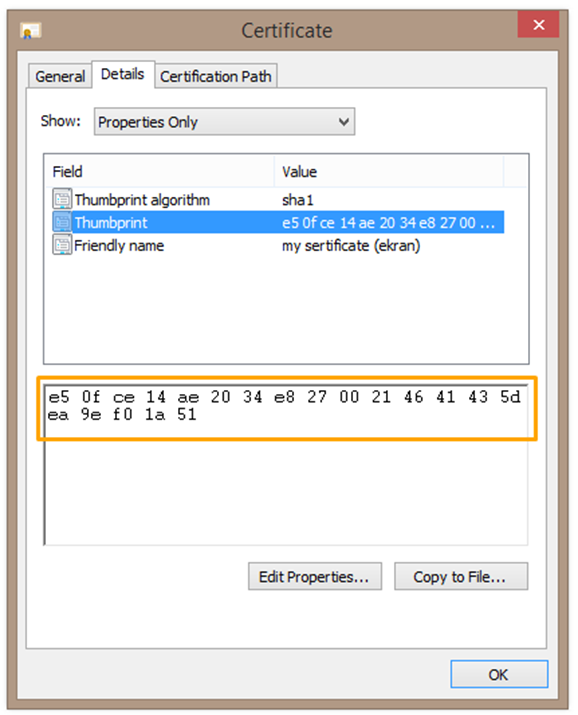
17. In the Certificate window, select Details > Thumbprint, and then copy the Thumbprint value.
