
Adding Alerts
To add a new alert, do the following:
1. Log in to the Management Tool as a user with the administrative Client Installation and Management permission.
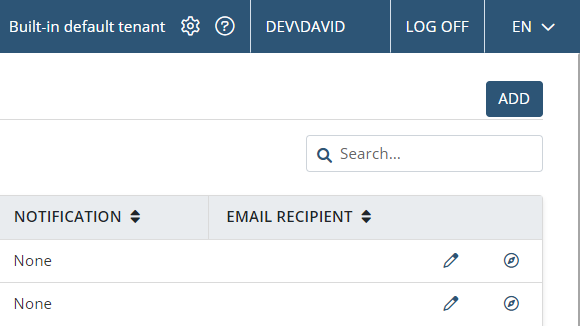
2. Click the Alerts navigation link (on the left), and then click the Add button in the top right of the Alerts page.
3. On the Add Alert page that opens, in the Properties section at the top, define the following alert properties:
• Select the Enabled checkbox to enable the alert.
• Enter a unique name for the alert.
• Optionally, enter a description (of up to 500 characters) for the alert.
• Select the alert risk level (Normal, High, or Critical).
.png?inst-v=362ca448-a20b-4783-93c2-f49186888f5c)
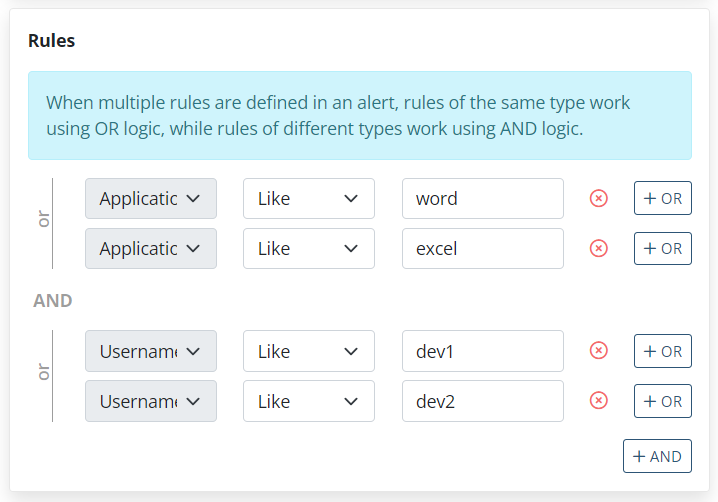
4. In the Rules section, define the rules to be applied to the alert, as follows:
• Select a parameter for the rule (in the drop-down list on the left).
• Select a comparison operator (in the drop-down list in the middle).
• Enter the value to which the parameter will be compared (in the field on the right).
Where:
• To add multiple rules to the alert (to work in combination with each other using OR/AND logic): Click the "+ Or" or "+ And" buttons.
NOTE: When multiple rules are defined in an alert, rules of the same type work using OR logic, while rules of different types use AND logic.
• To delete a rule: Delete its value or click the Close (
5. In the Assigned Clients and Assign Client Groups sections, select the Clients / Client groups which the alert will be assigned to, by clicking Add.
NOTE: To find specific Clients / Client groups, enter their names or part of their names in the Search box.
.png?inst-v=362ca448-a20b-4783-93c2-f49186888f5c)
6. In the Actions section at the bottom of the page, select how you would like to receive alert notifications as well as additional actions to be performed when the alert is triggered:
• Select the Send emails to checkbox, and then enter the email addresses to which the notifications will be sent (where multiple email addresses can be entered, separated by semicolons).
NOTE: To receive email notifications correctly, make sure that the Email Sending Settings contain the correct parameters for sending emails.
• Select the Show warnings in Tray Notifications application checkbox to activate tray notifications, where the alert notifications will pop up in the Windows Tray Notifications application.
• Select the Show warning message to user checkbox if you want an on-screen warning message to be displayed to the user when the alert is triggered (where you can either use the default message or enter your own text in the field below).
• In the Additional actions drop-down list, select the Block user on all computers option if you want to automatically block the user from performing forbidden actions, or select the Kill application option if you want to forcibly stop the detected application.
NOTE: The "Block user on all computers" and "Kill application" options are only available for Windows Clients.
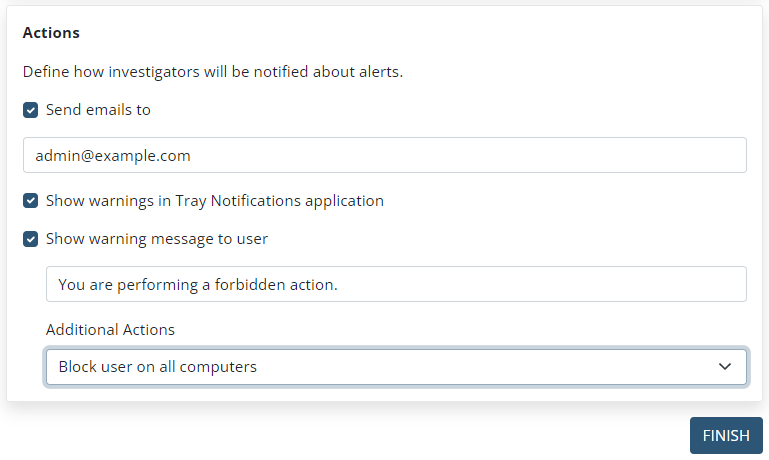
7. Click the Finish button (in the bottom right of the page) to save the alert.
8. The alert is then created.