
Configuring a Syteca Client Golden Image
A Syteca Client golden image allows you to configure a golden image on a Client computer, and then clone this image of the virtual machine (VM) to other Client computers, while avoiding creating duplicates of Clients in the Syteca Management Tool.
NOTE: The instructions on this page are only valid for Syteca version 6.37 or later.
Table of Contents
1. Configuring a Client Golden Image
To configure the Syteca Client Golden Image option, do the following:
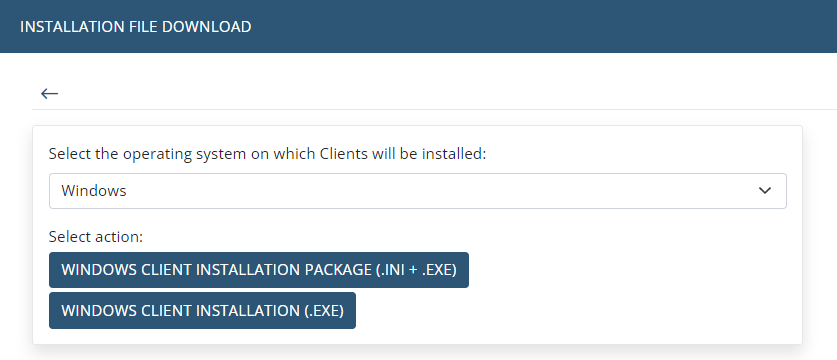
1. Download the Syteca Client installation package from the Management Tool by opening the Clients page, and then clicking the Install Clients button (in the top right of the page), followed by the Download Installation File button.

2. On the Installation File Download page that opens, select the Windows operating system, and then click either Windows Client installation Package (.ini+.exe) to generate the installation package, or Windows Client installation (.exe) to download the installation file.
3. Copy the Client installation package/file to the computer that will be used as the golden image, and install the Client on it (see more information on Client installation in the Installing Windows Client Locally section).
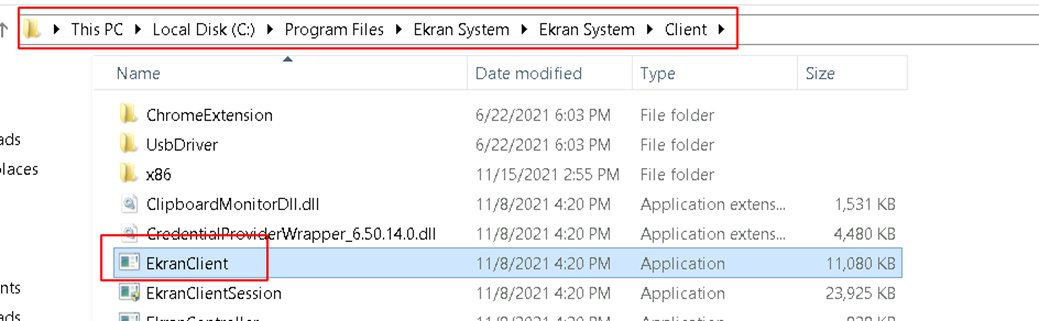
4. On this Client computer, open the folder where you installed the Syteca Client (by default: C:\Program Files\Ekran System\Ekran System\Client), and rename EkranClient.exe to EkranClient1.exe.
5. Open Windows Services, and stop the EkranClient and EkranController services.

6. Open Windows Registry Editor, and in the HKEY_LOCAL_MACHINE\SOFTWARE\EkranSystem\Client key, do the following, and then save the changes:
• Delete the AgentGUID value.
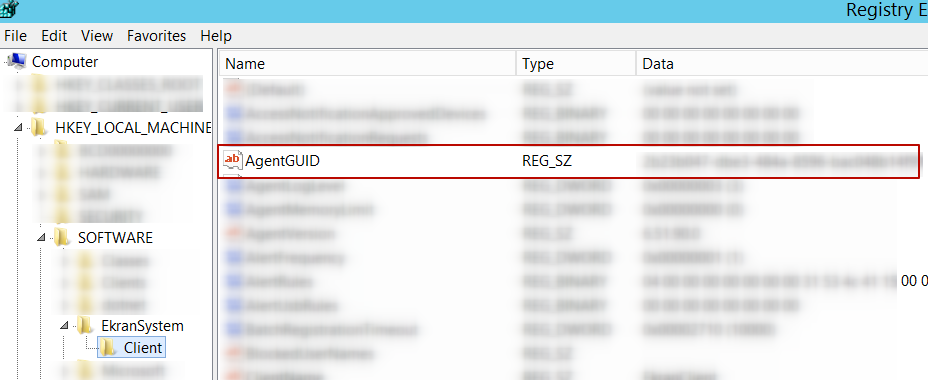
• Add a new DWORD value, and specify the following values in its fields:
- Value name: GoldenImageMode
- Value data: 1
7. Open the folder where you installed the Syteca Client (by default: C:\Program Files\Ekran System\Ekran System\Client), and rename EkranClient1.exe to EkranClient.exe.
NOTE: Do not restart the EkranClient service after this procedure, which needs to remain stopped until the next reboot of the system, otherwise this image will get a new ID and will start to produce duplicates.
After completing the steps above, the image can be used to clone your virtual machine without creating duplicate Clients.
2. Automatically Adding the Syteca Client to Specific Client Groups
This option allows you to automatically add the Syteca Client to the required Client group/s (in addition to the default All Clients group) after configuring a new golden image. In this way, each cloned Client will then automatically inherit the settings from the Client group/s defined.
To enable the option to automatically add Clients to a specific Client group, do the following:
1. Add the following key to the EkranServer.settings.config file (located in C:\Program Files\Ekran System\Ekran System\Server):
<add key="ClientAutoAssignToClientGroupEnabled" value="1" />
2. Define the auto-assignment rule by adding the following key (containing the required Client group ID) to the EkranServer.settings.config file:
<add key="ClientAutoAssignToClientGroupWithId2" value="WIN11-COMP1; WIN11-COMP2; WIN11-COMP3; WIN11-COMP4; 192.168.90.10; 192.168.90.20; 192.168.90.30; 192.168.90.40"/>
NOTE: Replace the hostnames and IP addresses in the example above with hostnames / IP addresses from your environment. You can define either the hostnames or IP addresses, or both.
NOTE: To automatically add a Client to multiple Client groups, additional keys can also be added to the .config file in a similar way, while specifying the ID of the additional Client group required in each key.
NOTE: For SaaS deployments, since the EkranServer.Settings.config file is not available, please contact your Syteca vendor or the Syteca Support team to enable this feature in your environment.
The second key above consists of 2 parts:
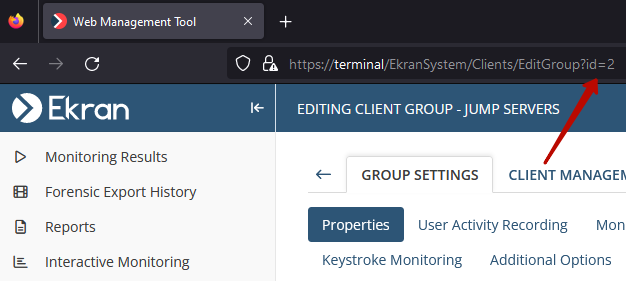
• key="ClientAutoAssignToClientGroupWithId2" - specify the ID of the Client group (which you can find on the Client Management page, on the Client Groups tab, by clicking on the name of the required Client group).
• value="WIN11-COMP1;192.168.90.10...” - you need to specify the hostnames and/or IP addresses that will be used by the new cloned images to be created in your environment. According to the DHCP settings in your environment, you can also specify IP addresses / hostnames that will be used for VMs to be added in the future.
If the cloned Syteca Client has a hostname or IP address that is included in the list, then the Client on this computer will be automatically added to the Client group with the ID specified in the key, and will inherit all the settings from this Client group.
In the example above, VMs with the hostnames WIN11-COMP1, WIN11-COMP2, WIN11-COMP3, WIN11-COMP4 and IP addresses 192.168.90.10, 192.168.90.20, 192.168.90.30, and 192.168.90.40 will be added to the Client group with the ID = 2, and will inherit all settings from this Client group.
Additional options for the auto-assigning rule:
- 192.168.1.* - this template can be used for all IP addresses that starts with 192.168.1, e.g. 192.168.1.24 or 192.168.1.233.
- 192.168.1.30-75 - this template can be used for all IP address in the range between 192.168.1.30 and 192.168.1.75, e.g. 192.168.1.34 or 192.168.1.68.
- Syteca-pc-* - this template can be used for all hostnames that start with Syteca-pc-, e.g. Syteca-pc-Alex or Syteca-pc-Max.
3. Restart the EkranServer service to apply the changes made to the EkranServer.settings.config file.