
Installing Windows Clients through Group Policy Using an MSI File
NOT AVAILABLE IN SAAS
You can install Clients remotely on a selected group of computers via Group Policy by using an MSI file.
When installing the Client by using Group Policy, a configuration file first needs to be created that includes the Application Server parameters. This file can be created by using Microsoft Orca.
Table of Contents
1. Creating the Configuration File
To create the configuration file using Microsoft Orca, do the following:
1. Right-click the agent.msi file, and select Edit with Orca in the context menu.
2. In the window that opens, on the Transform menu, select New Transform.

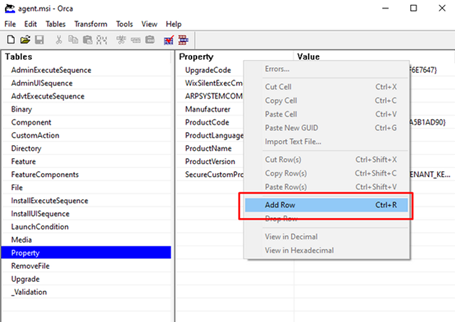
3. In the Tables pane, click Property.
4. In the pane that opens, right-click and select Add Row in the context menu.
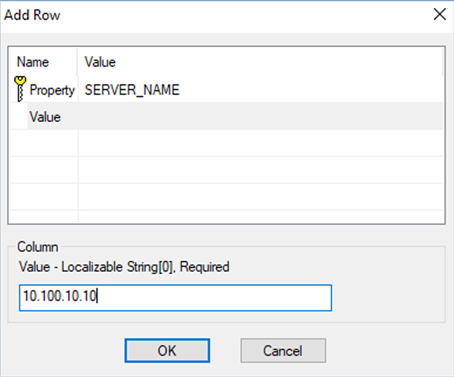
5. In the Add Row window, do either of the following:
• To install the Client with the default settings: Specify the Application Server parameters as follows, and then click OK:
- Property: SERVER_NAME
- Value: <Server IP>
NOTE: To define a Tenant Key, the Property TENANT_KEY also needs to be added with the Value <tenantkey>.
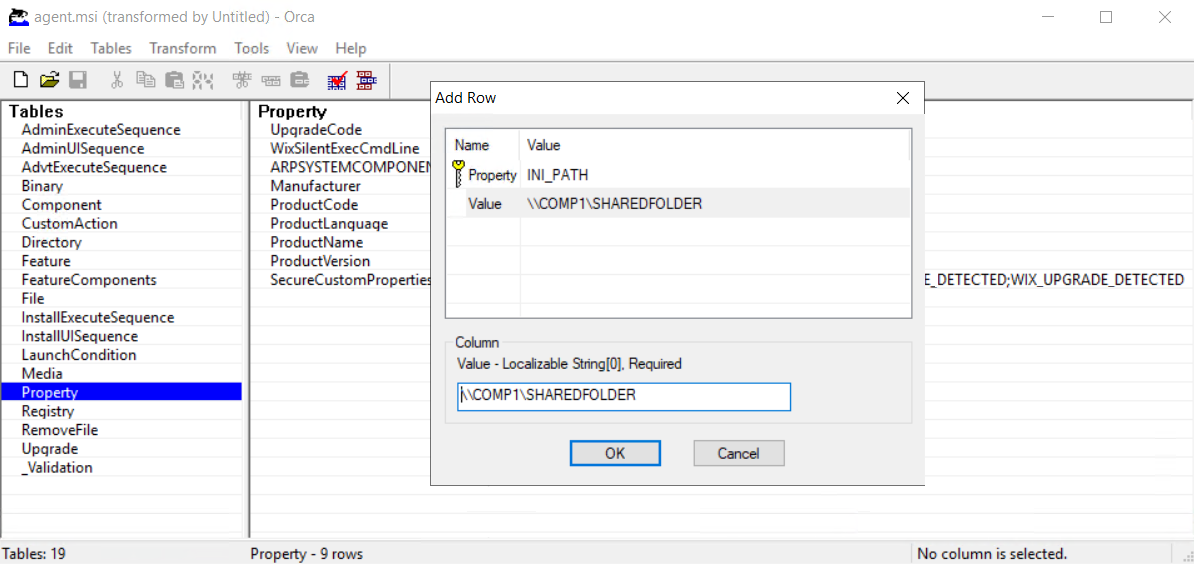
• To install the Client with custom settings: Specify the INI file as follows, and then click OK:
- Rename the SytecaClient.ini file to agent.ini.
- Copy the agent.ini file to a shared folder (see Section 2. Installing the Client by Using Group Policy below).
- Specify the INI file:
- Property: INI_PATH
- Value: <Path_to_INI_file>
6. After clicking OK, on the Transform menu, select Generate Transform.
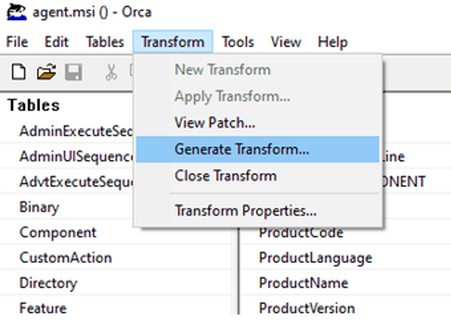
7. Enter a name for the MST file (e.g. SytecaClient.mst), and then save it.
2. Installing the Client via Group Policy
To installation Clients remotely by using Group Policy, do the following:
1. Create a shared folder which you will copy the agent.msi file to, along with the MST file (and also the INI file, if used above) that you have created, and make sure that the shared folder is accessible from all computers where you will install the Syteca Client.
NOTE: If you used the INI file (above), this file can either be copied to this same shared folder or to any other shared folder where the shared path was defined in the INI_PATH property.
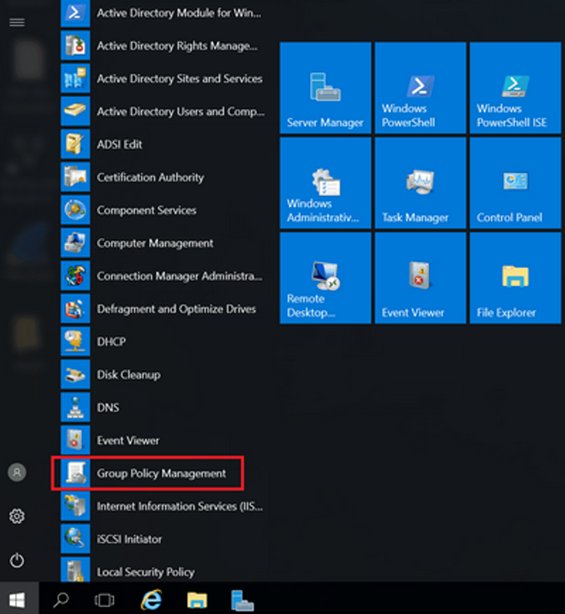
2. In the domain controller, use the Windows Start menu, to open Administrative Tools, and click Group Policy Management.
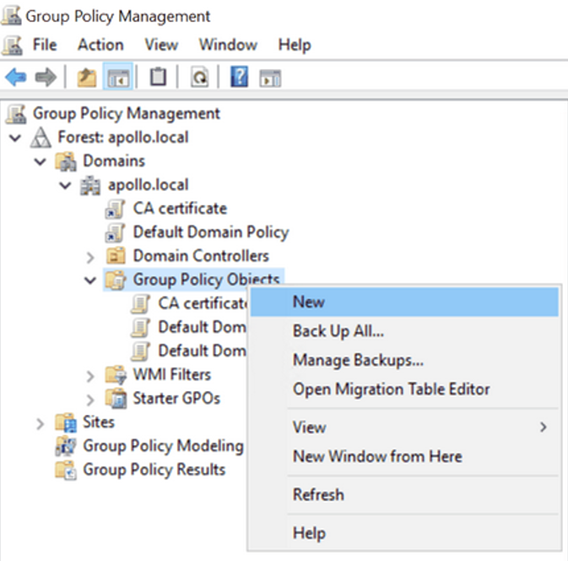
3. Right-click on Group Policy Objects, and select New (in the context menu).
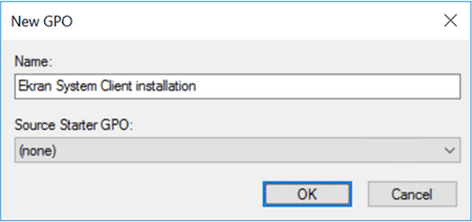
4. In the New GPO window that opens, enter a name for the new group policy object (e.g. Syteca Client installation), and then click OK.
5. To link a new object to your domain, in the navigation pane, right-click on your domain, and then select Link an Existing GPO.

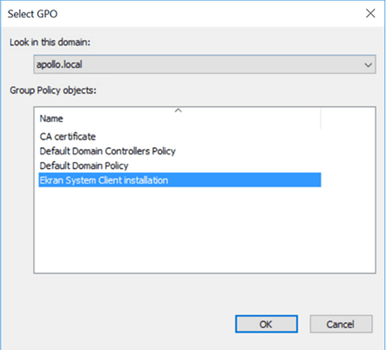
6. In the Select GPO window, select the group policy object that you have created, and then click OK.
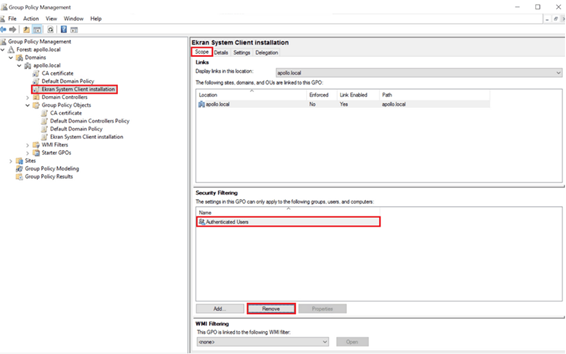
7. To remove authenticated users, in the navigation pane, click the group policy object that you have created.
8. On the Scope tab, in the Security Filtering section, click Authenticated Users, and then click the Remove button at the bottom.
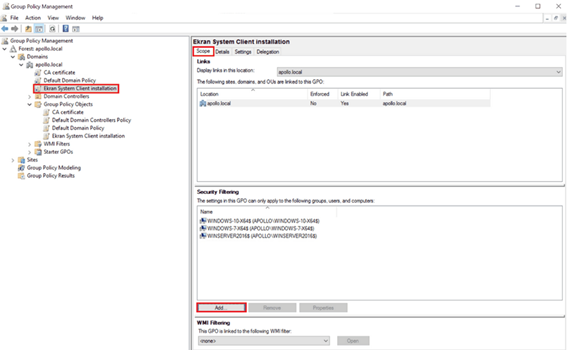
9. To add computers or a computer group on which the Syteca Client will be installed, click the Add button (at the bottom).
10. In the Select User, Computer, or Group dialog box, enter the name of the group whose members the GPO are to be applied to, and then click OK. If you do not know the name of the group, you can click Advanced to browse the list of groups available in the domain.
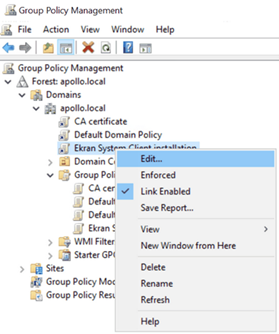
11. Right-click on the group policy object that you have created, and select Edit.
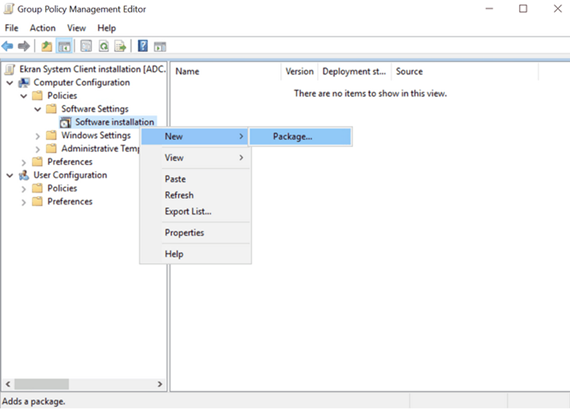
12. In the Group Policy Management Editor window then opens, select Computer Configuration > Policies > Software Settings.
13, Right-click Software installation, and in the context menu, select New > Package.
14. Locate the agent.msi file in the share.
NOTE: It is very important that the paths to both the agent.msi file and the MST file are not local or through a network drive. The path must be through a network share accessible from everywhere in your network, and which everyone has at least Read permissions for.
15. In the Deploy Software window, select Advanced.
16. On the Modifications tab, click Add.
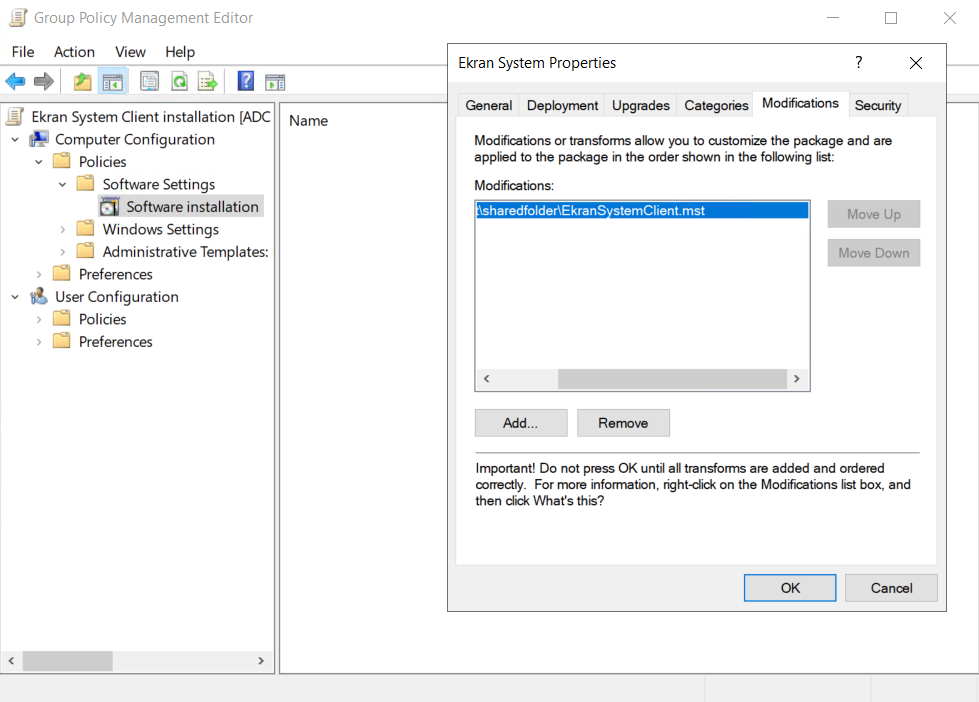
17. Locate the MST file that you have created in the share.
NOTE: It is very important that the paths to the agent.msi file, the MST file (and the INI file, if used) are not local or through a network drive. The paths to these three files must be through a network share accessible from everywhere in your network, and which everyone has at least Read permissions for.
18. Restart the computers on which Syteca Clients will be installed.
NOTE: It may require 2-3 restarts to update the GPO on these computers.
NOTE: If installation is performed using the MSI and INI files, these files can be copied to the same shared folder, in which case the settings from the INI file will be applied to the Client computers automatically, in which case the MST file does not need to be created.