
Managing Client Groups Settings for Multiple Clients Simultaneously
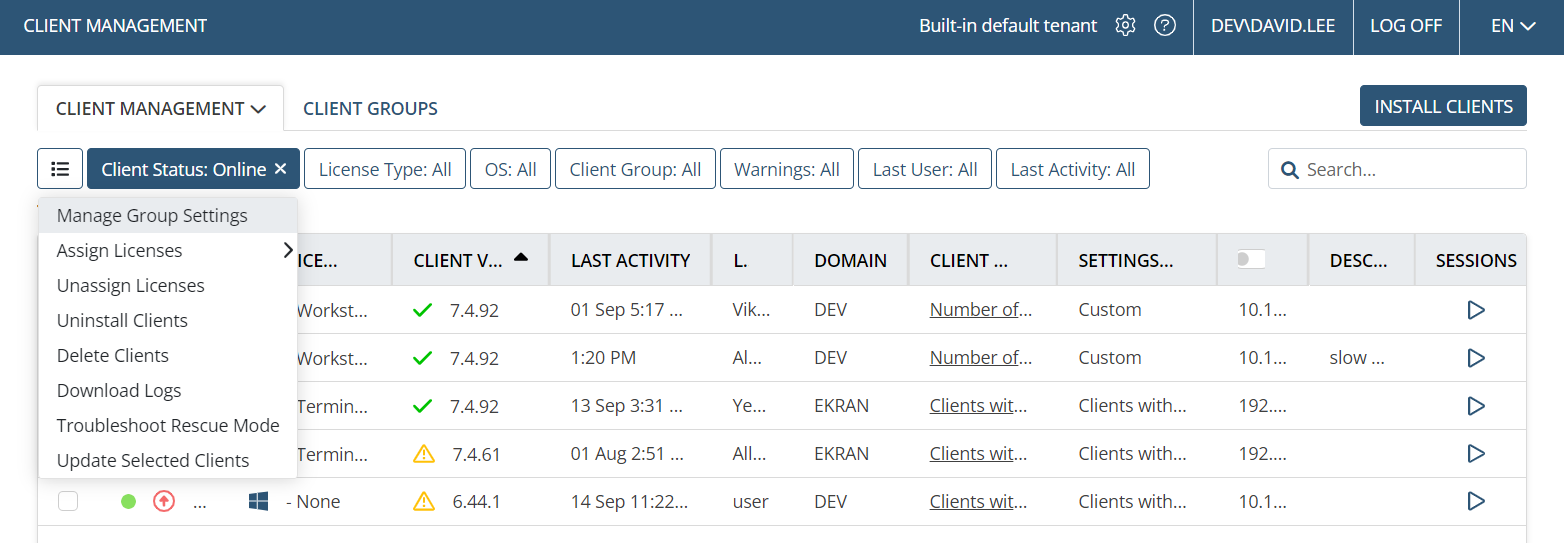
The Client group settings for (either a single Client or) multiple Clients simultaneously can be managed by using the Manage Group Settings functionality (on the Bulk Action (
• Add existing Clients to an existing Client group.
• Remove Clients from a Client group.
• Inherit the settings from a Client Group.
To manage the Client group settings of the required Clients, do the following:
1. Log in to the Management Tool as a user with the administrative Client Installation and Management permission.
2. Click the Clients navigation link (on the left).
3. On the Client Management tab that opens, find at least one Client to be managed, and select the checkboxes next to them (on the left).
NOTE: To find specific Clients, the Search box and filters at the top of the Client Management tab can be used.

4. Click the Bulk Action (
5. In the Edit Selected Clients pop-up window that opens, select the option required in the Action to perform drop-down list:
• Add to group
- In the Select a group drop-down list, select the Client group that you want the Clients to be added to.
- Optionally, select the Inherit Group Settings checkbox if you want the Clients to inherit the settings from this Client group.
• Remove from group
- In the Select a group drop-down list, select the Client group that you want to remove the Clients from.
• Inherit group settings
- In the Select a group drop-down list, select the Client group that you want the Clients to inherit the settings from.
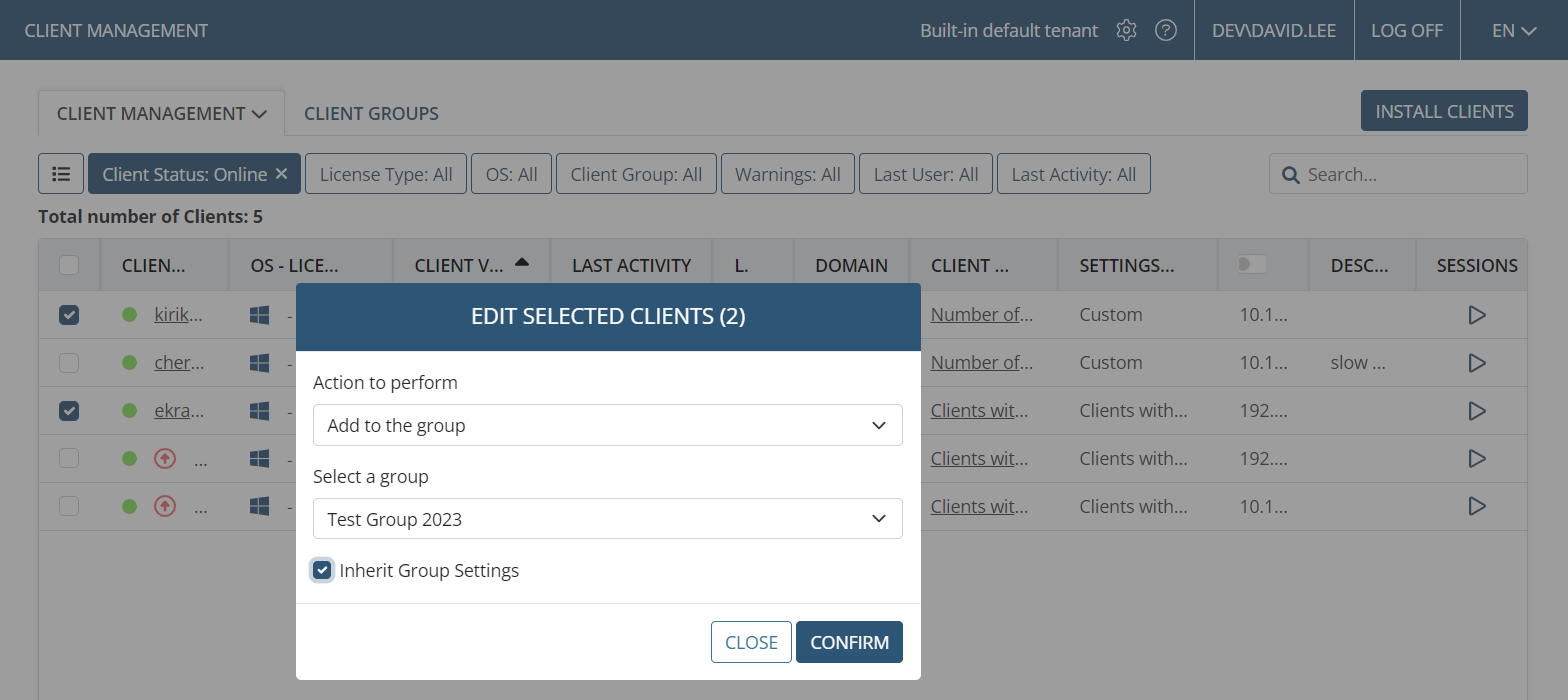
6. Click the Confirm button to save the new settings (or the Close button to cancel without saving).