Configuring and Deploying the Windows Client Using Azure Intune
This article provides instructions on how to configure the Syteca Windows Client and deploy it remotely on devices (i.e. Client computers) in a Microsoft Azure infrastructure using Microsoft Azure Intune.
This deployment method allows the use of the Client EXE file (or MSI file for SaaS deployments).
Table of Contents
1. Prerequisites
• Windows 10 version 1607 or higher.
• Devices must be enrolled in both Intune, and either:
- Azure AD registered
- Azure AD joined
- Hybrid Azure AD joined
• Generate the Windows Client installation package containing the SytecaClient.exe file by using the Syteca Management Tool.
NOTE: For SaaS deployments, instead of generating the Windows Client installation package containing the SytecaClient.exe file, download the Windows Client installation package containing the EkranSystemClient.msi file by using the Syteca Management Tool (for more information, please refer to the Getting Started with a SaaS Deployment guide.
2. Configuration
2.1. Create a .intunewin file using the Microsoft Win32 Content Prep Tool:
1. Create an empty folder on your computer (e.g. with the name SytecaClientInstall).
2. Copy the SytecaClient.exe file (downloaded by using the Management Tool) to this folder.
NOTE: For SaaS deployments, the EkranSystemClient.msi file needs to be used instead of the SytecaClient.exe file.

3. Download the Microsoft Win32 Content Prep Tool, and install it.
4. Create another empty folder (e.g. C:\output).
5. Repackage the SytecaClientInstall folder into a .intunewin file by using the IntuneWinAppUtil.exe tool in the Microsoft Win32 Content Prep Tool with the following command:
.\IntuneWinAppUtil.exe -c "C:\Users\Administrator\Desktop\SytecaClientInstall\" -s EkranSystemClient.exe -o C:\output

6. After running the command, the SytecaClient.intunewin file should be displayed in the C:\output folder.

2.2. Create a Windows App (Win32) package on Intune:
1. Log in to the Microsoft Endpoint Manager Admin Center.
2. In the Apps section, select All Apps.
3. Click + Add, and then select Windows app (Win32) in the App type drop-down menu in the Select app type pane (on the right).
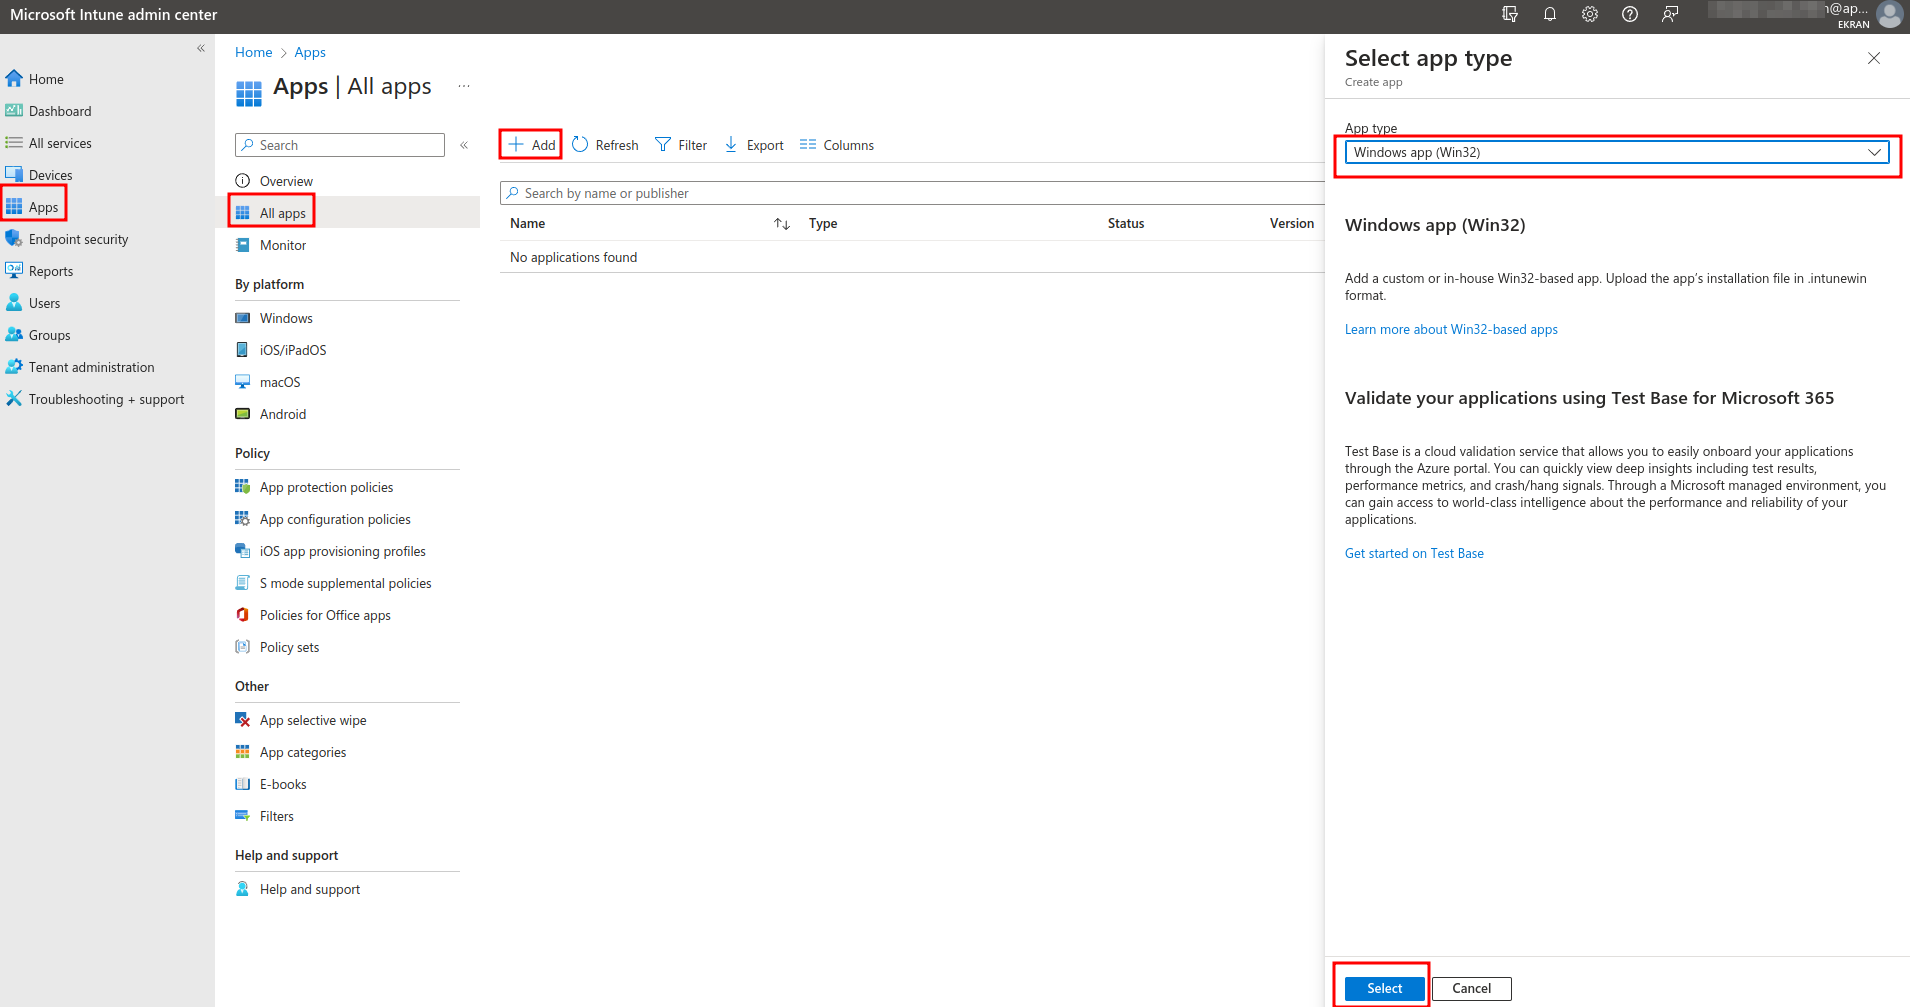
4. Click on Select app package file, and then select the SytecaClient.intunewin file, and click OK.

5. On the App information tab, enter the required details about the application (in the Name, Description, and Publisher fields), and then click Next.
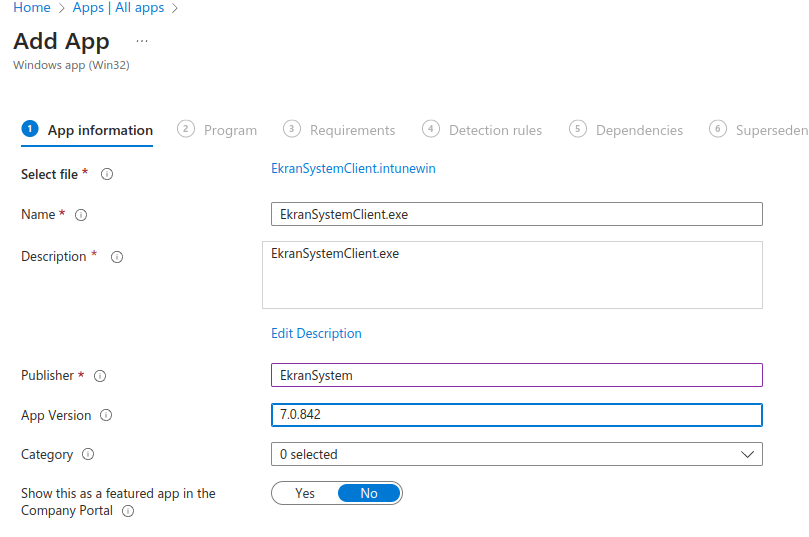
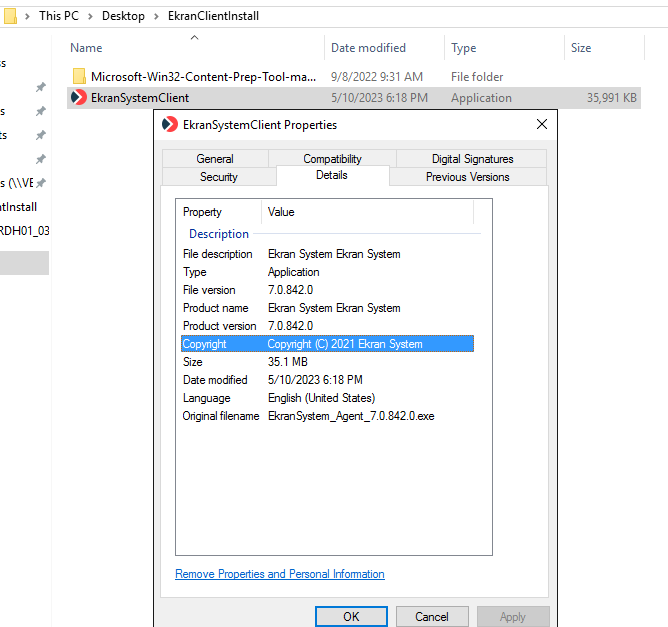
NOTE: You can get this information from the Details tab in the Properties of the original SytecaClient.exe file (or for SaaS deployments, the EkranSystemClient.msi file).
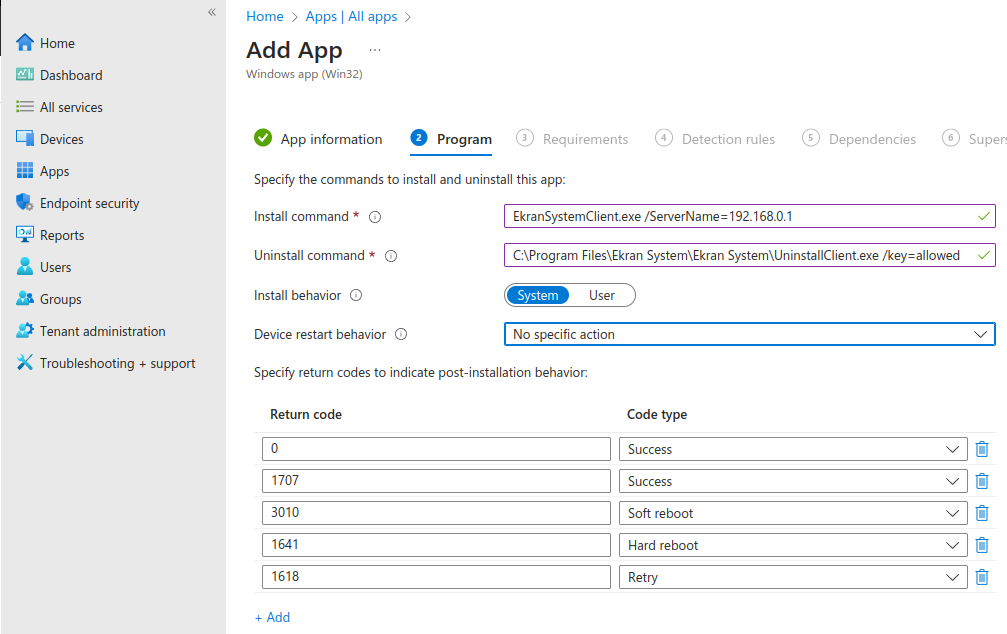
6. On the Program tab, specify the following values in the corresponding fields, and then click Next:
• Install command: SytecaClient.exe /ServerName=<IP/Hostname> /TenantKey=tenantkey (where IP/Hostname needs to be replaced by the IP address or hostname of SytecaServerAPP, and tenantkey by a tenant key if required).
NOTE: For SaaS deployments, instead use the following install command: msiexec /i "EkranSystemClient.msi" PROXY_HOST=<your proxy host> SILENT_INSTALL=Y /quiet
• Uninstall command: C:\Program Files\Ekran System\Ekran System\UninstallClient.exe /key=<uninstallation_key> (where "<uninstallation key>" needs to be replaced by the actual Uninstallation key).
• Install behavior: System.
• Device restart behavior: No specific action.
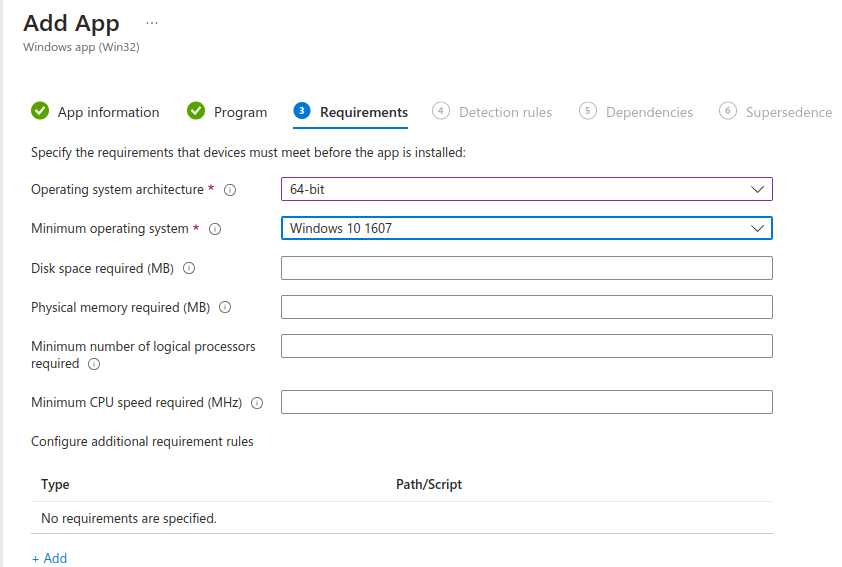
7. On the Requirements tab, select the following values in the corresponding fields, and then click Next.
• Operating system architecture: 64-bit.
• Minimum operating system: The operating system version used in your environment (e.g. Windows 10 1607).
8. On the Detection rules tab, select Manually configure detection rules in the Rules format drop-down menu, and then click + Add to add a detection rule, and select the following values in the corresponding fields in the Detection rule pane (on the right):
• Rule type: File.
• Path: C:\Program Files\Ekran System\Ekran System.
• File or folder: UninstallClient.exe.
• Detection method: File or folder exists.
• Associated with a 32-bit app on 64-bit clients: No.

9. Create an Azure AD Security Group that includes the users or devices where this application package needs to be deployed.
NOTE: If you add users to the list, the application will be deployed to all devices joined to Azure and enrolled in Intune for those users, or if you want to deploy the app to specific devices, add the devices instead of users to the Azure AD Security Group.
10. Make sure you add the Group to the Required section, so as to install the application on the users' systems as soon as possible, by selecting the Groups for which you want to make this app required.
NOTE: Required apps are automatically installed on enrolled devices, and some platforms may have additional prompts for the end user to acknowledge before app installation begins.
11. To deploy the app to all end user devices, click on + Add to target all the devices enrolled in Intune.

12. On the Review + Create tab, save the application, which will then initiate the process of uploading the .intunewin file and start the deployment process.
13. Once the process is complete, a new app will be displayed on the All apps tab, and the Syteca Client is then deployed to all the selected machines.

