
Getting Started with a SaaS Deployment
This guide is intended to assist customers to get started with a cloud-based SaaS deployment of Syteca, and explains the first steps to take which differ from those required for on-premises deployments of Syteca.
NOTE: Many deployment, configuration, and various other tasks cannot be performed in SaaS deployments, and the corresponding functionality is not therefore available (since these tasks can only be performed by the Syteca vendor), as well as some features (which are only available in on-premises deployments). This is indicated on the appropriate pages of this Knowledge Base by the following note: NOT AVAILABLE IN SAAS
After being issued with a SaaS serial key from your Syteca vendor, you will be provided with the following details by email to access the Management Tool:
• A URL (i.e. <Customer_name>.ekransystem.com) to open the Syteca Management Tool in your browser.
• Management Tool “admin” login credentials.
The SaaS serial key type is currently only available as a subscription-based key.
Table of Contents
1. Logging in to The Management Tool
To log in to the Management Tool for the first time, do the following:
1. Enter the URL provided by your vendor into your browser address bar, to access the Management Tool login screen.
2. Enter the “admin” login credentials provided to you by your vendor.
.png?inst-v=362ca448-a20b-4783-93c2-f49186888f5c)
3. Mandatorily change your password (by entering a new password in both fields).
NOTE: The password must be at least 8 characters long, and contain at least one lowercase letter, one uppercase letter, one numeric character, and one special character, and cannot contain more than 3 consecutive identical characters).
NOTE: In SaaS deployments, all users are forced to change their password on their first login.
.png?inst-v=362ca448-a20b-4783-93c2-f49186888f5c)
4. Log in to the Management Tool again (using your new password).
5. Scan the QR code displayed by using an authenticator app on a mobile device (e.g. Google Authenticator or Microsoft Authenticator) to set up 2FA.
NOTE: Make sure you save the recovery code displayed, in case you lose access to your authenticator device.
NOTE: In SaaS deployments, all users are forced to set up 2FA on their first login, and subsequently log in using 2FA, and this feature cannot be disabled (unlike in on-premises deployments, on the User Management page).
.png?inst-v=362ca448-a20b-4783-93c2-f49186888f5c)
6. Click Confirm, and enter the authentication code generated by using the authenticator app.
).png?inst-v=362ca448-a20b-4783-93c2-f49186888f5c)
7. You are then logged into the Management Tool.
2. Viewing the Serial Key and Client Licenses
To view your activated Saas serial key (and the licenses for Clients that it contains), do the following:
1. Click the Configuration (.png?inst-v=362ca448-a20b-4783-93c2-f49186888f5c)
2. On the Configuration page that opens, on the Serial Key Management tab, the serial key is displayed along with details about it (including the Update & Support period end date, the types and number of licenses for Clients that it contains, etc).
.png?inst-v=362ca448-a20b-4783-93c2-f49186888f5c)
NOTE: Viewing the serial key is done in the same way as for on-premises deployments, except that in SaaS deployments, the serial key does not need to be activated by the user (since it has already been activated by the vendor). However, if your Syteca vendor updates your (existing) serial key, you also need to update it (by clicking the Update Serial Key button) in the Managment Tool before the changes will take effect.
NOTE: You will be notified 14 days, 5 days, and 1 day before the serial key expires, and if you do not renew it on time, it will no longer be possible to monitor your Clients 7 days after the expiration date.
3. Installing Windows, macOS, and Linux Clients on the Endpoint Computers to be Monitored
To download the installation file, and install Windows, macOS, or Linux Clients on the endpoint computers, do the following:
1. Log in to the Management Tool as a user with the administrative Client Installation and Management permission.
2. Click the Clients navigation link on the left.
3. On the Client Management tab that opens, click the Install Clients button (in the top right of the page).
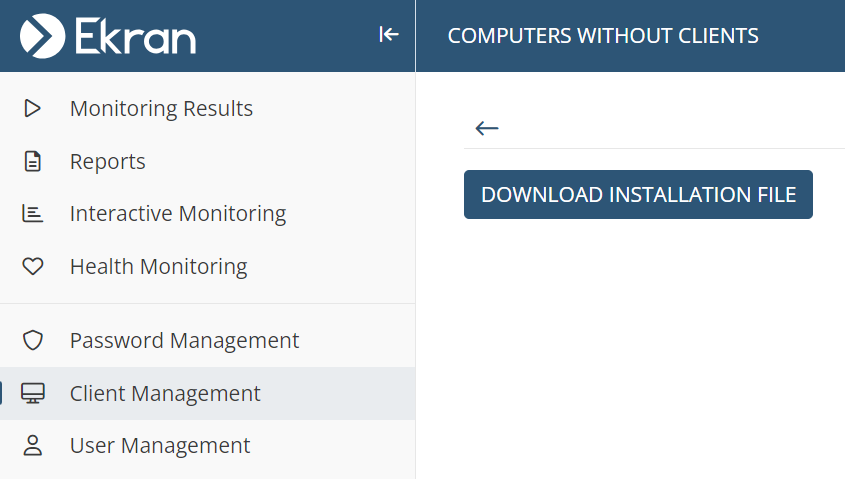
4. On the Computers Without Clients page that opens, click the Download Installation File button.
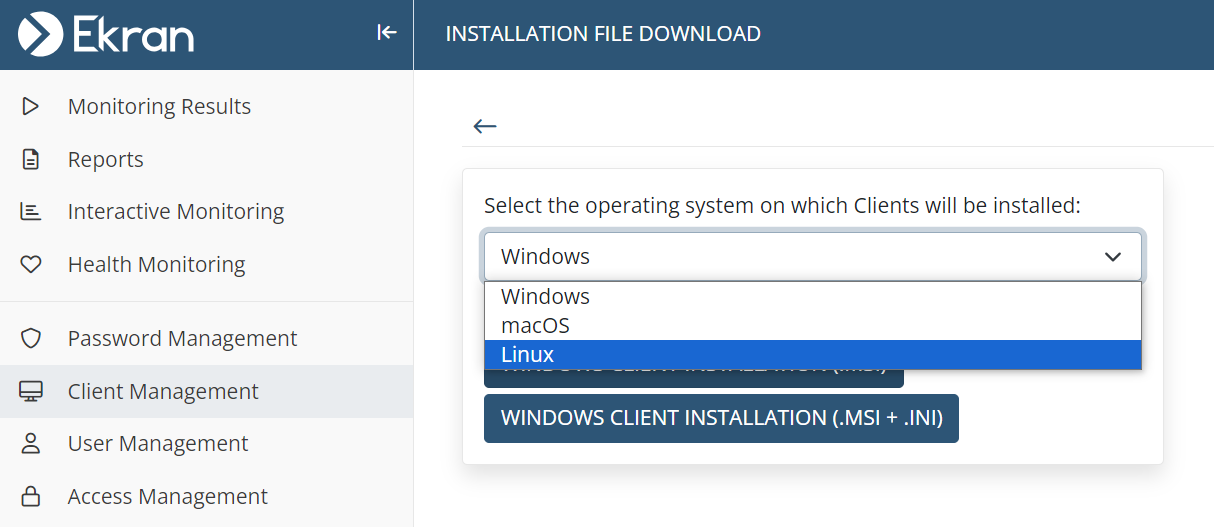
5. On the Installation File Download page that opens, download the installation file by selecting the required operating system in the drop-down list (either Windows, macOS or Linux), and then clicking the respective button that is displayed, either:
• Windows Client Installation (.msi) or Windows Client Installation Package (.msi+.ini).
• macOS Universal Client Installation (.tar.gz).
• Linux x86 Client Installation (tar.gz) or Linux x64 Client Installation (.tar.gz).
6. Install the Client on each endpoint computer to be monitored, as follows:
• [For Windows Clients:] Install the Client locally either with:
- Default parameters: By using the EkranSystemClient.msi file to install the Client:
a) After the EkranSystemClient.msi file is downloaded (having clicked the Windows Client Installation (.msi) button above), copy it to any folder on each Client (i.e. endpoint) computer to be monitored.
b) Then either:
- Use the Windows Installer: By opening the EkranSystemClient.msi file, use the Setup Wizard to install the Client.
- Use the command line: By using the Windows Command Prompt (cmd) or PowerShell application as an administrator user, and the path to the folder where the EkranSystemClient.msi file is located, run the following command to install the Client locally: msiexec /i EkranSystemClient.msi PROXY_HOST=<hostname_or_IP_address_of_load_balancer_on_Syteca_proxy_server>.
- Custom monitoring parameters: By using the EkranSystemClient.zip package to install the Client, as follows:
a) After the EkranSystemClient.zip package is downloaded (having clicked the Windows Client Installation Package (.msi+.ini) button above), copy it to any folder on each Client (i.e. endpoint) computer to be monitored.
b) Then run the EkranSystemClient.msi file to install the Windows Client locally with custom monitoring parameters in the same way as for on-premises deployments, but instead of the EXE file, use the MSI file.
• [For macOS Clients:] Install the Client either:
- Locally:
a) After the EkranSystemMacOSClientuniversal.tar.gz file is downloaded, copy it to any folder on each Client (i.e. endpoint) computer to be monitored.
b) Then install the macOS Client locally using the command line in the same way as for on-premises deployments.
c) Finally, it is then recommended to also trust the root certificate on each macOS Client computer.
- Remotely:
a) After the EkranSystemMacOSClientuniversal.tar.gz file is downloaded, copy it to any folder on each Client (i.e. endpoint) computer to be monitored.
b) First (before installing the Client), it is required to deploy a SaaS configuration profile.
c) Then install the Linux Client remotely (using VMware Workspace ONE UEM for mass deployment of Clients) in the same way as for on-premises deployments.
• [For Linux Clients:] Install the Client locally:
a) After the EkranSystemLinuxClientx64.tar.gz file or the EkranSystemLinuxClientx86.tar.gz file is downloaded, copy it to any folder on each Client (i.e. endpoint) computer to be monitored.
b) Then install the Linux Client using the installation file in the same way as for on-premises deployments, but instead use the hostname or IP address of the load balancer on the Syteca proxy server.
7. The Client is then installed on the endpoint computer(s), and user activity will start to be monitored as soon as any user logs in (where the user activity can be viewed in the Management Tool in the usual way).
4. Completing Getting Started
You can now continue with getting started in the usual way, i.e. in a similar way as to for on-premises deployments (please first refer to the Getting Started (Checklist) page), while ignoring those parts of the functionality described that are marked on the appropriate pages of this Knowledge Base by: NOT AVAILABLE IN SAAS .