
Enabling the Displaying of an Additional Message on Login to Windows Clients
The option to display an additional message to users on login can be enabled either while editing a Windows Client / Client Group configuration, while defining the Windows Client configuration during remote installation, or while generating the Windows Client installation package for local installation.
By default, the additional message text is: “According to company policy you must agree to the terms in order to continue using this computer.”. You can alternatively customize this message to be displayed to users.
NOTE: The message can be up to 10,000 symbols in length.
To enable the option to display an additional message on login while installing a Windows Client, select the Enable displaying of additional message checkbox on the Client Configuration page (if the Client is to be installed remotely) or do the same on the Generate Installation Package page (if the Client is to be installed locally using the installation package).
When the Client is installed, the user will see the default notification messages in the pop-up window on login unless the text of the messages is changed by editing the Client (or Client group).
To enable the option to display of an additional message on login (and configure the options in it) while editing a Windows Client (or Client group), do the following:
1. Log in to the Management Tool as a user with the Client Configuration Management permission for Clients.
2. Click the Clients navigation link (on the left).
3. On the Client Management tab that opens, find the Client which you want to enable the displaying of an additional message for, and click its name in the Client Name column (or select the Client Groups tab and find the required Client group, and then click on its name in the Client Group Name column).
NOTE: To find specific Clients, the Search box and filters at the top of the Client Management page can be used (or to find specific Client groups, the Search box at the top of the Client Groups page can be used).
4. On the Editing Client (or Editing Client Group) page that opens, select the Authentication Options tab, and then select the Enable displaying of additional message checkbox in the Authentication Options section, and optionally customize the message to be displayed to the user (which by default is: "According to company policy you must agree to the terms in order to continue using this computer.").
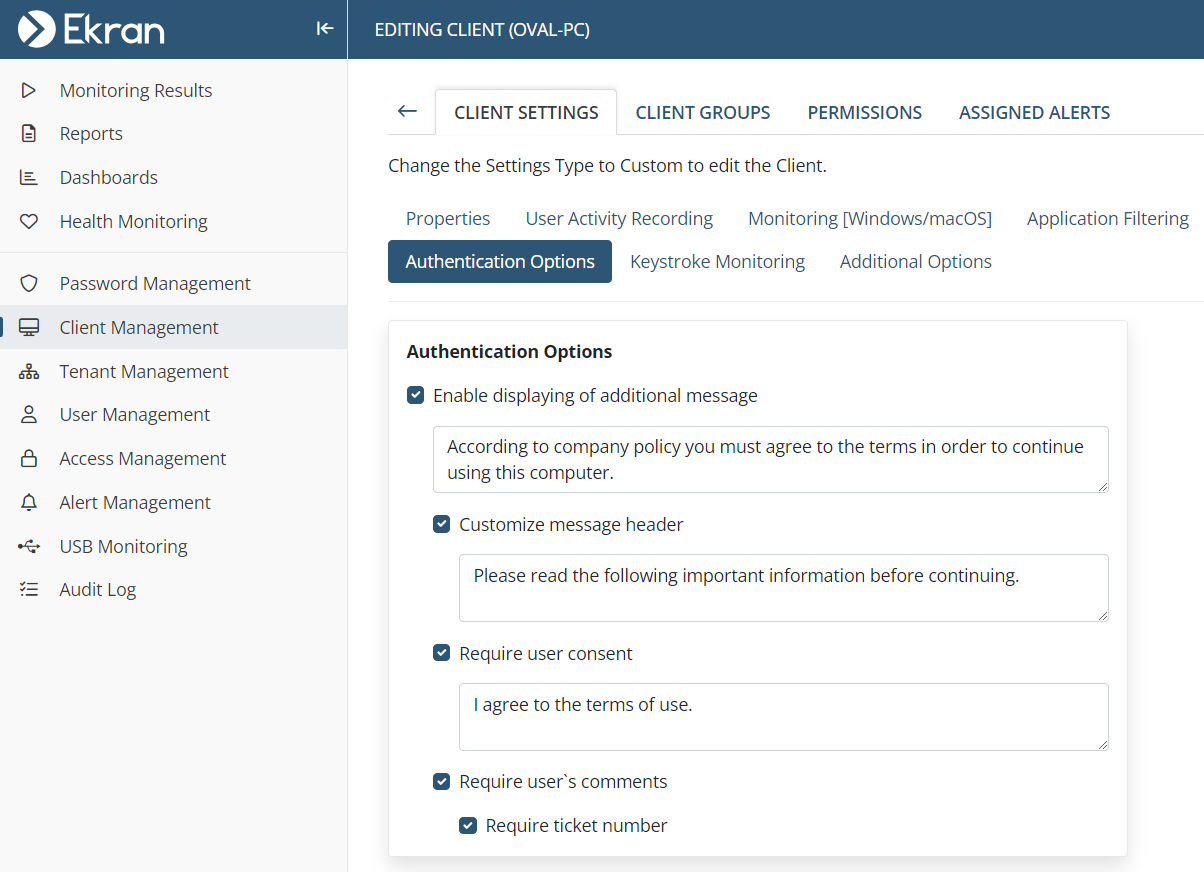
5. Optionally, also select the corresponding checkboxes:
• Customize message header: This option allows you to customize the text in the header of the additional pop-up message window displayed to the user on login (which by default is: "Please read the following important information before continuing.").
• Require user consent: This option allows you to also display a user consent checkbox in the additional pop-up message window, and optionally customize the message text in it (which by default is: "I agree to the terms of use."), which forces the user to select this checkbox so as to provide their consent to the message displayed in the additional pop-up message window. Only after the user selects this checkbox in the additional pop-up message window displayed on login, will they be allowed to access the Client computer by clicking the Continue button.
• Require user's comments: This option allows you to also force the user to enter a comment in to the additional pop-up message window, so as to inform Syteca administrators of the user's activity. Only after the user enters a comment into the Your comment is required field in to the additional pop-up message window displayed on login, will they be allowed to access the Client computer by clicking the Continue button.
- Require ticket number: If the Require user's comments checkbox is selected, this option allows you to also require the user to enter a valid ticket number created in an integrated ticketing system in order to access the Client computer, so as to provide you with an additional layer of authentication. Only after the user enters a enters a valid ticket number in to the Ticket number is required field (and also enters a comment into the Your comment is required field) in to the additional pop-up message window displayed on login, will they be allowed to access the system by clicking the Continue button.
6. Click the Finish button (in the bottom right of the page).
Whenever a user then logs in to the Windows Client computer with the option to display the additional message on login enabled, the window is displayed as follows (shown here with all options enabled, and with the default messages):
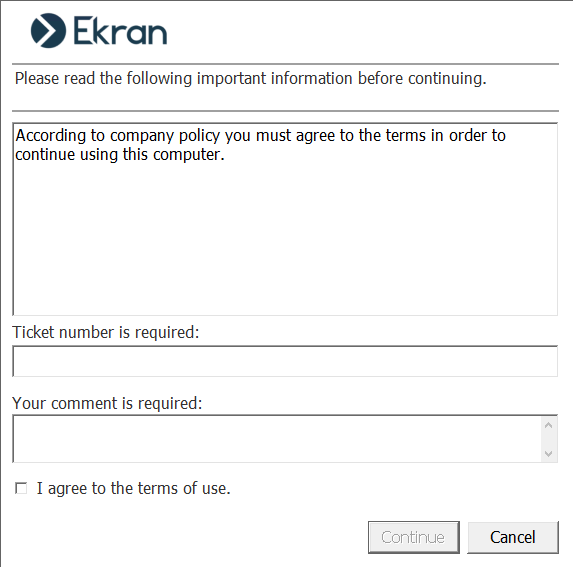
Only after entering any required information will the user be allowed to access the system (by clicking the Continue button).