Quick Start Deployment Guide
NOT AVAILABLE IN SAAS
This quick start guide will help you to install and configure Syteca, so as to start using PAM and/or monitoring the activity of users, etc.
The latest version of the Syteca installation package can be downloaded from our website: www.syteca.com/en/resources/downloads
To install and configure Syteca, follow the steps below (in sequence).
Table of Contents
1. Application Server Installation Prerequisites
1.1. Installing the Database
Syteca supports two types of databases:
• PostgreSQL (downloadable from here).
• MS SQL (downloadable from here).
1.2. Installing .NET Framework
.NET Framework 4.8 is included in Windows 10 (version 1903).
If your version of Windows does not have .NET Framework 4.8, you can download it from the official Microsoft website. .NET Framework requires administrator permissions for installation.
NOTE: After installing .NET Framework, the computer needs to be restarted.
2. Installing the Application Server
To install Syteca Application Server, do the following:
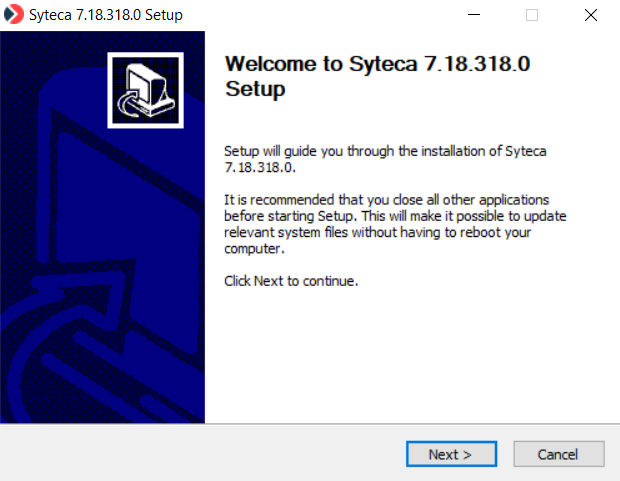
1. Run the installation file (Syteca_Server.exe) to open the Syteca Setup wizard.
2. On the Welcome to Syteca Setup page, click the Next button.
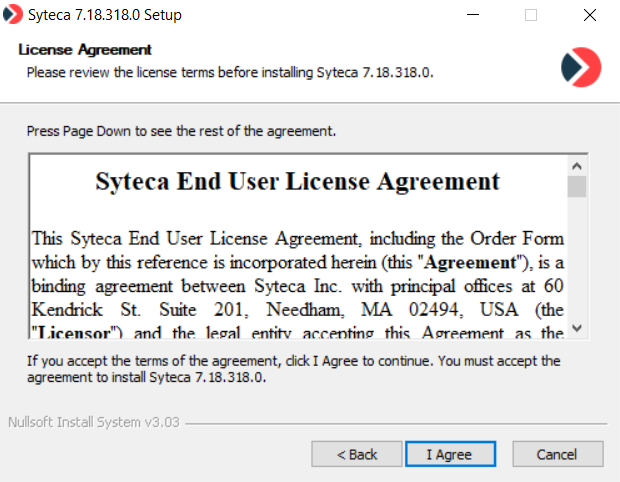
3. On the License Agreement page, read the End User License Agreement carefully, and then click I agree.
4. On the Choose the Installation Mode page, if this is the initial installation of the Application Server, make sure that the New Syteca Application Server option is selected, and then click Next.
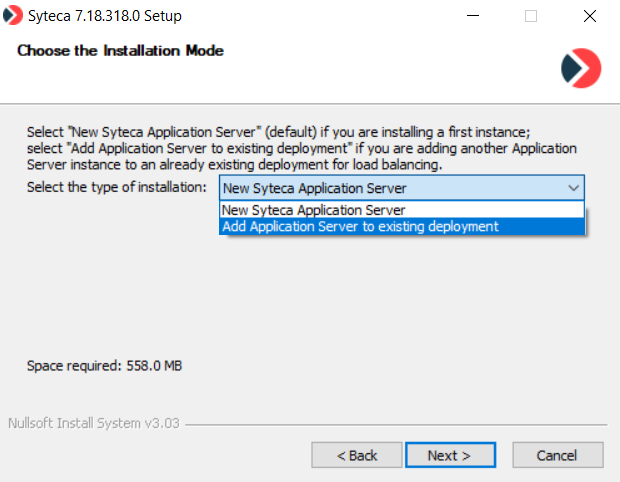
NOTE: After installation of the initial (new) Application Server, the “Add Application Server to existing deployment” option can be used later to subsequently install additional Application Server instances on multiple nodes, if required for large deployments.
5. On the Choose Install Location page, enter the installation path, or click Browse to navigate to the Application Server installation folder, and then click Next.

NOTE: If more than one Master Certificate (called EkranMasterCertificate) is detected in the certificate store (e.g. due to reinstallation of the Application Server), a warning message is displayed to the user, and installation cannot be performed until the unnecessary Master Certificates are deleted.
6. On the Syteca Master Certificate page, if the Application Server is being installed for the first time, select the Generate a new certificate option.
NOTE: Syteca uses the Syteca Master Certificate (called EkranMasterCertificate) for encryption, which must be generated during initial installation of Syteca Application Server. For large deployments requiring multiple instances of the Application Server, after installation of the initial Application Server, the “Use an existing certificate” option must be selected later when subsequently installing additional Application Server instances.

7. On the Database Type page, select the type of database you want to use for storing data, and then click Next.
NOTE: If you have an existing database, select its type, and then define the connection parameters for this database.

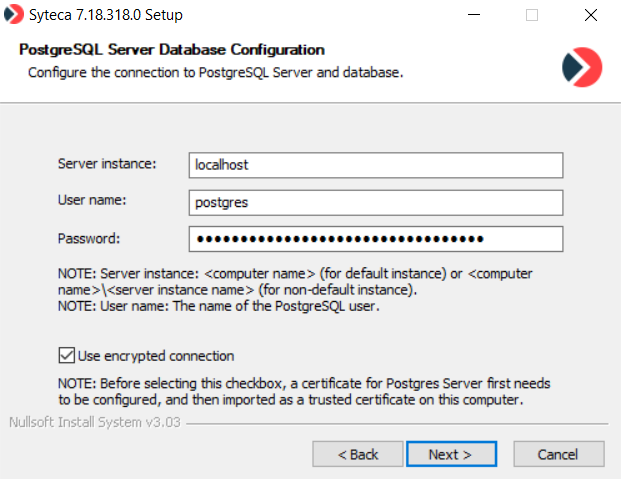
8. If you selected the PostgreSQL database, on the PostgreSQL Server Database Configuration page, define the connection parameters as follows, and then click Next:
• Enter the hostname or IP address of the PostgreSQL Server instance, which is the instance name assigned to the TCP/IP port. Optionally, you can define a custom PostgreSQL database port by entering its name after the Server instance name, separating them by a colon (e.g. <server_instance_name>:<port>).
NOTE: If the default instance of the PostgreSQL Server is used, enter “localhost” in the “Server instance” field.
• Enter the User name and Password of the user account via which the connection to the server will be established.
NOTE: By default, this is the user with the login “postgres”, and the password defined during the installation of PostgreSQL.
• Select the Use encrypted connection checkbox to use SSL encryption for the connection between the Application Server and the database.
NOTE: Before selecting this checkbox, a certificate for the database server first needs to be configured, and then imported as a trusted certificate on this computer.
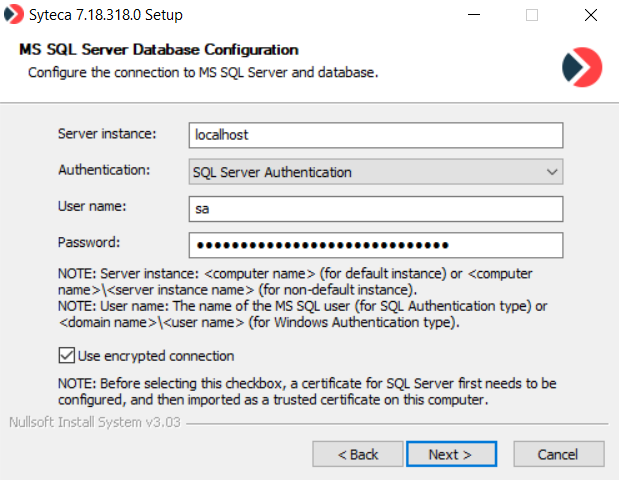
9. If you selected the MS SQL Server database, define the connection parameters as follows on the MS SQL Server Database Configuration page,, and then click Next:
• Enter the hostname or IP address of the MS SQL Server instance, which is the instance name assigned to the TCP/IP port. Optionally, you can define a custom MS SQL database port by entering its name after the Server instance name, separating them by a comma (e.g. <server_instance_name>,<port>).
NOTE: If the default instance of the MS SQL Server is used, only the name of the machine where the MS SQL Server is located needs to be defined.
• Select the type of authentication required: SQL Server Authentication or Windows Authentication.
• When using SQL Server Authentication, enter the SQL Server User name and Password for the user account via which the connection to the server will be established.
NOTE: You must enter either “sa” (system administrator) credentials or the credentials of a user with the “dbcreator” permission.
• When using Windows Authentication, enter the User name as <domainname>\<user name> and the Password.
NOTE: The specified user must have already been added as a user in MS SQL and have system administrator permissions.
• Select the Use encrypted connection checkbox to use SSL encryption for the connection between the Application Server and the database.
NOTE: Before selecting this checkbox, a certificate for the database server first needs to be configured, and then imported as a trusted certificate on this computer.
10. On the Binary Data Location page, define the location to be used to store the binary data (i.e. screen captures) recorded by Syteca Clients.
NOTE: The SQL Database option is not recommended unless used for small deployments, due to the large amount of data that will be accumulated over time.
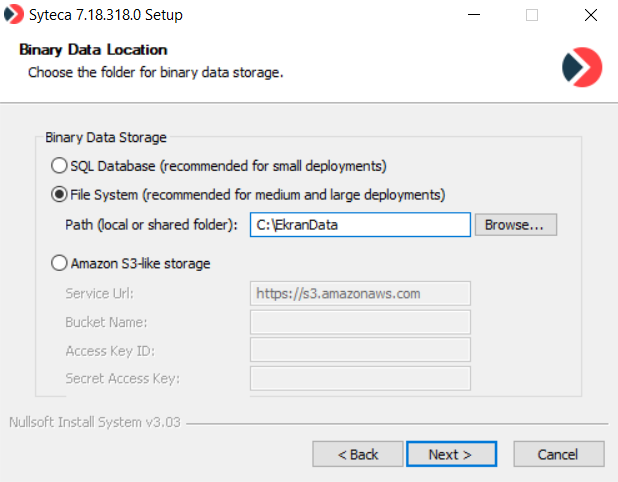
NOTE: More information can be found on the Editing the Database Parameters page, and for the "Amazon S3-like storage" option, more information can be found on the Configuring Syteca to Store Binary Data in Amazon S3 page.
11. On the Syteca Database Names page, define unique names to be used for the Syteca databases.
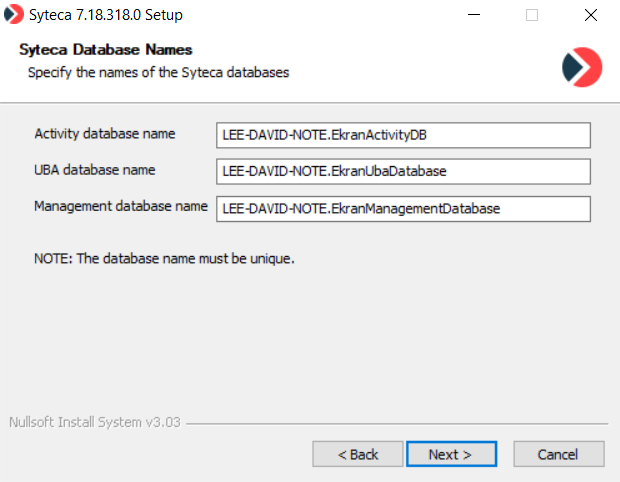
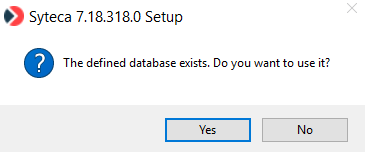
12. If the Syteca database (i.e. actually consisting of the 3 separate databases shown above) already exists, which was created either manually or when using previous installations of Syteca Application Server, you will be offered to use it. If you want to use the existing database, click Yes. Otherwise, click No and a new database will be created.
13. On the Administrator credentials page, define the credentials to be used for the administrator user of Syteca (i.e. the admin user of the built-in default tenant, who has full system permissions) in the corresponding fields as follows, and then click Next:
• Login: Optionally change the login name from the default name “admin” (where the login name can be from 5 to 50 characters long, and only contain letters and numbers, or can be an email address).
• Password and Confirm password: Enter a password (where the password must be at least 8 characters long, and contain at least one lowercase letter, one uppercase letter, one numeric character, and one special character, and cannot contain more than 3 consecutive identical characters).
NOTE: These credentials can be changed at any time later in the Management Tool (on the User Management page) by editing the administrator user.

14. On the Syteca Client Uninstallation Key page, enter a key that will be used for uninstalling the Client locally, and then click Next.

15. Click Install, and the installation process will start.

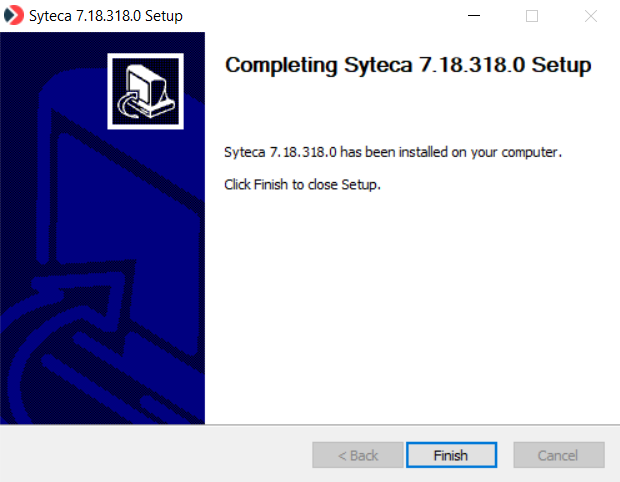
16. When installation is complete, click Finish to exit the Setup wizard.
3. Management Tool Installation Prerequisites
The following preconditions need to be met before installing the Management Tool application.
NOTE: For Windows 7, these tasks must be done in the correct sequence (as stated below).
3.1. Turning on Internet Information Services (IIS)
3.1.1. IIS for Windows 8.1 and Windows 7
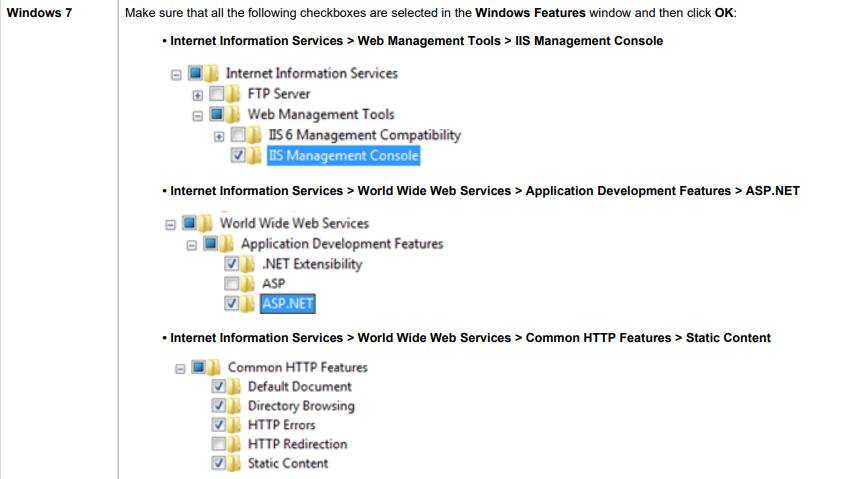
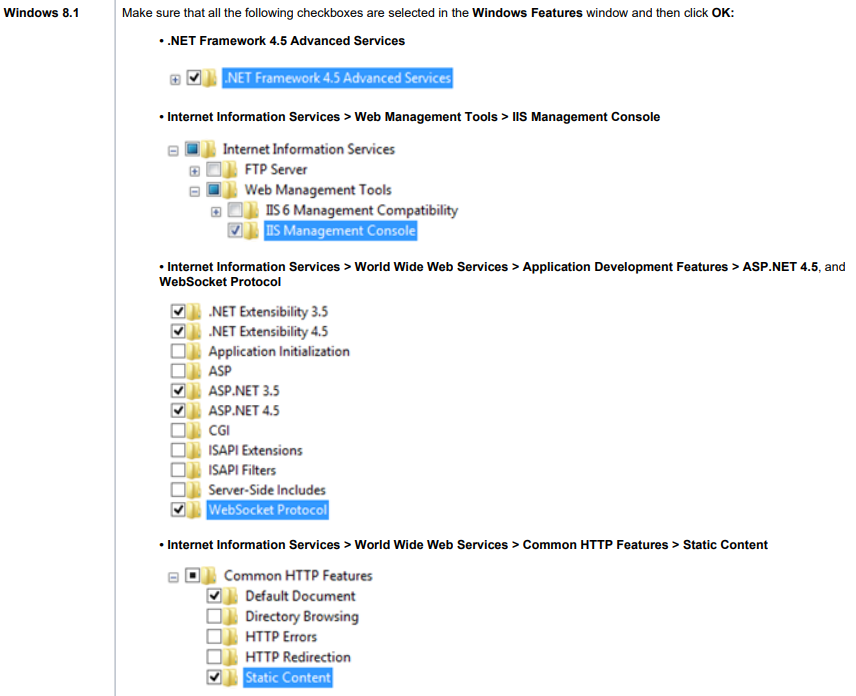
To turn on Internet Information Services for Windows 8.1 and Windows 7, do the following:
1. Select Control Panel > Programs > Programs and Features.
2. Click the Turn Windows features on or off navigation link.
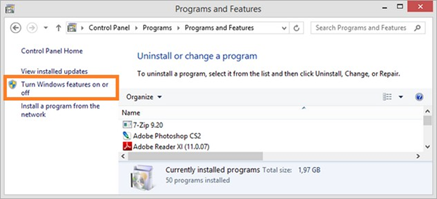
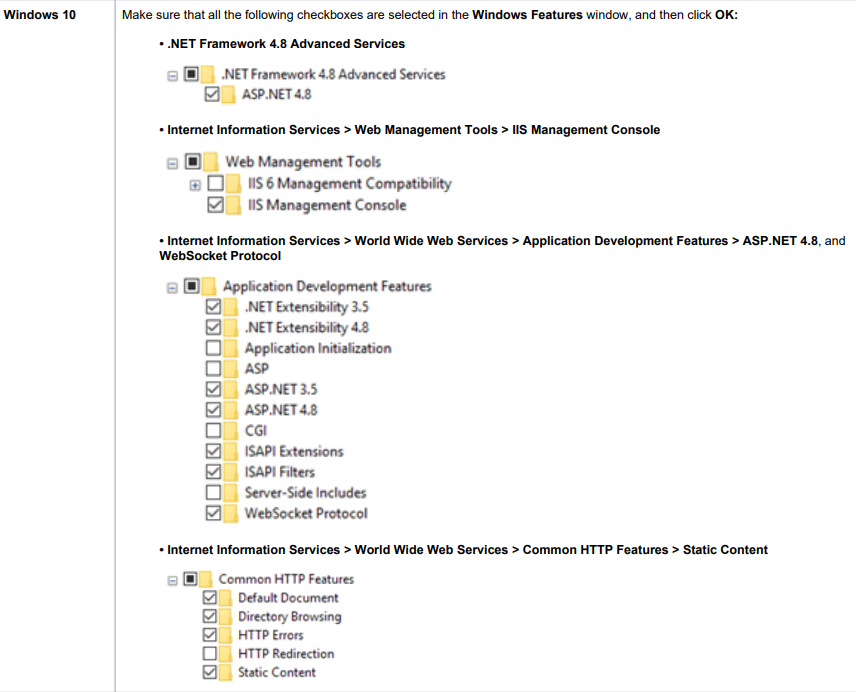
3. In the Windows Features window that opens, in the Features tree-view, select the Internet Information Services checkbox, and then click OK.

3.1.2. IIS for Windows Server 2012
Internet Information Services can be turned on using either Windows PowerShell or Windows Server 2012 Server Manager.
To turn on Internet Information Services for Windows Server 2012 using Windows PowerShell, do the following:
• On the Start menu, select Windows PowerShell.
• Enter the following command, and then press Enter:
Install-Windows Feature -Name Web-Server, Web-Mgmt-Tools
To turn on Internet Information Services for Windows Server 2012 using Server Manager, do the following:
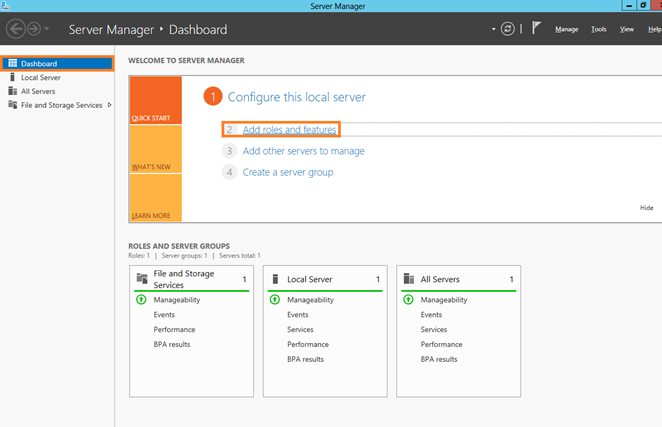
1. On the Start menu, select Server Manager.
2. In the Navigation pane, select Dashboard, and then click Manage > Add roles and features.
3. In the Add Roles and Features Wizard that opens, on the Before You Begin page, click Next.
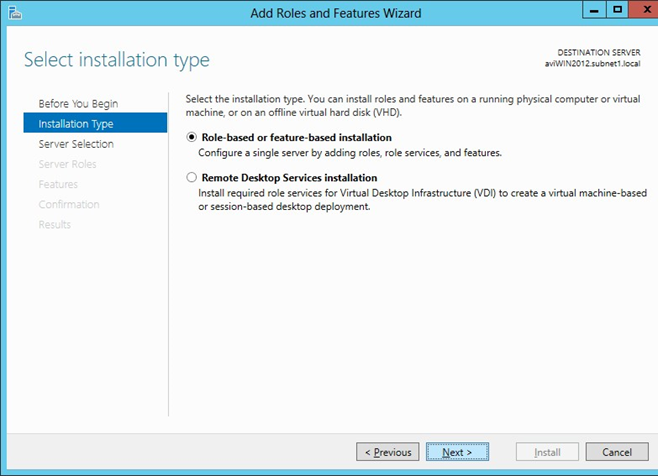
4. On the Installation Type page, select the Role-based or feature-based installation option, and then click Next.
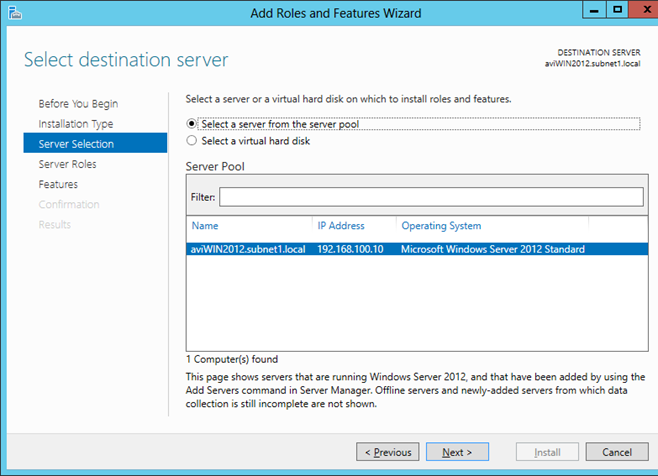
5. On the Server Selection page, select the Select a server from the server pool option, and then select your server from the Server Pool list, and click Next.
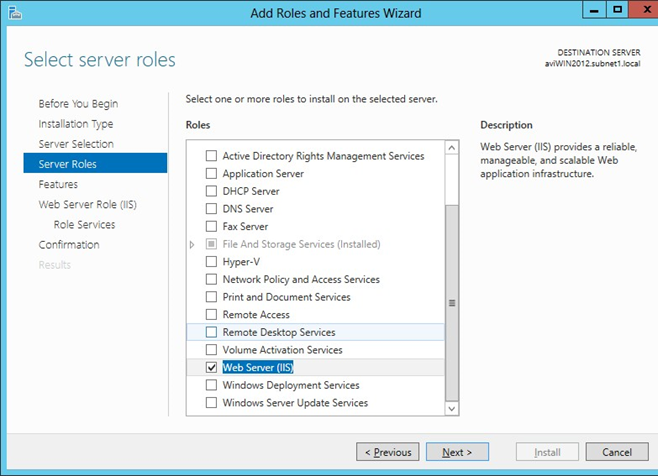
6. On the Server Roles page, select the Web Server (IIS) checkbox, then click Next, and click Add Features to complete turning on IIS.
3.1.3. IIS Installation on Windows Server 2019 Core
The following PowerShell commands (using the PowerShell admin prompt) can be used on Windows Server 2019 Core for installing the IIS feature:
1. Install IIS and its components:
Install-WindowsFeature -Name Web-Server, Web-WebSockets, Web-Asp-Net, Web-Asp-Net45, Web-Mgmt-Console
2. Check for installed features:
Get-WindowsFeature
3. After installation, IIS Manager can be run by using its full path and name. The default path is:
C:\Windows\System32\inetsrv\InetMgr.exe.
3.2. Configuring Internet Information Services (IIS)
.NET Framework 4.8 is included in Windows 10 (version 1903).
If your version of Windows does not have .NET Framework 4.8, you can download it from the official Microsoft website. .NET Framework requires administrator permissions for installation.
NOTE: After installing .NET Framework, you must restart the computer.
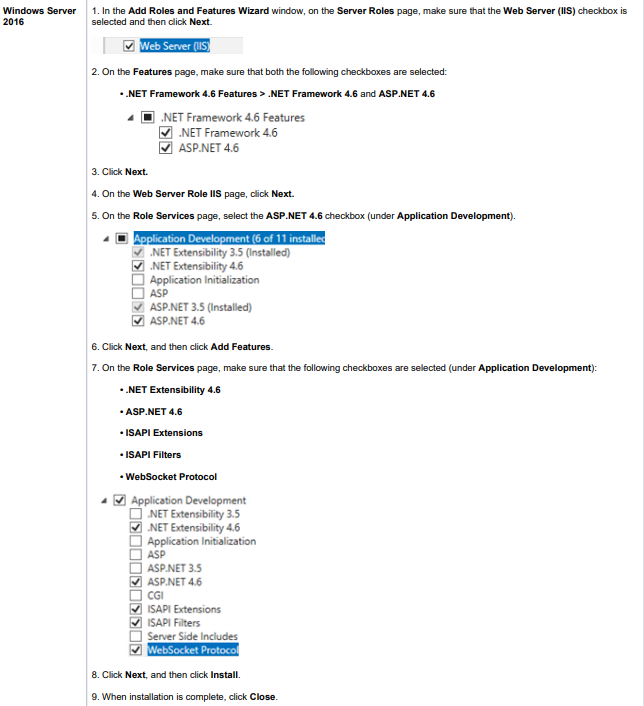
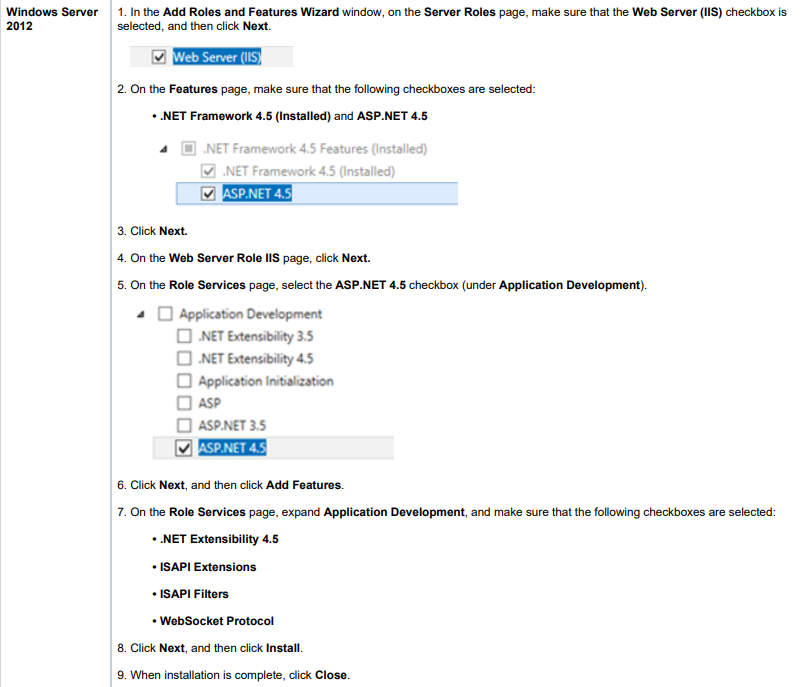
To configure IIS correctly, follow the corresponding instructions below depending on your version of Windows OS:
3.3. Using a Trusted Certificate
3.3.1. Creating a Trusted Self-Signed Certificate
To create a trusted self-signed certificate, do the following:
1. Run Windows PowerShell
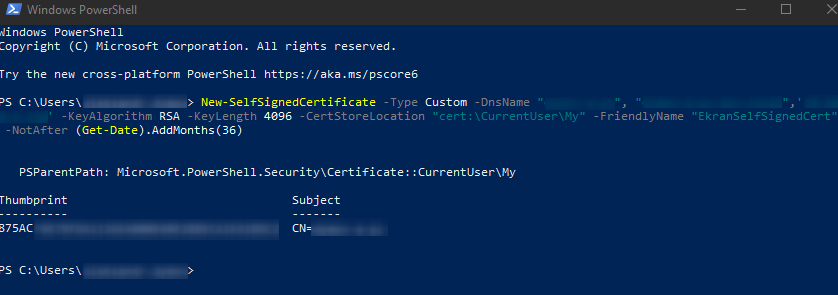
2. Enter the following command:
New-SelfSignedCertificate -Type Custom -DnsName "server", "server.domain.local",'192.168.0.1' -KeyUsage "DigitalSignature","KeyEncipherment","KeyAgreement" -KeyAlgorithm RSA -KeyLength 4096 -CertStoreLocation "cert:\CurrentUser\My" -FriendlyName "EkranSelfSignedCert" -NotAfter (Get-Date).AddMonths(36) -Subject "EkranCA"
Where the following parameters in the command are defined as follows:
• DnsName: Specify all the names that are used for the server computer, i.e. hostname, domain name, and IP address.
• KeyLength: You can use at least a length of 2048, but some browsers will show a warning if the KeyLength is less than 4096.
• CertLocation: The place where the certificate will be stored when created (the only available options are "LocalMachine\My" or "CurrentUser\My").
• FriendlyName: Used to specify a friendly name for the newly created certificate.
• NotAfter: Specify the expiration date for the certificate.
3. When the command is executed, you will then see the following in PowerShell:
3.3.2. Exporting the Trusted Self-Signed Certificate
To export the certificate, do the following:
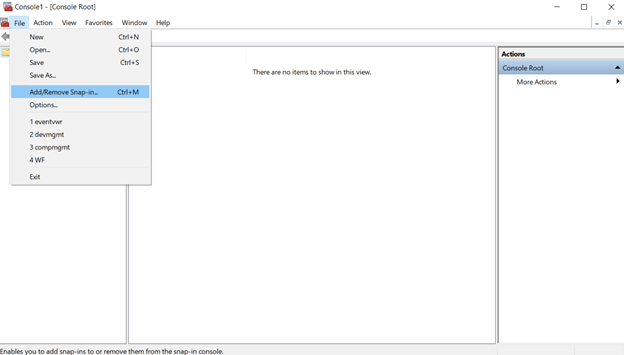
1. Press Windows+R, and enter "mmc" in the Run window that opens, and then press Enter.
2, In the User Account Control window that opens, click Yes.
3. In the Console window, select File > Add/Remove Snap-in.
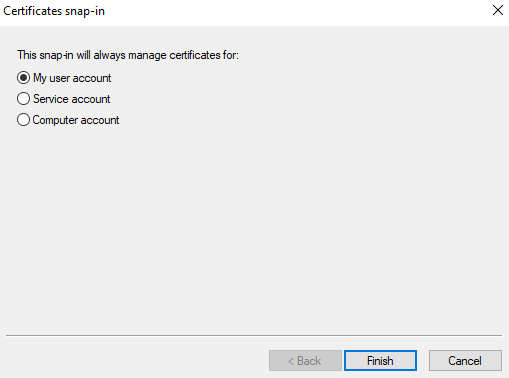
4. In the Add or Remove Snap-ins window that opens, select Certificates, and then click the Add button.

5. In the Certificates snap-in window that opens, select My user account, and then click Next.
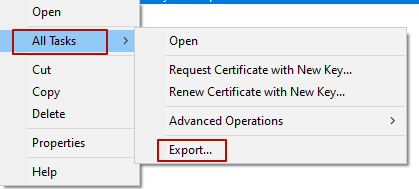
6. Click Certificates - Current User > Personal > Certificates.

7. Right-click on your certificate, and select the All Tasks > Export option.
8. On the Welcome to the Certificate Export Wizard page, click Next.
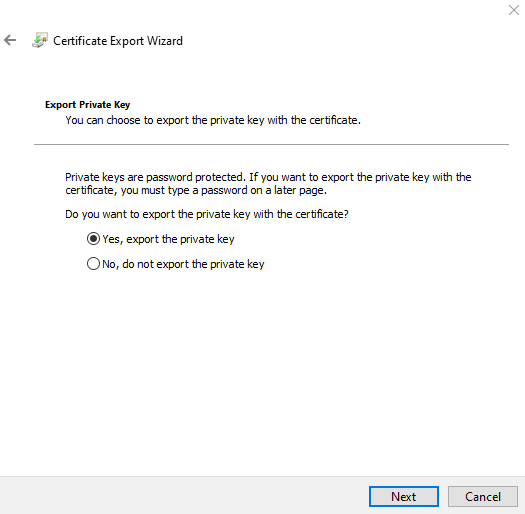
9. On the Export Private Key page, select the Yes, export the private key option, and then click Next.
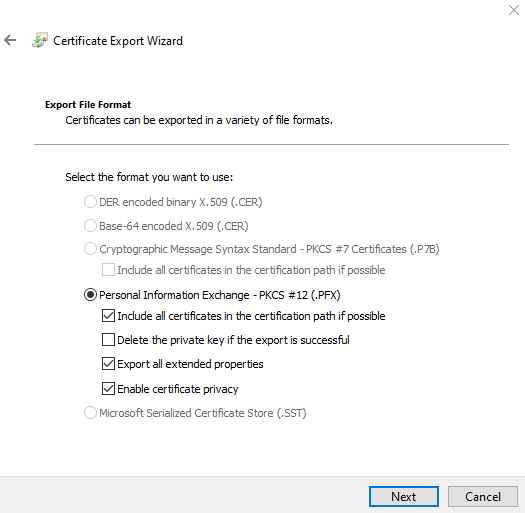
10. On the Export File Format page, select the following checkboxes, and then click Next.
• Include all certificates in the certification path if possible
• Export all extended properties
• Enable certificate privacy
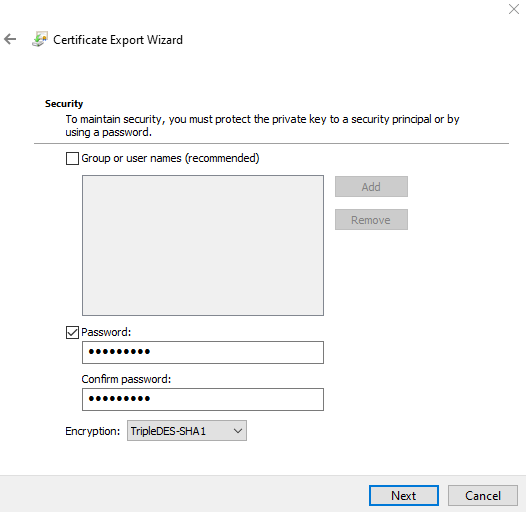
11. On the Security page, enter (and confirm) a password for the certificate, and then click Next.
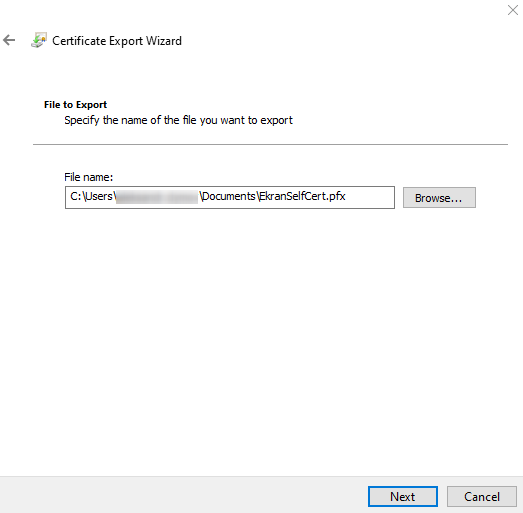
12. On the File to Export page, click Browse, and select the location where the certificate will be exported to, and enter a name for the certificate, and then click Next.
13. On the last page of the Certificate Export Wizard, click Finish to complete exporting the certificate.
14. In the confirmation message, click OK.
3.3.3. Adding the Trusted Self-Signed Certificate to the Trusted Certificates
To add the certificate to Trusted Root Certification Authorities, do the following:
1. Open the folder where the certificate was exported to.
2. Right-click the certificate, and select the Install PFX option.
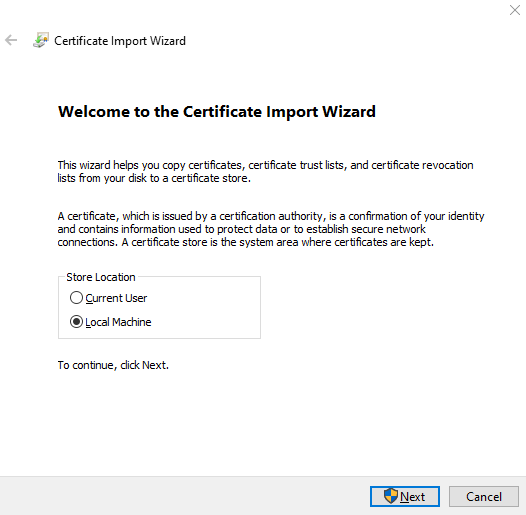
3. On the Welcome to the Certificate Import Wizard page, select Local Machine, and then click Next.
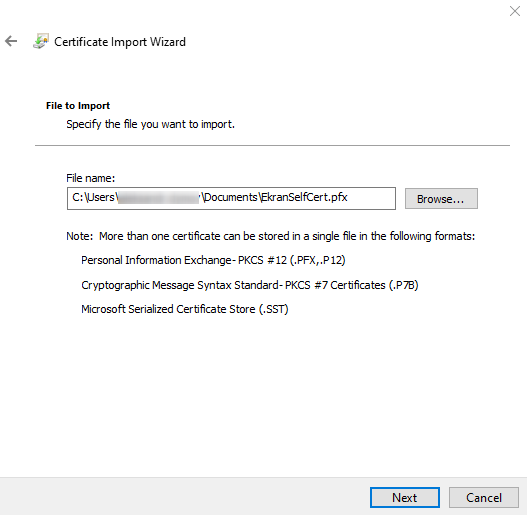
4. On the File to Import page, click Next.
5. On the Private key protection page, enter the certificate password, and then click Next.

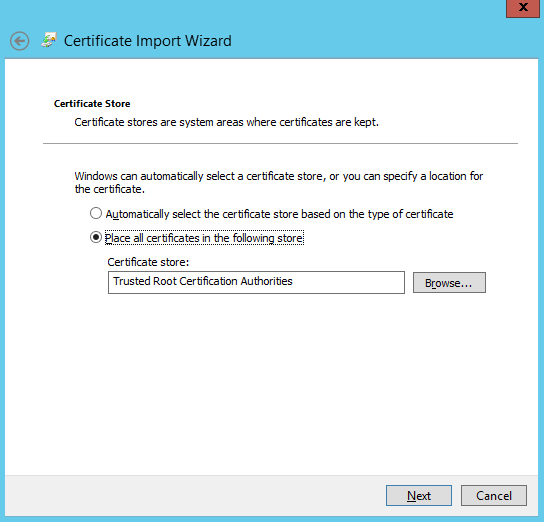
6. On the Certificate Store page, select the Place all certificates in the following store option, and then select Trusted Root Certification Authorities, and click Next.
7. On the last page of the Certificate Import Wizard, click Finish to complete importing the certificate.
8. In the confirmation message, click OK.
3.3.4. Configuring Internet information Services (IIS)
To use the certificate, do the following:
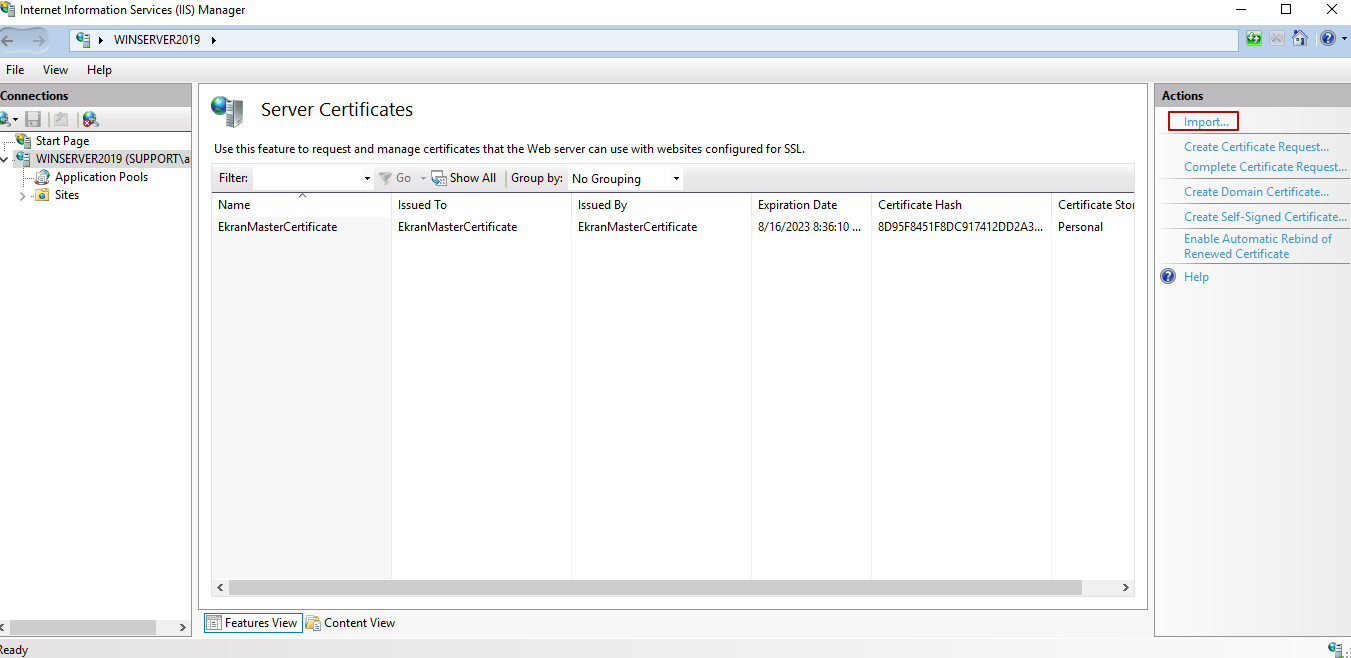
1. Open Internet information Services (IIS) Manager.
2. In the Connections pane (on the left), expand the node with the name of the target computer, and select Server Certificates (in the pane in the center).
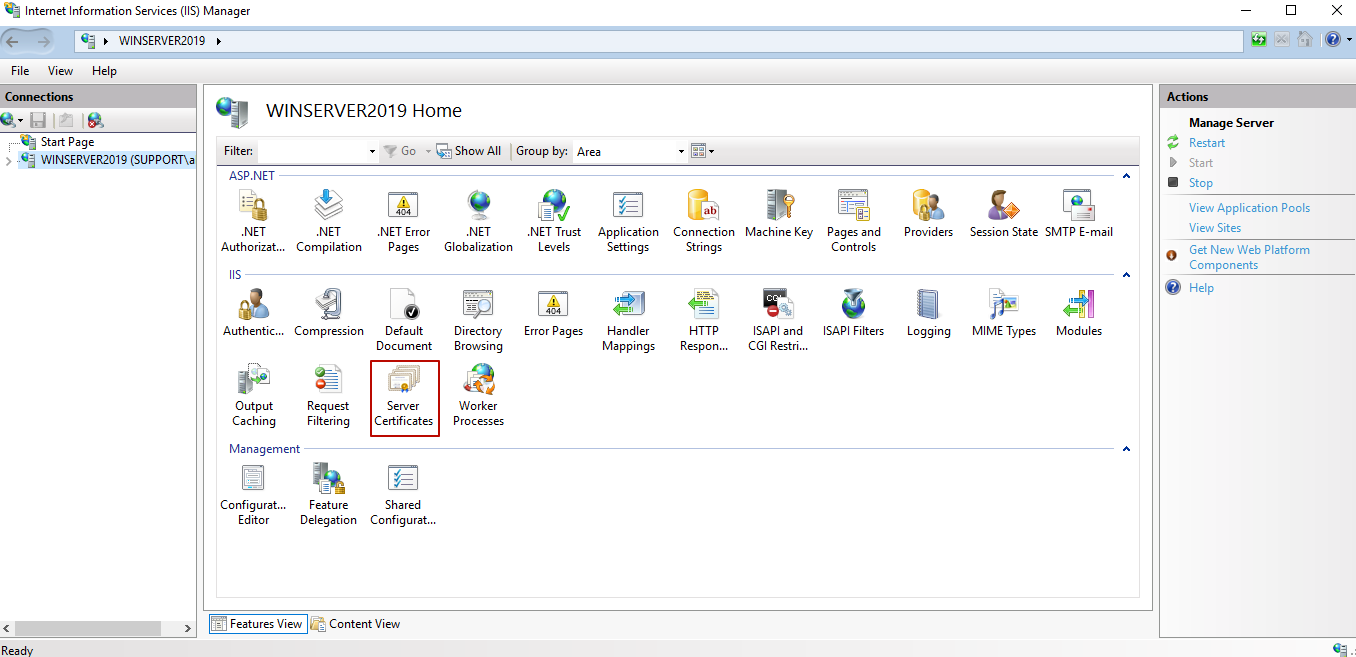
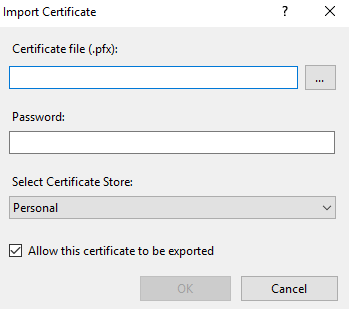
3. On the Server Certificates page, click Import (in the Actions pane on the right).
4. In the Import Certificate pop-up window that opens, select your certificate, and enter its password, and then click OK.
3.3.5. Setting Up an HTTPS Binding for the Default Website
To set up an HTTPS binding for the default website, do the following:
1. Open Internet Information Services Manager:
• For Windows 8.1 or Windows 7: Open Computer > Manage > Services and Applications > Internet Information Services (IIS) Manager.
• For Windows Server 2012: Press Windows+R, enter “inetmgr” in the Run window that opens, and then press Enter.
NOTE: Using the “inetmgr” command is a common way to open Internet Information Services Manager for any version of the Windows operating system.
2. In the Connections pane on the left, expand the node with the name of the target computer, and then expand the Sites node under it, and select Default Web Site to open the Default Web Site Home pane in the center.
NOTE: If there is no such website in Internet Information Services (IIS) Manager on the computer, any other website can be selected (the name of the website does not matter).
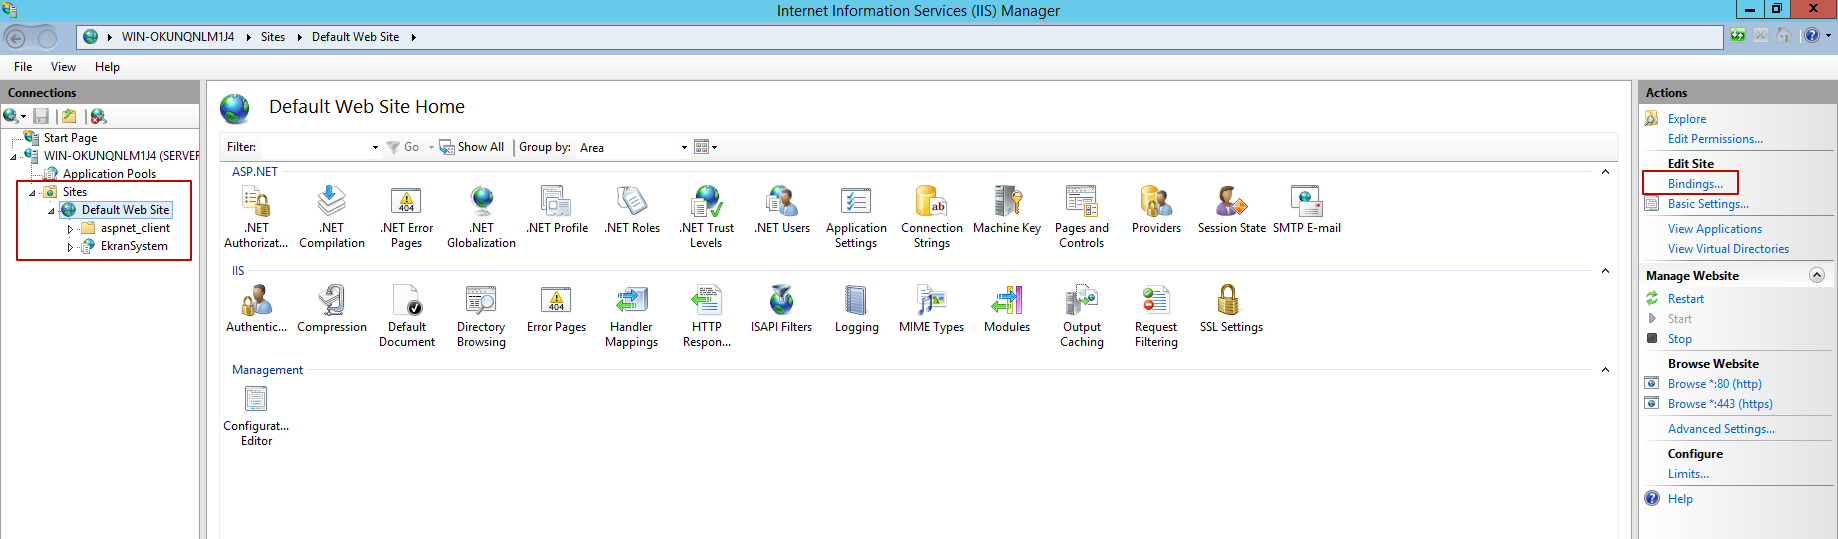
3. In the Actions pane on the right, click the Bindings navigation link to open the Site Bindings window.
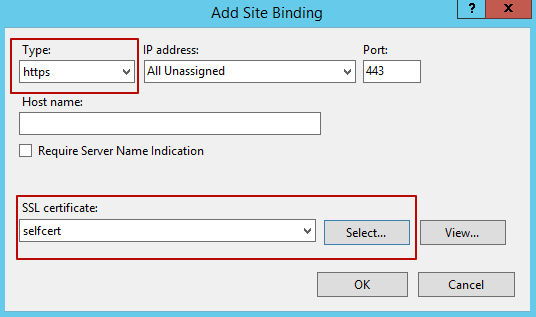
4. If there is no binding of https type in the Site Bindings window, click Add.

5. In the Add Site Binding window that opens, select https in the Type field, and then select your trusted certificate in the SSL certificate field, and click OK.
6. In the Site Bindings window, click Close, and Internet Information Services is then fully configured, so the Management Tool can now be installed.
3.3.6. Using a Self-Signed Certificate on Windows Server 2019 Core
The PowerShell commands (using the PowerShell admin prompt) to use on Windows Server 2019 Core are as follows:
• To export a self-signed certificate, use the following PowerShell commands:
$password = ConvertTo-SecureString -String "my_password" -Force -AsPlainText
Get-ChildItem -Path Cert:\LocalMachine\My\<cert_thumbprint> | Export-PfxCertificate -FilePath "C:\cert.pfx" -Password $password
• To import a self-signed certificate, use the following PowerShell commands:
$password = ConvertTo-SecureString -String "my_password" -Force -AsPlainText
Import-PfxCertificate -FilePath <path_to_certificate> -CertStoreLocation Cert:\LocalMachine\My -Password $password
• To generate a self-signed certificate with the name “systeca” and bind it to port 443, use the following PowerShell commands:
$site = "Default Web Site"
New-WebBinding -Name $site -IPAddress * -Port 443 -Protocol https
$cert = New-SelfSignedCertificate -CertStoreLocation 'Cert:\LocalMachine\My' -DnsName "syteca"
$certPath = "Cert:\LocalMachine\My\$($cert.Thumbprint)"
$providerPath = 'IIS:\SslBindings\0.0.0.0!443'
Get-Item $certPath | New-Item $providerPath
4. Installing the Management Tool
To install the web-based Management Tool application, do the following:
1. Run the Syteca_ManagementTool.exe installation file.
2. Carefully read the terms of the End-User License Agreement, and then click I Agree.
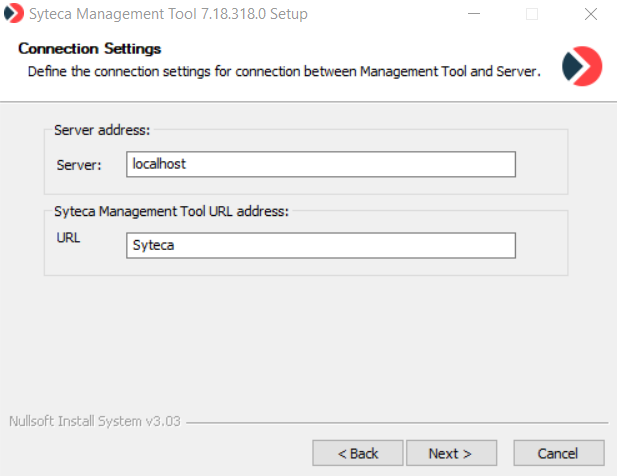
3. On the Connection Settings page, specify the required values in the following fields, and then click Next:
• In the Server field, enter the name or IP address of the computer on which the Application Server is installed.
• In the URL field, enter a name for the folder where you want the Management Tool to be located within IIS (the default name is Syteca, and this folder name will form part of the URL used to open the Management Tool).
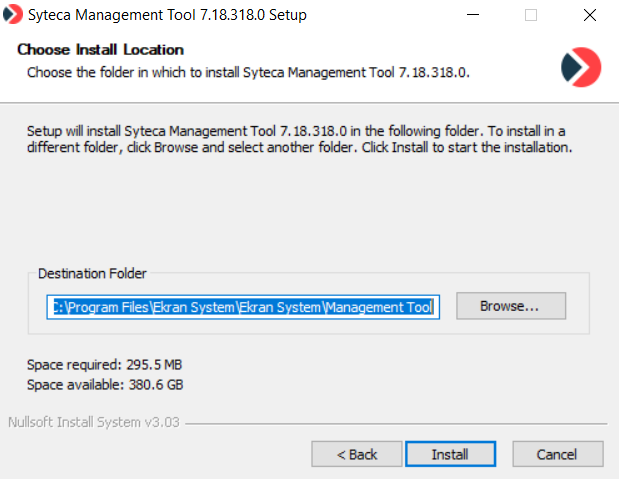
4. On the Choose Install Location page, click Browse to change the Destination Folder (if required), and then click Install.
To log in to the web-based Syteca Management Tool application, do the following:
1. Open a browser, and in the address bar enter: https://<Hostname_or_IP_address_of_the_machine_where_the_Management_Tool_was_installed>/<URL_that_was_specified_during_Management Tool_installation>.
e.g. https://server/Syteca
2. Enter the default Login “admin” and the Password that was defined during installation of Syteca Application Server.
.png?inst-v=362ca448-a20b-4783-93c2-f49186888f5c)
5. Installing Windows/macOS/Linux Clients
To see how to install Windows Clients, please refer to Installing Windows Clients section of the User Manual.
To see how to install macOS Clients, please refer to Installing macOS Clients section in the User Manual.
To see how to install Linux Clients, please refer to Installing Linux Clients section in the User Manual.
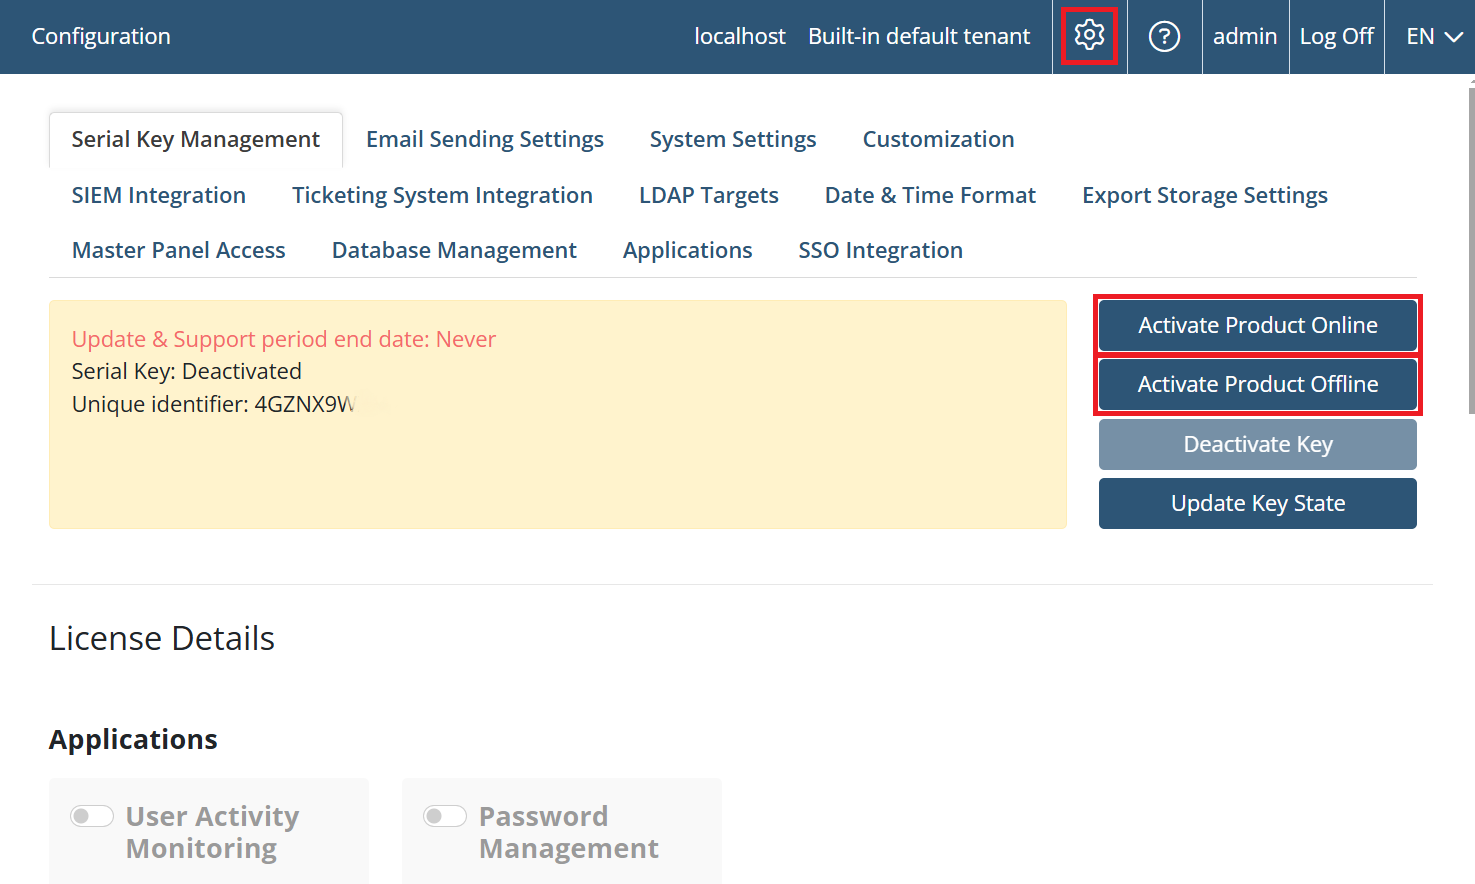
6. Licensing
To activate the product, a serial key needs to be entered into the system.
To obtain a serial key, please contact your account manager or the Syteca Support team at: info@syteca.com
To activate the serial key, click the Configuration (.png?inst-v=362ca448-a20b-4783-93c2-f49186888f5c)