Using Secrets
Users connect to the accounts stored in the secrets (that they have been granted the corresponding permissions to use) by way of the Syteca Connection Manager.
Click on the links below for more detailed information above using the functionality described.
NOTE: As a root user, the built-in default admin user of Syteca has the "Owner" Role Type permissions for all secrets, and is therefore able to access all secrets added by other Syteca users.
Table of Contents
1. Connecting to Secrets (by Using the Syteca Connection Manager)
To access accounts on remote computers (by using the associated account secrets) in the Syteca Connection Manager, do the following:
1. Log in to the computer with the Syteca Connection Manager remotely (or locally).
2. If secondary user authentication is enabled, enter the credentials of the secondary user.
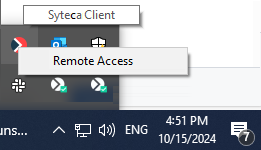
3. Right-click on the Syteca Client tray icon (in the Windows system tray), and click Remote Access in the context menu (or double-click the Syteca Remote Access icon on the desktop).
NOTE: When using a custom Windows shell, the Syteca Connection Manager application (shortcut icon) may not be displayed on the desktop, but can be found in the C:\Users\Public\Desktop folder.
NOTE: The Syteca Connection Manager requires .NET Framework 4.8 to be installed.
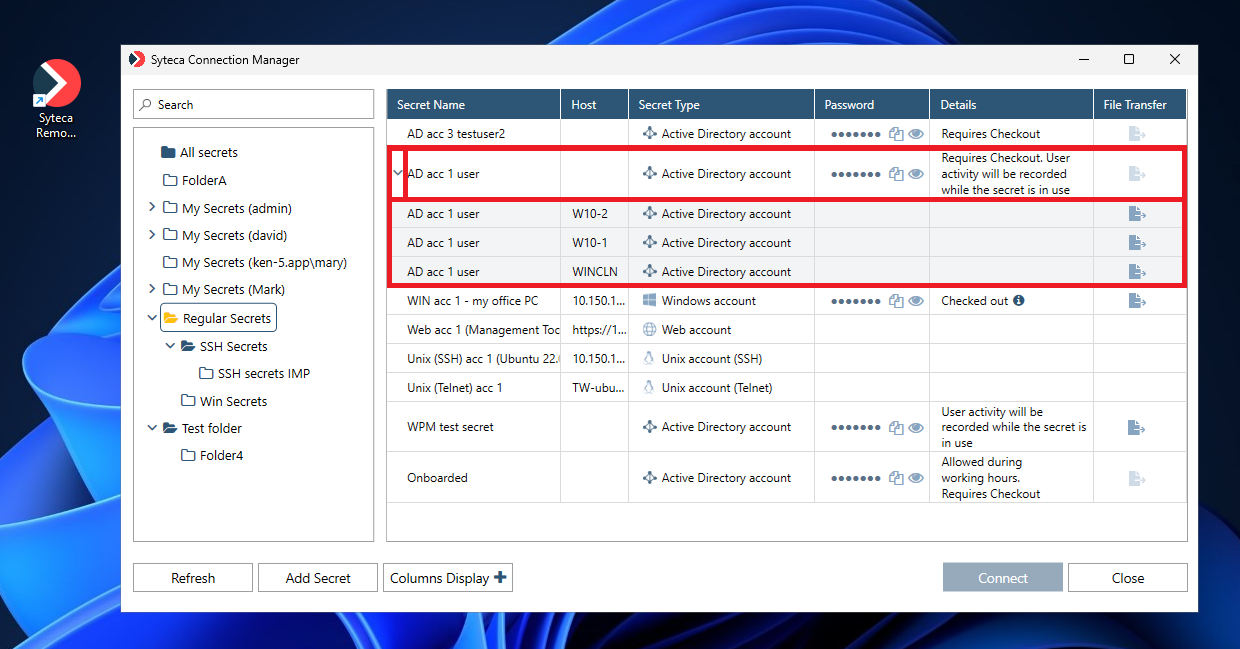
4. The Syteca Connection Manager then opens, which displays the list of secrets (and folders in the Tree View folder structure pane) that the user has been granted the corresponding permissions to use (where the Refresh button can be clicked at any time to update the list of secrets).
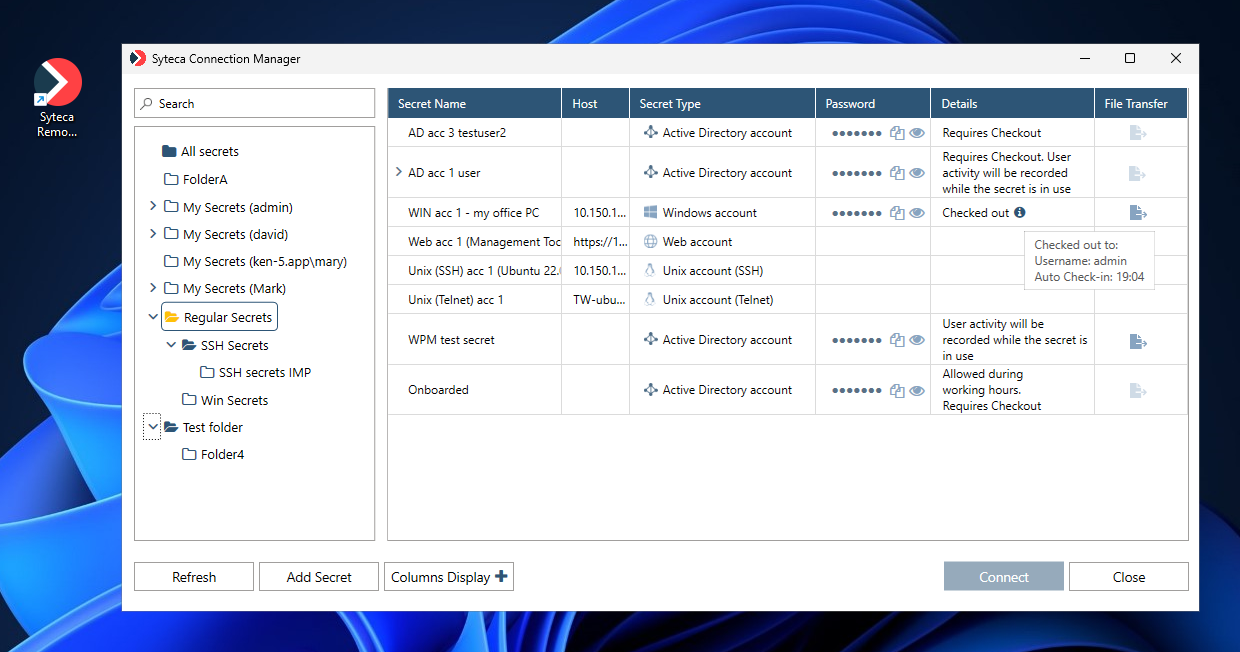
Apart from the basic information in the Secret Name and Secret Type columns, additional information is also displayed in the Details column (as shown in the screenshot above) if the following features are enabled to indicate their status:
• If access approval is required to use a secret (as defined on the secret's Restrictions tab), one of the following status messages is displayed:
- Allowed during working hours: Indicates that approval is not required at the current time, in accordance with the standard work hours defined (i.e. it is only required outside of the times/days defined).
- Requires approval: Indicates that the user needs to request access, but has not yet requested it.
- Waiting for Approval: Indicates that the user has requested access, but access has not yet been granted by an Approver (see the Access Requests section).
- Approved. Expiration date/time [xx:xx]: Indicates that the access request has been granted by an Approver, so the user can now connect to the account.
- Denied: Indicates that the access request has been denied by an Approver, so the user will not be granted access to connect to the account.
• If the Password Checkout functionality is enabled for a secret (as defined on the secret's Security tab), one of the following status messages is displayed:
- Requires checkout: Indicates that the secret is available for use (i.e. its password is not currently checked out by another user).
- Checked out: Indicates that the secret is not currently available for use (as it is being used by another user), where the following additional information can be viewed in the Checked out to hint by hovering over the Info (
- Username: The user name of the user that the secret's password is currently checked out to (i.e. of the user that is using the secret).
- Auto Check-in: If the Check in automatically after checkbox is selected in the secret, the date & time when the password will be automatically checked back in (i.e. when the secret will become available for use by another user).
• If the Record user activity while the secret is in use checkbox is selected for a secret (as defined on the secret's Security tab), the following status message is displayed:
- User activity will be recorded while the secret is in use: Indicates that user activity will be monitored whenever a user is connected to the corresponding account (i.e. after clicking the Connect button in the Syteca Connection Manager).
Furthermore, if the user has been granted advanced permissions for any secrets, as shown in the following columns, they can also:
• Copy Password: Copy the secret's password, by clicking the Copy (
• View Password: View the secret's password, by clicking the View (
• File Transfer: Transfer files between the computer with the Syteca Connection Manager and the remote computer (that the secret connects to access the account), by clicking the dark blue (

5. Click anywhere on the required secret, and then click the Connect button.
6. Request access approval if required in the pop-up window that opens.
NOTE: Approvers receive notifications by email and can approve access either by clicking the link in the email or by way of the Management Tool (see the Access Requests section).
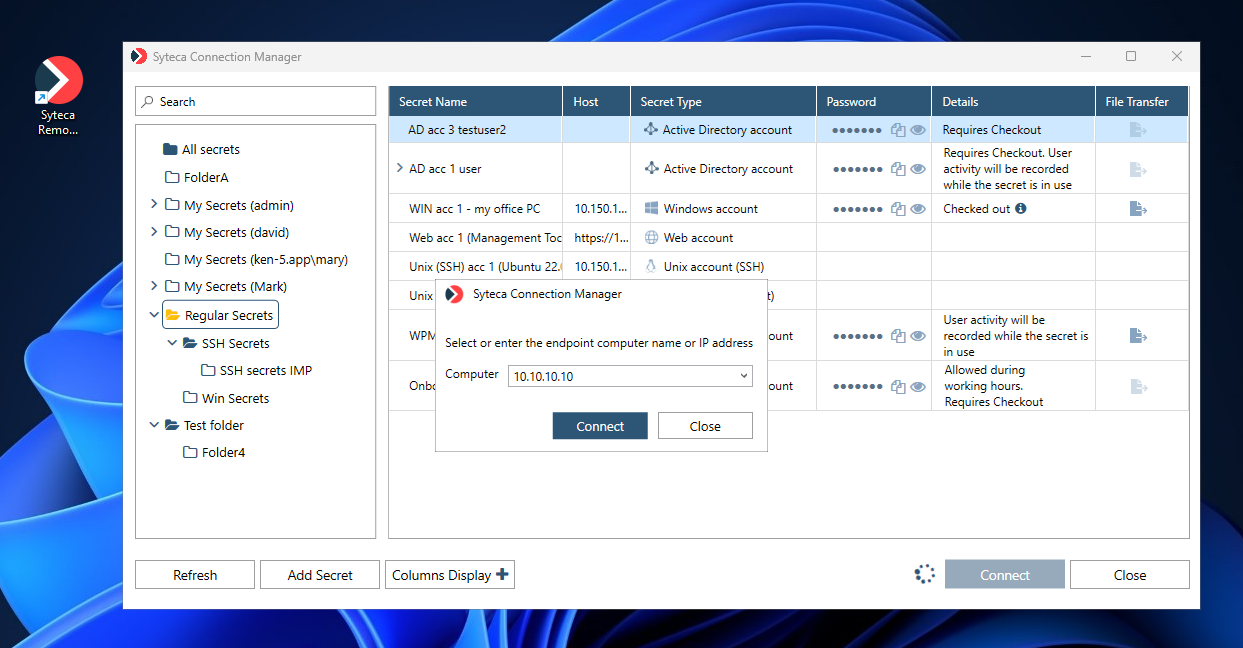
7. [For the Active Directory account secret type only:] In the additional pop-up window that opens, enter the name of the Computer (or its IP address) to connect to, and then click Connect.
NOTE: [For the Active Directory account secret type only:] If connections are only allowed to specific computers in the domain, the “parent” secret first needs to be expanded (by clicking the down-arrow (

8. A remote connection is then established according to the type of secret, and the user is automatically logged in to the corresponding account.
NOTE: A watchdog for Syteca Connection Manager provides for automatic recovery in the case of failure.
NOTE: [For the Unix (SSH) account secret type only:] PuTTY needs to be installed on the computer with the Syteca Connection Manager for the secret to work.
NOTE: [For the MS SQL account secret type only:] Version 18.0 or higher of MS SQL Server Management Studio needs to be pre-installed for the secret to work correctly.
NOTE: [For the Web account secret type only]:
• This type of secret is only compatible with the Google Chrome browser, and always opens in Incognito mode, which does not allow the browser to cache data.
• If the system does not log you in automatically, an Syteca extension for the Google Chrome browser is available that allows you to insert the username and password for the Web account.

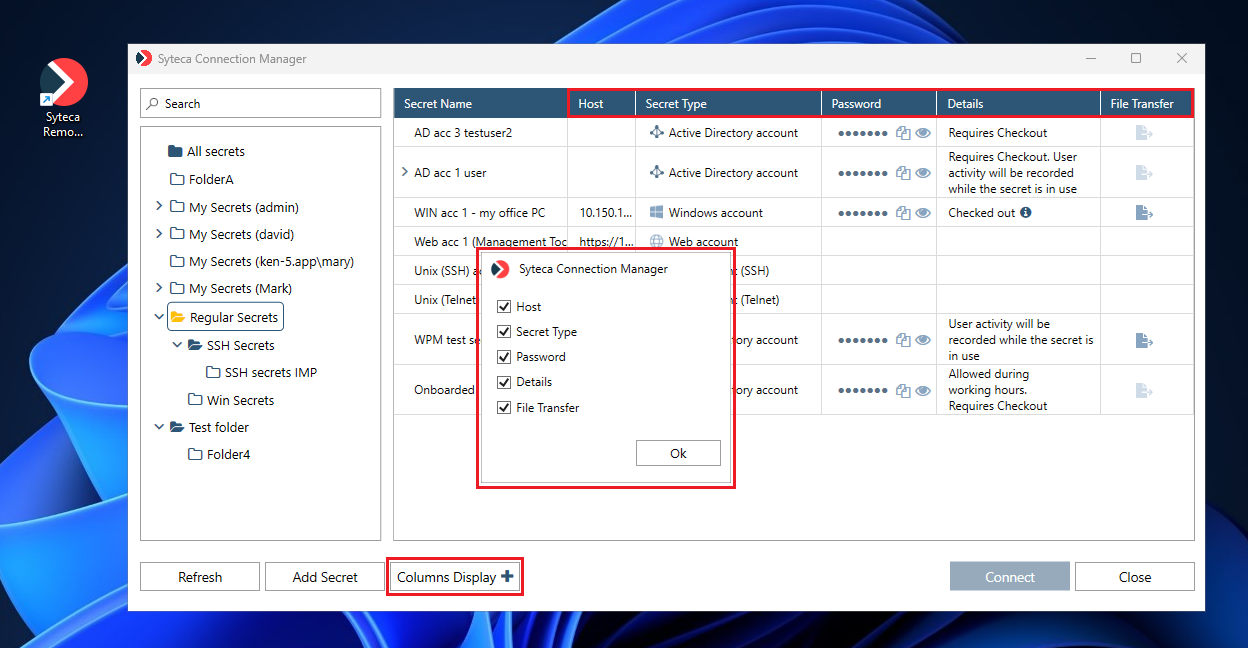
2. Changing the Columns Displayed in the Syteca Connection Manager
To select which columns are displayed/hidden in the Syteca Connection Manager, click the Columns Display button (in the bottom right of the Syteca Connection Manager), and then select/deselect the checkboxes for the required columns to be displayed/hidden (except for the Secret Name column, which cannot be hidden).
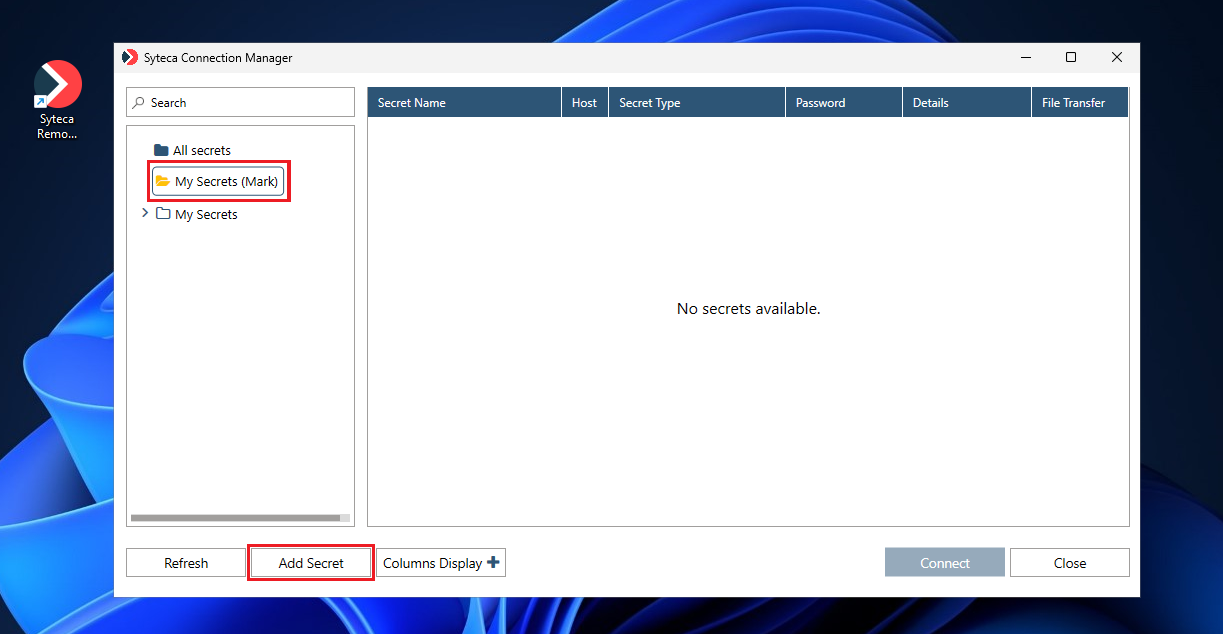
3. Adding Workforce Password Management (WPM) Secrets
To add (and manage) Workforce Password Mangement (WMP) secrets, which are hidden from other users (unless specifically shared with them), click the Add Secrets button (at the bottom of the Syteca Connection Manager), and then add your own private WPM secrets in your own WPM folder in the Management Tool that opens in the browser.